MFAT for Joint and Tissue Healing: Microfragmented adipose tissue therapy helps promote natural repair by using your body’s own tissue to support healing. It may help patients with joint discomfort, soft-tissue damage, and reduced mobility.
Severe Low Back Pain in Amazon Fulfillment Workers: Epidural Injections, Spinal Decompression, and the Treatment Window
Abstract: Severe low back pain can turn a 10-hour fulfillment shift into a battle. Repeated low-bin reaching, standing, twisting, and handling can keep an irritated lumbar nerve from settling. This article explains a function-first strategy: “turn down the fire, then address the load.” When true lumbar radiculopathy is present, an appropriately selected epidural injection may reduce acute nerve inflammation enough to create a treatment window for nonsurgical spinal decompression, mechanical chiropractic care, rehabilitation, and safer work habits. The goal is not temporary numbness. It is restoring movement while addressing the forces that keep symptoms returning.
A picker starts the shift moving quickly: scan, reach, bend, pull, pivot, walk, repeat. By hour seven, a familiar ache becomes sharper. By hour ten, standing upright hurts, the leg may burn, and getting into the car feels harder than moving another tote.
NIOSH identifies heavy physical work, lifting, forceful movement, bending, twisting, and static postures as recognized risk factors for low-back musculoskeletal disorders (National Institute for Occupational Safety and Health [NIOSH], 2024). For fulfillment workers, the problem is cumulative exposure. Low bins encourage trunk flexion, rushed reaches add rotation, and long hours on concrete floors magnify fatigue. Once pain changes how you move, compensation can load the hips, pelvis, and opposite side of the back.
The Key Question: Is the Fire in the Back or the Nerve?
Not every severe backache needs an injection. The first step is to identify what is irritated.
Localized lumbar pain may come from muscles, joints, discs, or other structures. Radicular pain is different. It can occur when a lumbar nerve root becomes irritated or compressed and may produce:
Burning or electric pain into the buttock or leg
Numbness or tingling
Pain that travels below the knee
Weakness in the foot or leg
Symptoms that worsen with certain spinal positions, coughing, or straining
A careful examination should assess strength, reflexes, sensation, movement tolerance, nerve tension, gait, and symptom patterns. Imaging may be appropriate when findings suggest significant disc injury, persistent neurologic symptoms, trauma, or when results would change treatment.
New loss of bowel or bladder control, saddle numbness, rapidly worsening weakness, fever with severe back pain, or major trauma requires urgent medical evaluation. These symptoms are not ones you can just “work through.”
Turn Down the Fire, Then Fix the Load
Think of an irritated lumbar nerve like a fire alarm beside a hot engine. If inflammation is high enough, even small movements can trigger intense pain. The worker may stop bending normally, brace every step, sleep poorly, and avoid rehabilitation because almost everything hurts.
That is where the treatment-window concept matters.
For appropriately selected lumbar radiculopathy, an epidural corticosteroid injection can place anti-inflammatory medication near the affected nerve root. A 2025 American Academy of Neurology review found that epidural steroid injections probably reduce short-term pain and disability in radiculopathy, while long-term pain benefit remains uncertain (Armon et al., 2025).
In plain language: the injection is not rebuilding a disc or correcting lifting mechanics. It may turn down the inflammatory “fire” long enough to make useful movement possible.
That window matters when pain blocks progress. A worker who could not tolerate walking, traction, unloading, or stabilization may gain enough control to begin them.
What an Epidural Injection Can—and Cannot—Do
A properly indicated epidural may help:
Reduce acute radicular pain
Improve tolerance for walking and sleep
Make rehabilitation easier to participate in
Allow a graded return to mechanical treatment
Reduce reliance on passive coping alone
It does not guarantee permanent relief, prevent surgery in every case, or address occupational loading patterns on its own. The AAN review found insufficient evidence that epidural steroid injections reduce the eventual need for surgery (Armon et al., 2025).
There are also risks. The FDA notes rare but serious neurologic complications associated with epidural corticosteroid injections and states that corticosteroids are not FDA-approved specifically for epidural administration (U.S. Food and Drug Administration [FDA], 2014). That makes informed consent, patient selection, appropriate image guidance, and medical oversight essential.
Step Two: Use the Window for Nonsurgical Spinal Decompression
Once the fire is quieter, the next question is simple: what mechanical inputs can the spine tolerate now?
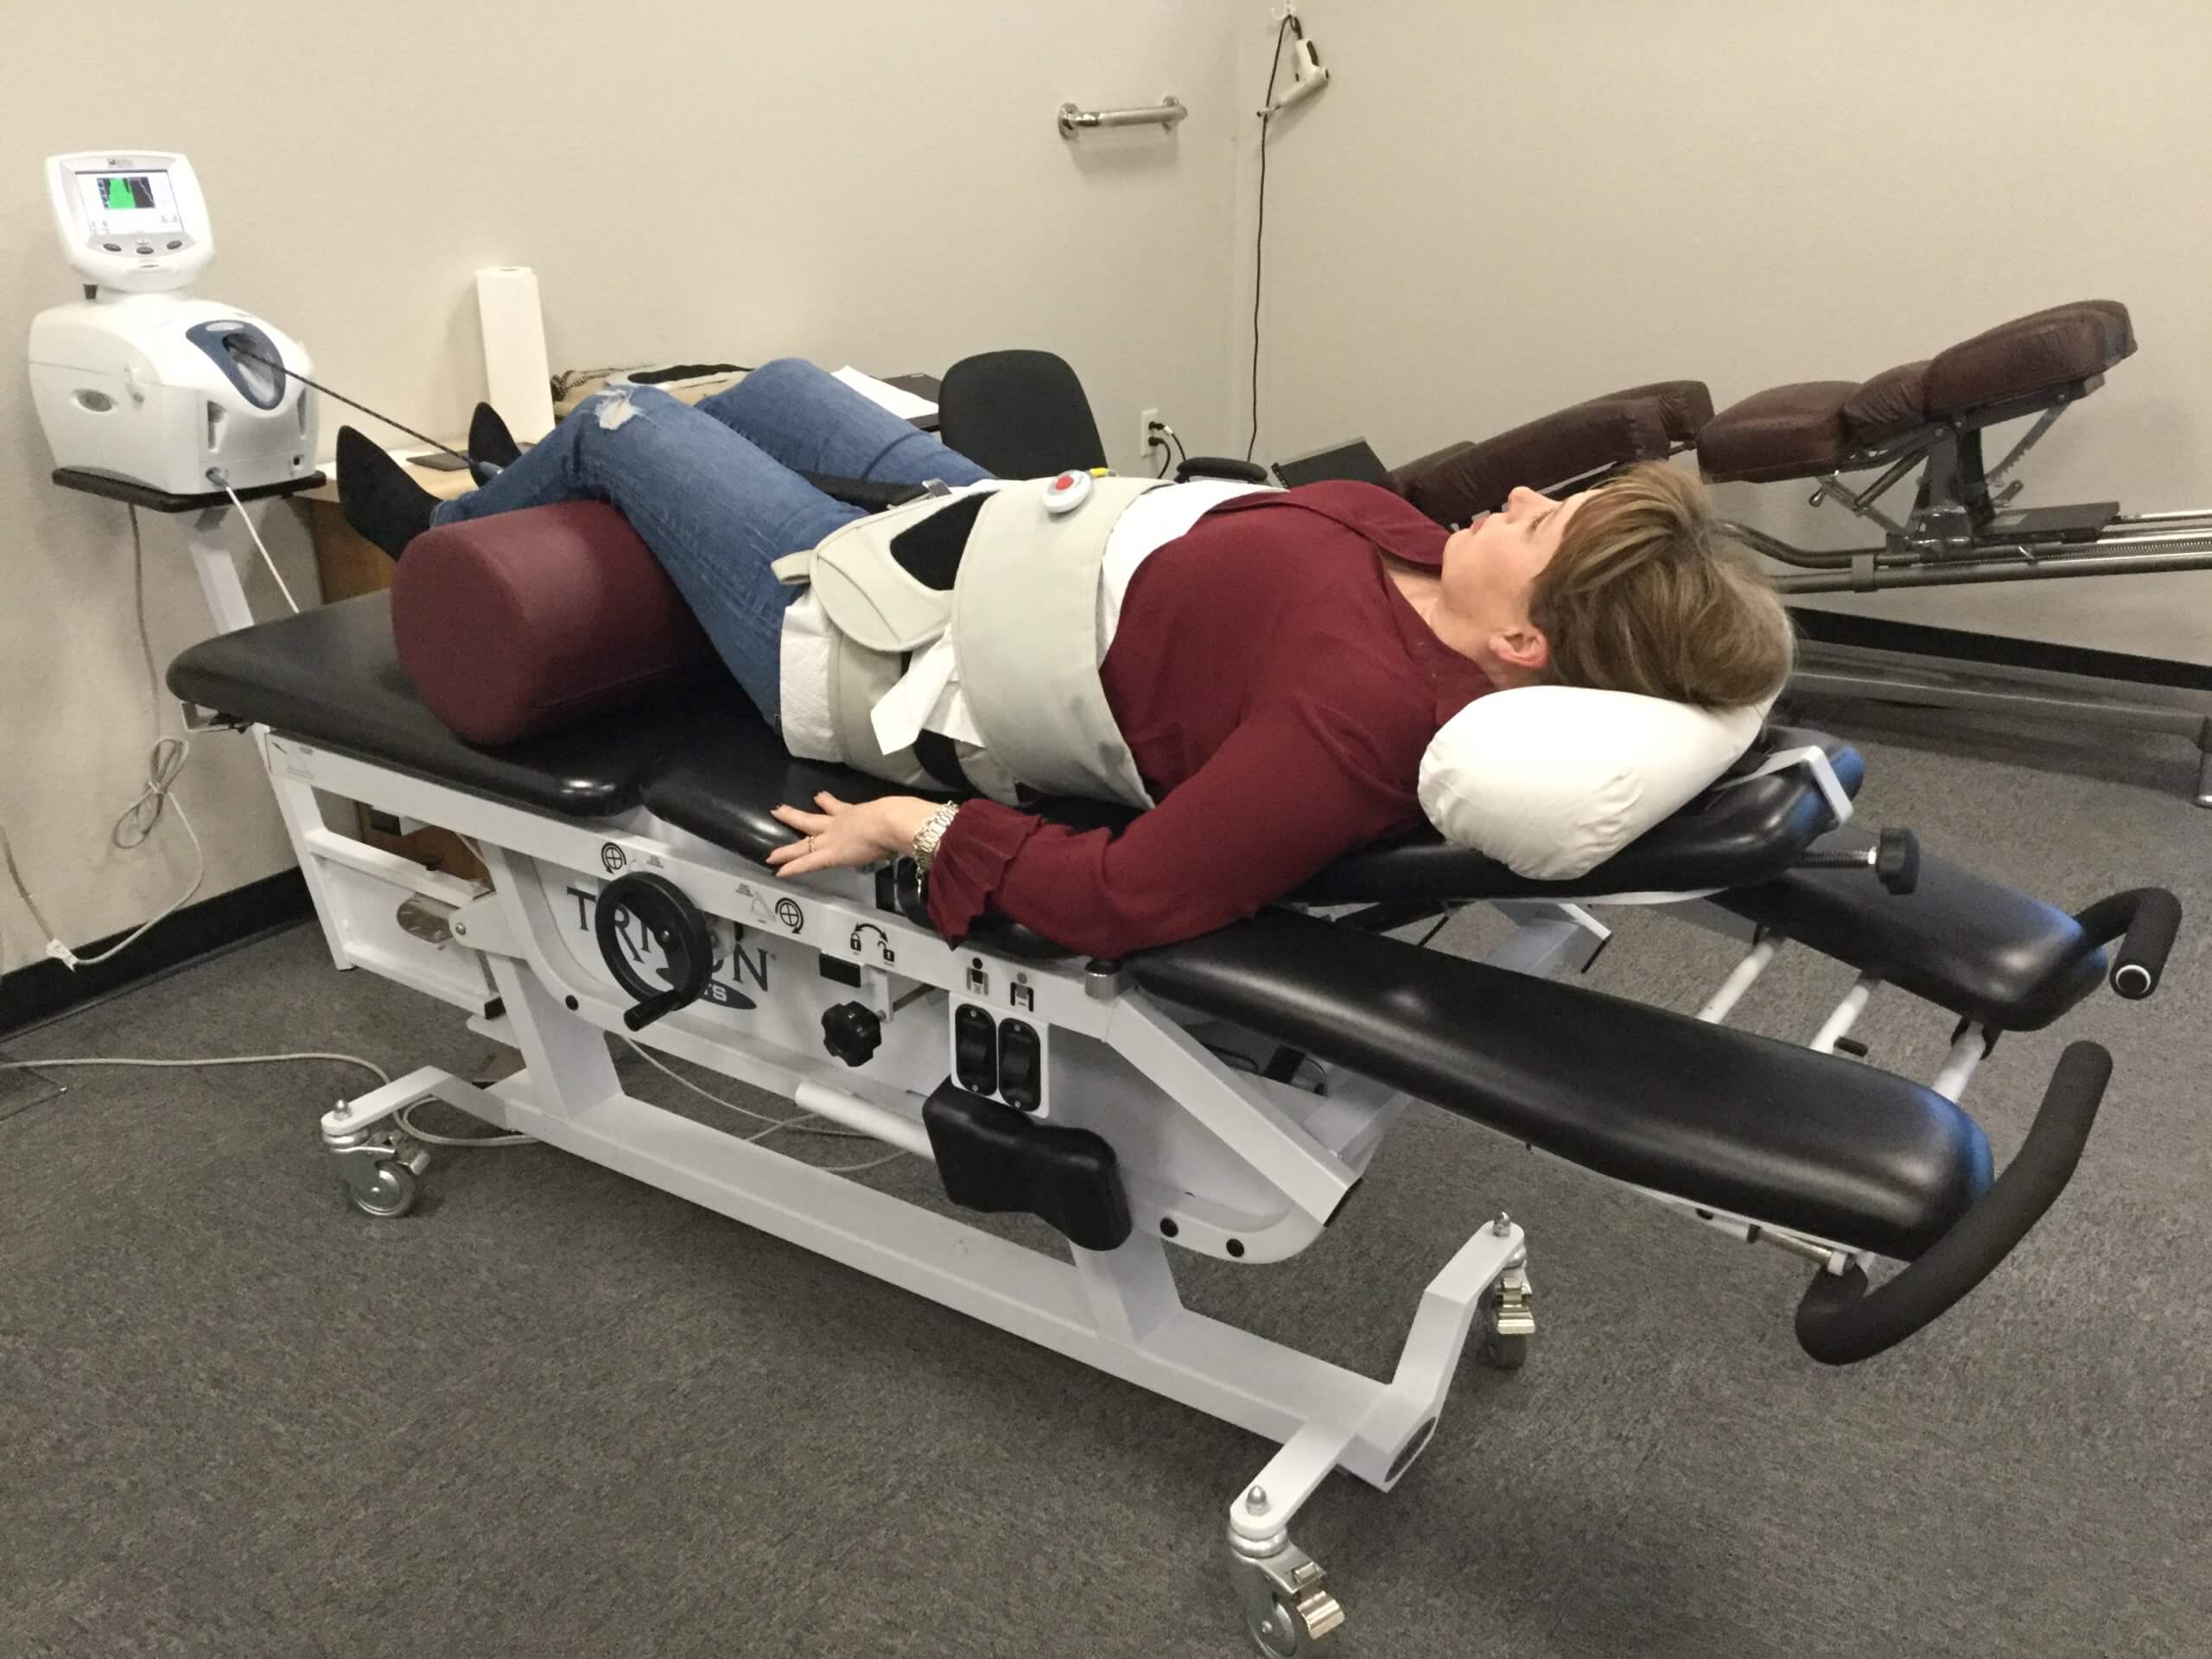
Here, “spinal decompression” means nonsurgical mechanical traction or distraction, not surgery. The goal is controlled lumbar unloading while monitoring symptoms and neurologic response.
Research on traction is encouraging for some lumbar disc herniation patients, but it is not one-size-fits-all. A 2025 systematic review found improvements across traction, exercise, and manipulation studies, while also reporting very high variability between protocols and patient groups (Thavarajasingam et al., 2025).
That is why decompression should be treated as a clinical tool, not a magic table.
During the treatment window, the clinician can look for useful signs:
Leg pain centralizes toward the back
Standing and walking tolerance improves
Numbness or tingling decreases
The patient can change positions with less guarding
Basic trunk and hip exercises become tolerable
If symptoms worsen, spread farther down the leg, or neurologic weakness progresses, reassess the plan.
Step Three: Fix the Load With Mechanical Chiropractic Care
Pain relief is valuable, but function is the finish line.
The picker or packer has to return to the same realities: low bins, repetitive handling, long walking routes, awkward reaches, and a clock that does not care whether the lumbar muscles are fatigued. Mechanical chiropractic care should therefore focus on restoring motion and controlling load, not simply chasing pain scores.
Care may include low-force mobilization, selected chiropractic adjustments, hip mobility, trunk endurance, graded lifting, nerve-mobility exercises, and conditioning. Aggressive manipulation is not automatically appropriate during a highly irritable radicular episode; treatment intensity should match neurologic findings and tolerance.
A useful return-to-function plan teaches the worker to:
Hinge through the hips instead of repeatedly rounding the lumbar spine
Bring the load closer before standing
Pivot with the feet instead of twisting while bent
Alternate positions when task design allows
Break large recovery goals into short movement exposures
Report progressive weakness or spreading numbness promptly
These habits support autonomy. The patient should understand what is being treated, why each step is being used, what alternatives exist, and what would change the plan.
Integrated Care: One Plan, Not Three Disconnected Treatments
Severe radicular pain often crosses professional lanes. That is where multidisciplinary care can improve coordination.
Dr. Alex Jimenez, DC, APRN, FNP-BC, CFMP, IFMCP, combines Doctor of Chiropractic care with board-certified family nurse practitioner authority and advanced practice nursing. Under collaborative medical oversight, his scope includes image-guided epidural spinal injections, structural chiropractic care, mechanical rehabilitation, and functional medicine support.
Dr. Maria Guadalupe Cardenas, MD, is board-certified in Internal Medicine, has more than 40 years of experience, and serves as Medical Director and collaborative physician at Injury Medical Clinic PA. Her role includes medical oversight, risk stratification, laboratory interpretation, and coordination of medical conditions that can affect recovery.
The benefit is sequence and communication: calm the nerve when indicated, restore tolerable motion, rebuild capacity, and coordinate with the patient’s existing medical team. That supports beneficence while respecting non-maleficence—using the least invasive reasonable options first when safe, without delaying surgical or emergency referral when neurologic findings demand it.
Your Treatment Window Should Lead Somewhere
An epidural injection should not become permission to ignore the same loading pattern until the pain returns. The window is valuable because it creates opportunity.
Use it to walk more normally.
Use it to sleep.
Use it to tolerate decompression or rehabilitation.
Use it to relearn bending, lifting, and bracing strategies.
Use it to build enough capacity that the next 10-hour shift is not simply another flare waiting to happen.
For an Amazon fulfillment worker with severe low back pain and leg symptoms, the goal is not to choose between “an injection” and “chiropractic.” The better question is whether each tool fits the diagnosis and timing.
Turn down the fire. Then fix the load.
If severe back pain, sciatica, numbness, or weakness is limiting your work or daily function, schedule a multidisciplinary evaluation at El Paso Back Clinic. A coordinated DC/APRN/FNP-BC and MD-guided plan can help determine whether you need urgent referral, an epidural treatment window, nonsurgical decompression, mechanical rehabilitation, or a different path entirely. You remain the informed decision-maker at every step.
Server Rack to Desk Chair: Why Data Center and IT Work Can Trigger Chronic Low-Back Pain—and What You Can Do About It
A shift can change quickly. For one hour, you sit and answer tickets. The next, you are standing on a server-room floor, crouching behind a rack, reaching for cables, or lifting hardware. By day’s end, your low back may feel tight, tired, or familiar.
For El Paso’s IT professionals, data center technicians, and network teams, recurring low-back pain rarely comes down to one “bad posture.” Sitting, standing, bending, twisting, and lifting can contribute to symptoms, but no single exposure consistently explains every case (Swain et al., 2020). The better question is which combined loads, habits, and recovery limits keep your back irritated.
Why Tech Work Can Become a Mechanical Load Problem
Your lumbar spine is built to move and carry load. Problems can appear when tissues face more stress than they comfortably recover from.
Long desk sessions reduce movement variety. Prolonged standing can also become uncomfortable; substantial occupational standing has been associated with more low-back symptoms, though it has not been proven that standing itself causes pain (Coenen et al., 2018). Add crouching, cable work, twisting, and equipment lifting, and the demand changes again.
The goal is not to fear movement. It is to improve how well your body handles it.
Sitting, Hip Stiffness, and the “Locked Up” Feeling
After hours seated, many workers stand feeling stiff through the hips and lower back. It is tempting to blame “tight hip flexors,” but low-back pain is more complex than one muscle group.
Limited hip motion can change how you bend, squat, or reach. The lumbar region may then take on more motion during some tasks. Hip mobility, trunk control, and movement variety can therefore be reasonable rehabilitation targets without claiming that tight hips automatically cause back pain.
Standing on Concrete Is Not Automatically Better Than Sitting
A standing desk may help, but standing all day is not a cure. Technical workspaces may require long periods on firm surfaces while monitoring equipment.
Variation is usually practical: sit, stand, walk, change foot position, and move when the job permits. NIOSH identifies static posture, heavy physical work, lifting, bending, and twisting among contributors to work-related musculoskeletal stress (National Institute for Occupational Safety and Health [NIOSH], 2024a).
Think “best next position,” not “perfect position.”
Crouching, Cable Work, and Rack-Side Repetition
Working behind equipment can place you in deep hip flexion, kneeling, squatting, rotation, or sustained forward bending. None is inherently dangerous. Trouble may develop when exposure is prolonged, repeated, heavily loaded, or performed while fatigued.
Bring tools closer. Raise work when possible. Use a kneeling pad or stable support when appropriate. Alternate sides instead of always rotating one way. Brief movement breaks can reduce unnecessary repetition.
Lifting Hardware: Control the Load, Not Just Your Back
Servers, batteries, monitors, and UPS components can be awkward or hard to grip. Safe lifting is not simply “keep your back straight.” Weight, distance, height, twisting, frequency, grip, and repetition matter. The Revised NIOSH Lifting Equation estimates physical stress from two-handed lifts and supports safer job design (NIOSH, 2024b).
Get close to the load, use a stable stance, avoid rushed twisting, and use team lifts or assistance when appropriate. Lifting limits should reflect the task and your current capacity.
What a Structural Assessment Should Actually Look For
Recurring low-back pain deserves more than a quick label.
At El Paso Back Clinic, a mechanical assessment can consider spinal and pelvic motion, painful patterns, hip mobility, trunk endurance, lifting mechanics, neurological findings, and positions that change symptoms. The goal is not to claim every painful back is “out of alignment,” but to identify modifiable findings and whether conservative care is appropriate.
Imaging is not necessary for every episode. History and examination help determine when testing may be appropriate. New bowel or bladder problems, saddle numbness, progressive leg weakness, major trauma, fever, or systemic symptoms require prompt medical evaluation.
Mechanical Rehabilitation: Build Capacity for Your Real Job
Rehabilitation should prepare you for work, not only help you feel better on a treatment table. Clinical guidelines support exercise and selected manual therapies for many people with acute or chronic low-back pain (George et al., 2021).
For an IT professional, rehabilitation might include hip mobility, trunk endurance, hinging, graded lifting, strength, walking tolerance, and desk-position changes. A data center technician may also need loaded carries, squat tolerance, kneeling transitions, reaching, and controlled rotation.
The plan should progress with your response. Some people need mobility; others need strength, endurance, or confidence with painful movements. Patient autonomy matters: you should understand what is tested, why treatment is suggested, alternatives, and how progress will be measured.
Where Chiropractic Care and Decompression Fit
Chiropractic care may be one part of conservative treatment when examination indicates manual care is appropriate. Guidelines include spinal manipulation among options that may help some people with chronic low-back pain, especially when paired with active care rather than used alone (World Health Organization [WHO], 2023).
“Decompression” requires careful thinking. WHO does not recommend routine traction for chronic primary low-back pain because the supporting evidence is uncertain (WHO, 2023). Decompression should not be sold as a guaranteed disc fix or universal answer.
If decompression is considered, it should follow examination, fit the symptom pattern, have clear goals, and be reassessed. Beneficence means choosing care for your clinical needs—not applying the same protocol to everyone.
Integrated Care When Back Pain Is More Than Mechanical
Persistent pain can be influenced by sleep, stress, metabolic health, medication use, recovery, and other medical factors. An integrated team can help when those issues matter.
Dr. Alex Jimenez, DC, APRN, FNP-BC, CFMP, IFMCP, bridges chiropractic structural care, mechanical rehabilitation, and functional medical assessment. Dr. Maria G. Cardenas, MD, Board Certified in Internal Medicine, provides medical direction and oversight for complex medical or metabolic concerns and clinically appropriate laboratory evaluation.
Collaboration does not remove your voice. You remain the informed decision-maker.
A Better Back Strategy for El Paso Tech Workers
Whether your day moves from an El Paso desk to a server room, network closet, help-desk station, or equipment floor, your back needs more than perfect posture. It needs movement variety, smart load management, recovery, and enough strength for the work.
Start with small changes: interrupt long sitting, vary standing, improve workstation reach, keep loads close, plan awkward lifts, and build capacity gradually. If pain keeps returning, limits work, radiates into the leg, or changes how you move, seek a qualified evaluation.
At El Paso Back Clinic, our goal is to identify changeable drivers, explain your options clearly, and coordinate structural chiropractic care, mechanical rehabilitation, and medical oversight when indicated. We build the safest plan around your findings, goals, and informed choices. That approach supports safer movement, stronger function, and more confident workdays ahead.
References
Coenen, P., Willenberg, L., Parry, S., Shi, J. W., Romero, L., Blackwood, D. M., Maher, C. G., Healy, G. N., Dunstan, D. W., & Straker, L. M. (2018). Associations of occupational standing with musculoskeletal symptoms: A systematic review with meta-analysis. British Journal of Sports Medicine, 52(3), 176–183. https://doi.org/10.1136/bjsports-2016-096795
George, S. Z., Fritz, J. M., Silfies, S. P., Schneider, M. J., Beneciuk, J. M., Lentz, T. A., Gilliam, J. R., Hendren, S., & Norman, K. S. (2021). Interventions for the management of acute and chronic low back pain: Revision 2021. Journal of Orthopaedic & Sports Physical Therapy, 51(11), CPG1–CPG60. https://doi.org/10.2519/jospt.2021.0304
Swain, C. T. V., Pan, F., Owen, P. J., Schmidt, H., & Belavy, D. L. (2020). No consensus on causality of spine postures or physical exposure and low back pain: A systematic review of systematic reviews. Journal of Biomechanics, 102, 109312. https://doi.org/10.1016/j.jbiomech.2019.08.006
World Health Organization. (2023). WHO guideline for non-surgical management of chronic primary low back pain in adults in primary and community care settings. World Health Organization. https://www.who.int/publications/i/item/9789240081789
Unlocking Relief: A Closer Look at Occipital Nerve Blocks for Head and Neck Pain
Abstract
This educational guide offers an in-depth, first-person look at managing head and neck pain, focusing on conditions like occipital neuralgia and cervicogenic headaches. I will walk you through the diagnostic process. Additionally, I explain how occipital nerve block injections help diagnose and treat this type of debilitating pain.
We will explore the underlying anatomy and physiology, detailing how irritation of the occipital nerves can lead to widespread symptoms. This post explains the rationale behind using a combination of a local anesthetic (lidocaine) and a corticosteroid (cortisone) to provide immediate relief. It also shows how this combination helps reduce inflammation over the long term.
We will also discuss how this intervention is a crucial part of our integrative care model at Injury Medical Clinic. This model combines medical oversight from Dr. Maria Guadalupe Cardenas, MD, with chiropractic care, functional medicine, and comprehensive rehabilitation. Together, these approaches address the root causes of pain, restore function, and promote lasting wellness.
By the end of this article, you will understand how we diagnose, treat, and holistically manage complex head and neck pain syndromes.
The Journey to Diagnosing Complex Head and Neck Pain
Hello, I’m Dr. Alex Jimenez. At our clinic, we frequently see patients who have been suffering from persistent, often debilitating, head and neck pain for months or even years. They come to us describing symptoms that can range from a dull, constant ache at the base of their skull to sharp, shooting, or electrical-shock-like sensations. These sensations may travel up the back of their head. Sometimes they even reach behind their eyes. These symptoms are characteristic of occipital neuralgia.
Occipital neuralgia occurs when the greater or lesser occipital nerves, which emerge from the upper cervical spine (neck) and run up through the scalp, become inflamed or irritated. This irritation can be caused by various factors, including:
Muscle Tension and Spasms: Chronic tension in the suboccipital muscles at the base of the skull is a primary culprit. These muscles can tighten from poor posture (like “text neck”), stress, or previous injury, compressing the nerves that pass through them.
Trauma: Injuries such as whiplash from a car accident can directly damage these nerves or cause inflammation and muscle guarding that entraps them.
Spinal Misalignments: Structural issues in the cervical spine, particularly the upper vertebrae (C1/Atlas and C2/Axis), can impinge on the nerve roots that form the occipital nerves.
Degenerative Changes: Conditions like osteoarthritis in the cervical spine can lead to bone spurs that narrow the spaces through which the nerves travel.
The journey to an accurate diagnosis begins with a thorough history and a detailed physical examination. For a patient presenting with these symptoms, I focus my evaluation on the suboccipital region. This area is located at the junction where the neck meets the skull. My goal is to reproduce the patient’s familiar pain through careful palpation.
Pinpointing the Source: A Hands-On Approach
In a recent case, I was working with a patient who had been experiencing significant posterior head pain. As I gently but firmly applied pressure to specific points along the occipital ridge, I asked for feedback. “Is that hurting right there?” I inquired. The patient’s immediate, affirmative response—”That’s it”—is a crucial diagnostic clue. This process, known as provocative testing, helps us confirm that the occipital nerves are indeed the source of the pain.
Once I identify the point of maximum tenderness, I need to mark it for the next step. This can be tricky, especially in the hairline, where traditional ink marks can be hard to see. To ensure precision, I use a two-step method. First, I use the tip of a capped ballpoint pen to create a small, temporary indentation in the skin directly over the tender spot. This provides me with a tactile landmark. Then, just below it, I place a small ink mark as a visual guide. I repeat this process to identify a second tender spot, as multiple points along the nerve’s path are often irritated.
The Occipital Nerve Block: A Targeted Intervention
After identifying and marking the precise locations of nerve irritation, the next step is to perform an occipital nerve block. This procedure serves a dual purpose: diagnostic and therapeutic.
Diagnostic Purpose: If injecting a local anesthetic provides immediate and significant pain relief, it confirms our diagnosis that the occipital nerve is the primary pain generator.
Therapeutic Purpose: The injection delivers medication directly to the site of inflammation, providing both short-term and potentially long-term relief.
Preparing for the Procedure
Before any injection, patient safety and comfort are paramount. I begin by thoroughly cleaning the marked areas with alcohol swabs to minimize the risk of infection. While a stronger antiseptic like Betadine is often used for other procedures, its application in the hairline can be messy and less practical. Given the small needle size and the superficial nature of the injection, rigorous cleaning with alcohol is sufficient.
The medication I use is a carefully measured mixture of two key components:
Lidocaine: A fast-acting local anesthetic. Its primary role is to block the sodium channels in the nerve fibers. By preventing sodium ion influx, lidocaine stops the nerve from transmitting pain signals to the brain. This is why patients often experience relief within minutes of the injection. The immediate feedback is invaluable—if the pain disappears, we know we’ve targeted the right spot.
Cortisone: This is a type of corticosteroid, a powerful anti-inflammatory agent. While lidocaine provides immediate relief, its effects are temporary. The cortisone addresses the underlying physiological problem: inflammation. It works at a cellular level to suppress the inflammatory cascade, reducing swelling, irritation, and pressure on the nerve. The therapeutic effects of cortisone develop over the coming days and can provide relief for several weeks or even months.
For this procedure, I use a thin, 1-inch, 25-gauge needle to minimize discomfort. In many cases, I would use a topical freeze spray (ethyl chloride) to numb the skin before the injection. However, in the scalp and hairline, the spray can run down into the patient’s face, eyes, or ears, which is uncomfortable and potentially hazardous. So I proceed without it. Instead, I rely on a quick, precise technique. I always communicate this to the patient: “You’re going to feel a little bit of a stick here. Is that all right?” Informed consent and clear communication help alleviate patient anxiety.
The Injection Technique: Precision and Safety
With the patient ready, I locate the first marked spot. I brace my hand and, on a count of three, gently insert the needle. The goal is to advance the needle until I feel it make contact with the surface of the occipital bone. This provides a safe and solid backstop, ensuring I don’t inject too deeply.
Before injecting the medication, I perform a critical safety assessment called aspiration. I gently pull back on the syringe plunger to see if any blood enters the syringe. If it does, the needle tip is in a blood vessel. Injecting the medication, especially the corticosteroid, directly into the bloodstream can cause systemic side effects and would not be effective locally. Seeing “nothing on aspiration” confirms the needle is in the correct tissue plane—the perineural space around the nerve.
Satisfied with the needle’s position, I slowly inject half of the medication from the syringe, bathing the inflamed nerve and surrounding tissues. I then withdraw the needle. Next, I repeat the exact same process at the second marked location, injecting the remaining half of the mixture.
Immediate Feedback and Post-Procedure Care
Immediately after the injections, I gently massage the areas. This helps spread the medication throughout the suboccipital tissues. This helps ensure the medication reaches all irritated nerve branches. This also helps alleviate some of the initial post-injection soreness.
The final and most rewarding step is to re-evaluate the patient’s pain. I apply firm pressure to the same spots that were excruciatingly tender just moments before. “Does that hurt right there?” I asked the patient. Their response changed from a pained wince to a simple “Pressure.” When I asked if it was better, they replied, “Feels better.” We checked the second spot, which had also improved significantly.
This immediate pain reduction confirms the block’s success. The lidocaine is already at work, silencing the overactive pain signals. The patient leaves the room with hope and immediate relief, while the cortisone begins its slower, more sustained work of healing the inflammation.
The Power of Integrative Care: Beyond the Injection
An occipital nerve block is a powerful tool, but it is rarely a standalone cure. At Injury Medical Clinic, we view it as one critical piece of a much larger, comprehensive puzzle. As a Family Nurse Practitioner (APRN, FNP-BC), I am qualified to perform these procedures. In addition, my foundation as a Doctor of Chiropractic (DC) and my advanced certifications in Functional Medicine (CFMP, IFMCP) provide the framework for a truly holistic approach. This is all done under the medical direction and collaboration of our esteemed internist, Dr. Maria Guadalupe Cardenas, MD. Her decades of experience provide invaluable medical oversight.
Our philosophy is that true healing requires addressing the root cause, not just masking the symptoms. The nerve block provides a crucial window of opportunity. By significantly reducing the patient’s pain, it allows us to implement other therapies effectively. These are treatments that were previously too painful to perform.
Integrating Chiropractic and Rehabilitation
This is where my expertise as a chiropractor becomes essential. With the patient’s pain under control, I can begin to address the underlying biomechanical dysfunctions. Our integrated approach includes:
Chiropractic Adjustments: Gentle, precise adjustments to the cervical spine, particularly the C1 and C2 vertebrae, can relieve mechanical pressure on the nerve roots and improve overall spinal alignment. This restores proper motion and reduces the structural stress that may have been compressing the occipital nerves.
Myofascial Release and Soft Tissue Therapy: The nerve block calms the nerve, but it doesn’t release the chronically tight muscles that are strangling it. I use advanced soft tissue techniques to break down adhesions and trigger points in the suboccipital, trapezius, and other neck muscles. This improves blood flow, reduces muscular tension, and creates more space for the nerve to function without compression.
Corrective Exercises and Rehabilitation: We provide a personalized rehabilitation program. This includes specific stretches to maintain flexibility in the neck and shoulders, along with strengthening exercises to improve postural endurance. The goal is to correct poor postural habits (like forward head posture) that often contribute to occipital neuralgia and prevent recurrence.
By combining the immediate relief of the medical injection with the long-term structural correction of chiropractic care and rehabilitation, we create a synergistic effect. The injection breaks the pain-inflammation cycle. Moreover, rehabilitative therapies address the underlying cause, supporting sustainable recovery. This multidisciplinary model—where medical, chiropractic, and functional medicine professionals work hand in hand—is the future of effective pain management and injury care.
References
Choi, H. J., & Oh, I. H. (2021). The effect of greater occipital nerve block on pulseless disease (Takayasu arteritis) with occipital neuralgia. The Korean Journal of Pain, 34(1), 126–129. https://doi.org/10.3344/kjp.2021.34.1.126
Dach, F., & Eckeli, A. L. (2021). Occipital nerve block for cervicogenic headache: A systematic review. Cephalalgia: An International Journal of Headache, 41(14), 1476–1489. https://doi.org/10.1177/03331024211027464
Naja, Z. M., El-Rajab, M. A., Al-Tannir, M. A., Faysal, W. M., & Ziade, F. M. (2006). Occipital nerve blockade for cervicogenic headache: A double-blind, randomized, controlled clinical trial. Pain Practice, 6(2), 89–95. https://doi.org/10.1111/j.1533-2500.2006.00068.x
Unlocking Tendon Healing: An Inside Look at Percutaneous Tenotomy
Abstract
Chronic tendon pain, or tendinopathy, can be debilitating and significantly affect quality of life. Traditional treatments often provide only temporary relief, leaving patients searching for more definitive solutions. In this educational post, I will explore a groundbreaking, minimally invasive procedure known as percutaneous tenotomy. We will get into the science behind this ultrasound-guided technique, which removes damaged tendon tissue to stimulate the body’s natural healing processes. Specifically, we will examine the two leading methods, Tenex and TenJet, and discuss their applications for conditions like tennis elbow, Achilles tendinopathy, and plantar fasciitis. As we explore the mechanics of this procedure, I will also explain how we at Injury Medical Clinic integrate this advanced medical intervention into our comprehensive, multidisciplinary approach. This includes integrative chiropractic care, functional medicine, and personalized rehabilitation, all under the medical direction of Dr. Maria Guadalupe Cardenas, MD, to ensure our patients achieve optimal, long-lasting recovery.
As a practitioner with dual credentials in chiropractic (DC) and as an advanced practice registered nurse (APRN), I have dedicated my career to bridging gaps between medical disciplines. My goal has always been to find the most effective, evidence-based solutions for my patients. Today, I want to share insights into a fascinating procedure that has revolutionized how we treat chronic tendon pain: percutaneous tenotomy. This technique, once confined to surgical suites, is now a powerful tool accessible in an office setting, offering hope to those suffering from persistent tendinopathies.
At our practice, Injury Medical Clinic, we pride ourselves on a collaborative, integrative model. Our medical director and collaborative physician, Dr. Maria Guadalupe Cardenas, MD, an internist with over 40 years of experience, provides essential medical oversight. This partnership allows us to combine my expertise in chiropractic, functional medicine, and rehabilitation with her deep knowledge of internal medicine. This combination ensures that when we recommend and facilitate a procedure like percutaneous tenotomy, it is part of a holistic and well-managed treatment plan designed for comprehensive healing.
Understanding Chronic Tendinopathy: When Rest Isn’t Enough
Before we explore the solution, let’s understand the problem. Tendinopathy is not simply inflammation, as the term “tendinitis” might suggest. It’s a degenerative condition where the collagen fibers that make up the tendon begin to break down. This often happens with repetitive overuse, which prevents the tendon from healing properly. Instead of organized, strong collagen, the body lays down a disorganized, weak, and painful matrix of scar tissue. This abnormal tissue is metabolically inactive, has a poor blood supply, and doesn’t respond well to conservative treatments like rest, ice, or stretching.
Clinically, I see patients who have been struggling for months, or even years, with conditions such as:
Tennis Elbow (Lateral Epicondylitis or Extensor Carpi Radialis Brevis Tendinopathy)
Golfer’s Elbow (Medial Epicondylitis)
Jumper’s Knee (Patellar Tendinopathy)
Achilles Tendinopathy
Plantar Fasciitis (Plantar Fasciopathy)
These individuals often report a cycle of pain, temporary relief, and frustrating recurrence. This is precisely where a more targeted intervention becomes necessary.
Percutaneous Tenotomy: A Minimally Invasive Revolution
Percutaneous tenotomy is a cutting-edge, FDA-approved procedure designed to precisely remove the damaged, degenerative tissue from a tendon under ultrasound guidance. The term “percutaneous” means “through the skin,” highlighting its minimally invasive nature. Unlike open surgery, which requires large incisions and longer recovery times, percutaneous tenotomy is performed through a very small entry point, often requiring just a sterile bandage afterward.
The core principle is simple but powerful: by selectively debriding (removing) the diseased tissue, we create a controlled injury that triggers the body’s natural inflammatory and healing cascade. This process brings fresh blood, growth factors, and specialized cells to the area, encouraging new, healthy tendon tissue to grow.
Leading researchers in musculoskeletal medicine have shown that this targeted debridement is key to breaking the cycle of chronic pain and dysfunction (Knutsen et al., 2023). It’s a precise and elegant solution that addresses the root cause of the problem.
The Two Leading Techniques: Tenex and TenJet
Two primary technologies currently dominate the market for percutaneous tenotomy. While both achieve the same goal, they use different mechanisms.
Tenex Health TX System: This technique relies on phacoemulsification, the same ultrasonic energy used in modern cataract surgery. A specialized handheld instrument uses a small, 18-gauge double-lumen needle. The needle tip vibrates at an ultrasonic frequency, emulsifying (liquefying) the targeted pathologic tissue. At the same time, a second lumen within the needle suctions the emulsified debris out of the body. This is performed in real time under direct ultrasound visualization, ensuring that only damaged tissue is removed while the surrounding healthy tendon is preserved.
TenJet System: This technology offers an alternative to ultrasonic energy. It uses a high-velocity, pressurized stream of saline to create a “cutting” effect. The focused water jet precisely dissects and removes the degenerated tissue, which is then aspirated away through the same instrument.
In our collaborative network, we often use the Tenex device for its precision and effectiveness. The procedure is typically performed in an office or a minor procedure suite, making it incredibly convenient for patients. A foot pedal controls the device, and the settings are calibrated for the specific tendon and severity of the condition.
A Glimpse into the Procedure: Debriding Tennis Elbow
To help you visualize how the device works, let’s walk through a typical procedure for extensor carpi radialis brevis tendinopathy, commonly known as tennis elbow. This is one of the most common and well-studied applications for percutaneous tenotomy.
Preparation and Sterilization: The patient is positioned comfortably, and the area is prepped using a sterile technique. The ultrasound probe itself is covered with a sterile sheath to maintain a clean field. Local anesthetic numbs the area completely, ensuring the procedure is painless.
Ultrasound Visualization: The first and most critical step is using the ultrasound to identify the exact location and extent of the tendinopathy. The damaged tissue appears distinct on the screen—often hypoechoic (darker) and thickened compared with the bright, organized fibers of a healthy tendon.
Needle Insertion: Under continuous ultrasound guidance, the provider carefully inserts the Tenex needle through the skin and advances it directly into the degenerated tissue. Real-time imaging lets the provider see the needle tip at all times, ensuring pinpoint accuracy.
Debridement: The provider activates the device with the foot pedal. The ultrasonic tip begins to vibrate, and the provider moves the needle back and forth through the diseased tissue in a technique similar to fenestration (a needling procedure that promotes bleeding and healing). You can often hear a subtle hum as the device works. The device simultaneously suctioned away the emulsified, unhealthy tissue.
Completion: The entire “cutting time” is remarkably short, typically ranging from 30 seconds to two minutes. Once the provider has sufficiently debrided the pathologic area, they remove the needle and apply a small bandage.
This removes the source of pain and creates fertile ground for true healing to begin. Studies have demonstrated significant improvements in pain and function following this procedure for various tendinopathies (Seng et al., 2016).
Our Integrative Approach: Beyond the Procedure
At Injury Medical Clinic, performing a procedure like percutaneous tenotomy is just one part of a larger, more comprehensive approach. True and lasting recovery requires a multi-faceted approach that supports the body’s healing journey from every angle. This is where our unique integrative model, supervised by Dr. Cardenas, truly shines.
1. The Role of Integrative Chiropractic Care
As a chiropractor, I focus on the biomechanical integrity of the entire musculoskeletal system. The tendon issue didn’t arise in isolation. It often results from underlying biomechanical faults, postural imbalances, or compensatory movement patterns. My role, both before and after the tenotomy procedure, is to:
Assess and Correct Joint Dysfunction: I perform specific chiropractic adjustments to the elbow, wrist, shoulder, and even the spine to restore proper joint mechanics. If the joints don’t move correctly, the attached tendons remain under abnormal stress, hindering recovery and increasing the risk of reinjury.
Address Myofascial Restrictions: Using techniques like Active Release Technique (ART) and Graston Technique, we break down adhesions in the muscles and fascia surrounding the affected tendon. This improves flexibility, reduces muscle tension, and helps the tendon glide smoothly.
Prescribe Rehabilitative Exercises: After the procedure, a carefully graded exercise program is crucial. We start with gentle range-of-motion exercises and progress to eccentric loading exercises. Eccentric exercises (lengthening the muscle-tendon unit under load) are scientifically proven to stimulate collagen production and help the new tendon fibers align correctly, making them strong and resilient (Alfredson, 2005).
2. Functional Medicine and Nutritional Support
Healing is a metabolically demanding process. As a Certified Functional Medicine Practitioner (CFMP), I consider the biochemical factors that can support or hinder tissue repair. We may assess for and address:
Systemic Inflammation: Chronic inflammation can impede healing. We recommend anti-inflammatory diets rich in omega-3 fatty acids, antioxidants, and phytonutrients.
Nutrient Deficiencies: Key nutrients like Vitamin C, zinc, manganese, and certain amino acids (proline, glycine) are essential building blocks for collagen. We may recommend targeted supplementation to ensure the body has the raw materials it needs to build a strong new tendon.
Gut Health: Emerging research shows a strong link between gut health and systemic inflammation. Optimizing the gut microbiome can profoundly affect the body’s ability to heal.
3. Medical Oversight and Comprehensive Care
Having Dr. Cardenas as our medical director is invaluable. Her internal medicine expertise ensures we consider all aspects of the patient’s health. She provides medical clearance for procedures, manages any co-existing medical conditions (like diabetes or hypertension) that could affect healing, and can prescribe medications for pain management if necessary. This collaborative oversight ensures patient safety and a truly integrated standard of care that addresses the whole person, not just the injured tendon.
A New Era in Tendon Treatment
Percutaneous tenotomy represents a significant leap forward from older, more invasive methods. When skilled providers use it and integrate it into a comprehensive rehabilitation plan, this powerful tool delivers remarkable outcomes. It bridges the gap between failed conservative care and major surgery.
At our clinic, we use the latest evidence-based research to guide our practice. By combining advanced medical procedures like percutaneous tenotomy with the foundational principles of chiropractic care, functional medicine, and targeted rehabilitation, we create a synergistic healing environment. Our goal is to eliminate your pain, restore your function, strengthen your body, and empower you to return to the activities you love, stronger and more resilient than before.
If you have been struggling with chronic tendon pain, know that there are innovative and effective options available. It may be time to explore a more definitive solution that addresses the true source of your condition.
References
Alfredson, H. (2005). The chronic painful Achilles and patellar tendon: Research on basic biology and treatment. Scandinavian Journal of Medicine & Science in Sports, 15(4), 252–259. https://doi.org/10.1111/j.1600-0838.2005.00478.x
Seng, K., Mohan, P. C. S., & Koh, J. S. B. (2016). Percutaneous ultrasonic tenotomy for chronic tendinopathies: A systematic review. Journal of Orthopaedic Surgery, 24(1), 92–97. https://doi.org/10.1177/160240021602400120
Hydrodistension Treatment for (Frozen) Shoulder Pain and Stiffness
Abstract
As a clinician dedicated to exploring the frontiers of musculoskeletal health, I’m excited to share insights into an advanced, evidence-based procedure for one of the most stubborn and painful conditions we encounter: adhesive capsulitis, more commonly known as frozen shoulder. This condition, marked by severe pain and a progressive loss of shoulder motion, can be debilitating. Today, we’ll journey through the intricacies of a procedure called hydroplasty, or hydrodistension, a technique designed to physically release the constricted shoulder joint capsule.
We’ll review the latest research from leading scientists, including a close look at a hydrodistension procedure performed by a primary care sports medicine doctor. I will explain the physiological basis of this condition, the step-by-step mechanics of the procedure, and most importantly, how we integrate this advanced intervention with our comprehensive, multidisciplinary approach at Injury Medical Clinic. Our model combines medical oversight from Dr. Maria Guadalupe Cardenas, MD, with my expertise in chiropractic, functional medicine, and rehabilitation to create a powerful synergy that promotes not just relief, but true, lasting recovery.
Who We Are
Hello, I’m Dr. Alex Jimenez. With my extensive background in chiropractic, functional medicine, and family nursing, my mission has always been to provide my patients with the most effective, evidence-based treatments. At our clinic, we operate under a collaborative, integrative model. Our medical director, Dr. Maria Guadalupe Cardenas, a board-certified internist with over 40 years of experience, provides essential medical oversight. This partnership allows us to blend the best of conventional medicine with chiropractic care, physical rehabilitation, and functional medicine principles, creating a patient-centered treatment ecosystem.
Today, I want to focus on a particularly challenging condition: frozen shoulder. In our practice, we see many patients who have lost the ability to do simple daily tasks—combing their hair, reaching for a seatbelt, or lifting a grocery bag—because of the intense pain and stiffness of adhesive capsulitis. While conservative care is always our first line of defense, some cases require a more definitive intervention. This is where hydroplasty, also known as hydrodistension, comes in. This post presents the latest findings and highlights the work of leading experts, explaining how this procedure fits within our integrative chiropractic care framework to restore function and improve our patients’ quality of life.
Understanding Adhesive Capsulitis: The “Frozen” Shoulder
Before we explore the solution, it’s crucial to understand the problem. Adhesive capsulitis is an inflammatory condition that affects the glenohumeral joint capsule, the flexible, ligamentous sac that surrounds the ball-and-socket joint of the shoulder.
Pathophysiology: In a healthy shoulder, this capsule is elastic and allows for a wide range of motion. In frozen shoulder, the capsule becomes inflamed, thickened, and fibrotic. It develops adhesions, essentially becoming scarred and contracted. This process shrinks the capsule, physically restricting the movement of the humeral head within the glenoid socket.
The Three Phases: The condition typically progresses through three overlapping stages:
Freezing (Painful) Stage: This is characterized by the gradual onset of diffuse, severe shoulder pain. As the pain worsens, range of motion begins to decrease. Inflammation is the dominant process here.
Frozen (Stiff) Stage: During this phase, the pain may start to subside, but stiffness becomes the primary complaint. The joint capsule has significantly thickened and contracted, leading to a dramatic loss of both active and passive range of motion.
Thawing (Resolution) Stage: In this final stage, the shoulder’s range of motion slowly begins to improve. This phase can be very slow, sometimes lasting for months or even years.
Our goal with any intervention is to shorten these phases and restore function as quickly and completely as possible. This is where the synergy of medical procedures and chiropractic rehabilitation becomes invaluable.
Hydroplasty: A Targeted Intervention for a Constricted Joint
Hydroplasty is a minimally invasive procedure performed under ultrasound guidance. The core principle is simple yet powerful: to inject a large volume of sterile fluid directly into the glenohumeral joint capsule. The goal is to use hydraulic pressure to stretch and ultimately rupture the fibrotic adhesions restricting movement. Think of it like inflating a balloon until it stretches and breaks its constraints.
I want to showcase a respected primary care sports medicine physician. Their meticulous technique provides a clear, real-world example of how this procedure is performed. By understanding his approach, we can better appreciate the precision required and the rationale behind each step.
Here is a visual from an ultrasound-guided procedure. We are looking at the back of the shoulder, across the posterior glenohumeral joint. You can see the deltoid and infraspinatus muscles, the posterior capsule, and the humeral head. The needle is precisely positioned within the joint space, ready to deliver the therapeutic fluid. This image highlights the importance of ultrasound guidance to ensure accuracy and safety.
The Hydrodistension Procedure: A Step-by-Step Breakdown
The approach is methodical and prioritizes patient comfort and procedural success. It breaks down into three key stages. Let’s look at the “why” behind each one.
Step 1: The Suprascapular Nerve Block
The first step isn’t the joint injection itself, but a nerve block targeting the suprascapular nerve at the spinoglenoid notch.
The “What”: A 5 mL syringe of 1% lidocaine is used to numb this nerve. The spinoglenoid notch is a small passageway located just medial to the shoulder joint, where the suprascapular nerve runs.
The “Why”: The suprascapular nerve provides approximately 70% of the sensory innervation to the shoulder joint. By blocking this nerve, we achieve significant analgesia (pain relief). This serves two purposes:
Procedural Comfort: It makes the subsequent, more intensive part of the procedure far more tolerable for the patient.
Short-Term Pain Relief: It provides immediate relief that can last several hours, breaking the pain cycle and allowing gentle movement after the procedure.
This initial step is a clear example of thinking ahead in patient care—addressing pain before it becomes a barrier to treatment.
Step 2: Numbing the Joint Capsule Pathway
Next, the doctor anesthetizes the pathway for the main injection.
The “What”: Using a smaller, 25-gauge needle, the doctor injects a small amount of buffered 1% lidocaine directly into the subcutaneous tissue and down to the posterior glenohumeral joint capsule. He adds sodium bicarbonate to the lidocaine to buffer it.
The “Why”: Lidocaine is naturally acidic, which can cause a stinging sensation upon injection. Adding a bicarbonate buffer raises the solution’s pH, bringing it closer to the body’s natural pH. This simple modification significantly reduces injection discomfort. This step ensures the path for the larger needle is completely numb, further enhancing patient comfort.
Step 3: The Main Injection – Distending the Capsule
This is the therapeutic core of the procedure.
The “What”: A larger, 18-gauge needle is guided under ultrasound into the posterior glenohumeral joint. It’s connected via IV tubing to a large syringe containing the injectate. In protocol, this is a 51 mL cocktail:
10 mL of 1% lidocaine (a short-acting anesthetic)
10 mL of 0.5% ropivacaine (a longer-acting anesthetic for sustained pain relief)
30 mL of sterile saline (the primary fluid for creating hydraulic pressure)
1 mL of Kenalog (40 mg) (a corticosteroid to reduce inflammation)
The “Why”: This is a two-person job for safety and efficacy. While the physician holds the ultrasound probe and guides the needle, a medical assistant pushes the fluid from the syringe. The physician feels the resistance and watches the ultrasound screen in real time. Initially, the fluid flows freely into the small joint space. As the injection continues, pressure builds. On the screen, you can see the posterior capsule dramatically lift off the humeral head as it distends.
The “pop” isn’t always audible, but it’s visible on ultrasound. You see the capsule expand rapidly, then suddenly deflate as the adhesions tear and fluid escapes the joint space. This visual confirmation signifies a successful procedure—the capsule has been released. The combination of anesthetics provides a window of pain relief, while the corticosteroid helps manage the post-procedural inflammation caused by the mechanical tearing of the adhesions.
The Critical Role of Integrative Chiropractic Care Post-Procedure
The hydrodistension procedure is a powerful “reset” button, but it is not the end of the treatment. It is the beginning of a crucial window of opportunity. The adhesions have been broken, but without immediate, proper rehabilitation, they can reform, and the stiffness can return. This is where our integrative model truly shines.
As a chiropractor, I immediately focus on capitalizing on this newly created mobility. The period after hydrodistension is when we can make the biggest gains.
Gentle Mobilization and Adjustments: Immediately after the procedure, while the joint is still numb, we begin gentle, passive range-of-motion exercises. My role includes specific chiropractic mobilizations of the glenohumeral joint and surrounding joints (scapulothoracic, acromioclavicular, and sternoclavicular). These aren’t forceful manipulations but precise, controlled movements designed to guide the joint through its newly regained range and prevent adhesions from reforming. We also assess and adjust the cervical and thoracic spine, as dysfunction in these areas often contributes to poor shoulder mechanics.
Targeted Physical Rehabilitation: Our rehabilitation team designs a progressive program that evolves with the patient.
Initial Phase (Days 1-7): The focus is on pendulum exercises, passive stretching, and active-assisted range of motion. The goal is to maintain the mobility gained from the procedure and manage inflammation.
Intermediate Phase (Weeks 2-6): We introduce active range-of-motion and isometric strengthening exercises for the rotator cuff and scapular stabilizers (like the serratus anterior and rhomboids). Restoring proper scapulohumeral rhythm—the coordinated movement of the scapula and humerus—is a primary objective.
Advanced Phase (Weeks 6+): The program progresses to include resistive strengthening and functional, sport-specific, or work-specific movements. We retrain the neuromuscular system to use the shoulder correctly and confidently.
Functional Medicine Support: From my functional medicine perspective, we also address underlying systemic factors that may contribute to inflammation. We might assess dietary habits, stress levels, and nutrient deficiencies that could be hindering the healing process. Providing nutritional guidance on an anti-inflammatory diet or recommending supplements like Omega-3 fatty acids, turmeric, or Vitamin C can support the body’s natural healing mechanisms from the inside out.
This integrated approach ensures we treat not just the shoulder, but the whole person. Dr. Cardenas’s medical procedure creates the opening, and the chiropractic and rehabilitative care I provide guides the patient through that opening toward full recovery. It’s a true partnership between intervention and rehabilitation.
Conclusion: A Modern, Synergistic Path to Recovery
Adhesive capsulitis can be a long and frustrating journey for patients. As leading experts have shown, hydrodistension offers a modern, evidence-based way to break the cycle of pain and stiffness. However, this intervention’s success is magnified when embedded in a comprehensive, integrative care plan.
At our clinic, we have seen this synergy in action. By combining the precision of ultrasound-guided medical procedures under Dr. Cardenas’s direction with the hands-on, functional approach of chiropractic care and physical rehabilitation that I lead, we provide our patients with a structured path back to a pain-free, active life. We unlock the frozen shoulder with the procedure and then retrain it for lasting function through dedicated rehabilitation. This is the future of musculoskeletal care—a collaborative, patient-centered model that leverages the best of multiple disciplines to achieve superior outcomes.
Clinical Walkthrough: Ultrasound-Guided Hydrodissection for Radial Tunnel Pain
Abstract
In this educational post, I present a clear, evidence-based walkthrough of ultrasound-guided hydrodissection for radial tunnel–related lateral elbow pain, grounded in modern musculoskeletal research and my clinical observations.
I explain why patients with forearm-burning pain aggravated by pronation and supination often benefit from targeted nerve hydrodissection, how we safely perform perineural injections under ultrasound guidance, and where integrative chiropractic care and rehabilitation accelerate functional recovery.
I also describe our multidisciplinary workflow at Injury Medical Clinic PA (Mission Plaza Injury Medical Clinic) in El Paso, Texas, where I collaborate with Dr. Maria Guadalupe Cardenas, MD, to combine medical oversight with integrative chiropractic, functional rehabilitation, and personal injury care.
My focus here is on chiropractic and physical therapy–driven strategies, using medications and hormones only as background support when necessary.
By the end, you will understand the physiologic rationale for hydrodissection, how it reduces nerve irritation and restores movement, and how a coordinated plan supports lasting outcomes.
Hydrodissection For Radial Tunnel–Related Lateral Elbow Pain: A First-Person Clinical Walkthrough
As Dr. Alex Jimenez, DC, APRN, FNP-BC, CFMP, IFMCP, ATN, CCST, I routinely evaluate persistent lateral elbow and dorsal forearm pain—especially when classic “tennis elbow” does not fit the picture. When a patient reports a dull, burning discomfort in the dorsum of the forearm, worsened by pronation and supination, and tenderness is distal to the lateral epicondyle, I consider involvement of the deep branch of the radial nerve (posterior interosseous nerve) near the radial tunnel and the arcade of Frohse over the supinator muscle.
In the case described below, the patient experienced more than six months of pain. A 1 mL lidocaine test injection delivered to the vicinity of the radial nerve temporarily improved symptoms, corroborating a nerve-entrapment pain generator. From there, we proceeded with ultrasound-guided hydrodissection—a perineural technique using carefully controlled fluid volumes to free and “float” the nerve away from surrounding fascial planes, adhesions, and compressive interfaces.
Why Hydrodissection? Physiologic Rationale And Evidence
Entrapment physiology:
The radial tunnel is a tight anatomical corridor where fascial thickening, muscle hypertonicity, or micro-adhesions can compress the deep branch of the radial nerve.
This compression causes ischemia, mechanical deformation, and neurogenic inflammation—manifesting as burning pain, weakness in wrist or finger extension, and symptom provocation with forearm rotation.
Perineural hydrodissection mechanism:
Using ultrasound guidance, a needle is advanced to the perineural plane—never intraneural—and small, pulsed injections of fluid are delivered circumferentially.
The fluid creates a “halo” effect around the nerve, gently separating it from tight fascial envelopes and adjacent tissues, reducing local mechanical stress and improving microvascular perfusion.
The result is decreased nociceptor activation, improved axoplasmic flow, and the potential restoration of normal neurodynamics during movement (Brown et al., 2022; Cass et al., 2021).
Evidence-based insight:
Ultrasound-guided perineural hydrodissection has been studied in peripheral nerve entrapments, showing favorable short- and mid-term outcomes, especially when combined with rehabilitation to address root causes and movement patterns (Wu et al., 2017; Lam et al., 2021).
The superiority of ultrasound guidance lies in precise needle visualization, reduced risk of intraneural placement, and real-time confirmation of fluid spread (Özçakar et al., 2018).
Clinical Orientation: What I See On Ultrasound
Landmarks:
Brachioradialis lies superficially and laterally; the supinator wraps around the proximal radius; the deep branch of the radial nerve courses between them, just proximal to the arcade of Frohse.
The neurovascular bundle is identified between the brachioradialis and supinator, with the nerve appearing as a honeycomb structure in short axis.
Approach:
I position a linear ultrasound probe for a short-axis view of the deep branch of the radial nerve.
Using an in-plane technique, I introduce a fine needle (often a 25-gauge) under ultrasound visualization, advancing through the brachioradialis toward the perineural space around the nerve.
Confirmation:
I watch for muscle twitching when passing through contractile tissue—expected and typically benign—and constantly verify needle-tip location relative to the nerve.
The target is the perineural plane. We avoid the nerve fascicles themselves. The goal is a circumferential fluid halo that elevates and frees the nerve from adhered tissue.
Step-By-Step Hydrodissection: Perineural, Not Intraneural
Preparation and safety:
Anesthetize the skin with a cold spray or local infiltration.
Strict sterile technique with probe cover and sterile gel.
Real-time ultrasound ensures continuous visualization of the needle path and the nerve.
We check for prior response to diagnostic local anesthetic—useful for confirming the pain generator.
Needle movement and fluid delivery:
I make very small, subtle adjustments of the needle tip while keeping the ultrasound beam aligned.
I pulse small aliquots of fluid—often lidocaine with a minute dose of corticosteroid or buffered saline—to create gentle blunt dissection around the nerve.
I rotate the needle around the nerve’s perimeter (above, lateral, and below) to complete the halo, avoiding direct nerve penetration.
Why these choices?
Lidocaine provides immediate analgesia, facilitating comfortable movement post-procedure.
A small corticosteroid component may reduce perineural inflammation for several weeks, giving tissue time to remodel and patients time to implement corrective rehabilitation (Chang et al., 2019).
The hydrodissection itself is the primary mechanical solution—releasing entrapment and normalizing glide.
Integrative Chiropractic Care: How We Restore Function After Hydrodissection
Hydrodissection relieves the mechanical compression, but patients achieve durable results when we address biomechanics and neuromuscular control. At El Paso’s Injury Medical Clinic PA (Mission Plaza Injury Medical Clinic), I integrate chiropractic, functional rehabilitation, and physical therapy to correct movement patterns that feed radial tunnel stress.
Chiropractic neuro-biomechanical assessment:
I evaluate cervical and thoracic alignment, scapular mechanics, first rib mobility, and radial head mechanics.
Dysfunctions at the cervical spine (particularly C5–C7) can alter motor patterns through the radial nerve distribution; thoracic stiffness can disrupt scapulothoracic rhythm, increasing demand on forearm musculature.
Specific chiropractic techniques and reasoning:
Radial head mobilization: Restores proximal radio-ulnar mechanics, reducing supinator strain on the deep radial nerve during pronation-supination cycles.
Cervical and thoracic adjustments: Improve segmental mobility, reduce aberrant muscle guarding, and normalize descending motor control—beneficial for forearm extensor loading.
First rib and scapular mobilization: Optimizes scapular upward rotation and reduces compensatory forearm overuse.
Physical therapy integration:
Nerve gliding for the radial nerve: Gentle, pain-free sliders that encourage normal neural excursion and reduce post-procedure adhesiogenesis. We avoid aggressive tensioners early to protect the perineural interface (Shacklock, 2005).
Isometric extensor loading: Early-stage isometrics reduce pain via central modulation and prepare tissues for progressive strengthening.
Eccentric-concentric forearm training: Targets extensor carpi radialis brevis/longus and supinator-pronator balance, gradually building resilience.
Proprioceptive and motor control drills: Wrist stabilization, scapular setting, and kinetic chain integration to reduce forearm overload during work or sport.
Soft tissue and myofascial methods:
Instrument-assisted soft tissue mobilization and precise myofascial release around the supinator-brachioradialis interval can complement hydrodissection by promoting glide and lymphatic flow.
Dry needling may be considered for myofascial trigger points, performed conservatively to avoid nerve irritation.
Medical Oversight With Dr. Maria Guadalupe Cardenas, MD: Safety And Coordination
Our multidisciplinary clinic benefits from the seasoned medical direction of Dr. Maria Guadalupe Cardenas, MD (Board Certified in Internal Medicine, NPI #1164426749, Texas MD License #J2933), who has practiced internal medicine for over 40 years. She collaborates with me across personal injury, musculoskeletal pain, and functional recovery settings.
Role of medical oversight:
Ensures patient selection, contraindication screening (e.g., bleeding disorders, anticoagulant use, active infection), and medically appropriate use of local anesthetics and corticosteroids during hydrodissection.
Coordinates diagnostic frameworks and follow-up schedules, including consideration of imaging if atypical features emerge (e.g., profound weakness suggesting true posterior interosseous nerve palsy).
Provides backup strategies for complex cases where systemic factors—like diabetes or inflammatory conditions—increase neuropathic vulnerability.
Why this matters:
Interprofessional collaboration increases procedural safety and supports evidence-based care—from diagnosis to post-procedure rehabilitation—while keeping medication and hormonal therapy in the background unless clearly indicated for comorbidities.
Functional Medicine In Context: Keeping It Focused On Movement
Although my credentials include advanced functional medicine training, at El Paso Back Clinic we focus on movement-based solutions and reserve metabolic or hormonal interventions for select cases. Where appropriate:
We may recommend anti-inflammatory nutrition basics to support tissue healing.
We prioritize sleep optimization, stress modulation, and graded activity, all shown to affect pain perception and recovery trajectories (Clarke et al., 2023).
Supplements, if used, are adjuncts—not replacements—for chiropractic and physical therapy.
Personal Injury Care: Documentation And Recovery Pathways
In personal injury cases, clear causation and precise documentation are crucial:
High-resolution ultrasound documentation of nerve appearance, surrounding fascial tightness, and fluid spread during hydrodissection.
Objective measures: Grip strength, dynamometry, range-of-motion in pronation-supination, and functional tests tied to occupational demands.
Return-to-work plans: Staged exposure with ergonomic coaching and task modifications to prevent recurrence.
My Clinical Observations: What Patients Experience And Why
Drawing from years of care at El Paso Back Clinic and my clinical notes shared via our platforms, including our website and professional profiles:
Patients with dorsal forearm burning pain often report rapid reduction in symptoms after hydrodissection, particularly when the fluid halo is well established and the radial tunnel is decompressed.
Those who adhere to nerve glides, proximal kinetic chain correction, and graded strengthening experience more durable outcomes.
When cervical or scapular mechanics are neglected, symptoms tend to creep back during high-repetition tasks. Addressing the whole chain prevents over-reliance on the forearm extensors.
Safety Considerations And How We Minimize Risk
Perineural, not intraneural: We never inject directly into the nerve fascicles; ultrasound confirms placement.
Conservative volumes: Adequate to create separation without excessive tissue pressure.
Real-time visualization: The needle tip is visible throughout the procedure; we observe and respect tissue twitch.
Post-procedure monitoring: We encourage gentle movement the same day to promote neural glide and reduce stiffness. We advise patients on transient numbness from lidocaine and set expectations for gradual improvement over days to weeks.
When Hydrodissection Is Appropriate—And When It’s Not
Appropriate when:
Pain localizes distally in the dorsal forearm, worse with rotation, and examination indicates radial tunnel irritation.
The patient demonstrates temporary relief with a diagnostic local anesthetic block.
There is no frank motor deficit suggesting a complete posterior interosseous nerve palsy requiring surgical evaluation.
Consider alternatives or adjuncts when:
Pure lateral epicondylitis without nerve involvement is present—then tendinopathy protocols dominate the plan (eccentric loading, manual therapy).
Systemic neuropathies or inflammatory arthropathies are the primary drivers—then medical and rheumatologic collaboration guides care.
Putting It All Together: A Patient-Centered Care Pathway
Initial visit:
Thorough history, functional assessment, and targeted ultrasound of the radial tunnel.
Rule in nerve involvement with examination maneuvers and consider a small test lidocaine injection.
Procedure day:
Ultrasound-guided perineural hydrodissection using a fine needle and pulsed fluid delivery.
Immediate post-procedure instructions: gentle range of motion; avoid aggressive loading on day one.
Rehabilitation phase:
Begin radial nerve sliders, isometric extensor work, and scapular posture drills.
Progress to eccentric-concentric strengthening and functional task replication.
Maintenance:
Address workstation ergonomics, grip variation strategies, and sport technique refinements.
Periodic rechecks to ensure sustained neurodynamics and joint mechanics.
Summary
Today’s post provides a transparent, first-person account of how I identify and treat radial tunnel–related lateral elbow pain using ultrasound-guided hydrodissection, followed by integrative chiropractic and physical therapy. The core physiologic goals are to reduce perineural compression, normalize nerve glide, and retrain movement patterns across the kinetic chain. With medical oversight by Dr. Maria Guadalupe Cardenas, MD, we execute a safe, coordinated plan that emphasizes manual care, exercise therapy, and patient education—keeping medications and hormones in the background unless clinically necessary. This integrated approach delivers rapid symptom relief and durable function for forearm-burning pain aggravated by pronation and supination.
Key Takeaways
Hydrodissection creates a perineural fluid halo that frees the deep branch of the radial nerve in the radial tunnel.
Ultrasound guidance improves safety and precision and confirms fluid spread.
Integrative chiropractic and physical therapy restore biomechanics, ensuring durable results.
Medical oversight ensures appropriate selection, safety, and follow-up, especially in complex cases.
As a practitioner dedicated to the forefront of integrative and functional medicine, I constantly seek the latest evidence-based research to better serve my patients. It is also my privilege to share the work of leading researchers. I translate their advanced findings into practical, understandable knowledge for you.
My name is Dr. Alex Jimenez, and I hold several credentials, including DC, APRN, FNP-BC, CFMP, IFMCP, ATN, and CCST. At our clinic, Injury Medical Clinic PA, we pride ourselves on a multidisciplinary approach. This means we combine various specialties in one location to provide comprehensive care. Furthermore, our team is under the medical direction of Dr. Maria Guadalupe Cardenas, MD, an internist with over 40 years of experience. This team integrates chiropractic care, functional medicine, rehabilitation, and medical oversight to create personalized treatment plans. Today, I want to share insights into an advanced technique for treating chronic tendinopathy. We often see this condition in our practice.
Understanding Brisement and High-Volume Injections for Tendinopathy
Abstract
This educational post discusses a minimally invasive procedure called brisement, or high-volume injection (HVI), for treating chronic tendinopathies like Achilles and patellar tendinopathy. As Dr. Jimenez, I will guide you through the physiological basis of this technique and explain how it differs from other treatments like fenestration. We will also cover the procedure itself, from patient positioning to the injection process. We use insights from leading researchers like Dr. Fran O’Connor. The focus is on the mechanical and physiological effects of the injection, particularly hydrostatic decompression and the disruption of problematic neovessels and neonerves that contribute to chronic tendon pain. We will also discuss how this innovative medical procedure integrates seamlessly with our chiropractic and rehabilitative care at Injury Medical Clinic. This promotes optimal healing, restores function, and provides long-term relief for our patients.
What Is Tendinopathy, and Why Does It Become Chronic?
Before we dive into the specifics of the procedure, let’s understand the condition it treats: tendinopathy. Many people use the term “tendinitis,” which implies inflammation. However, in chronic cases, we often find not active inflammation but degeneration and a failed healing response within the tendon. This is more accurately called tendinopathy.
In a healthy healing process, the body repairs damaged tissue. However, with chronic tendinopathy, this process goes awry. The body attempts to heal the area by growing new, disorganized blood vessels and nerve endings. This process is called neovascularization and neoinnervation. These new structures, or neovessels and neonerves, are not beneficial. In fact, they are often the primary source of the persistent pain that patients experience. The disorganized tissue and these new nerve endings create a cycle of pain and dysfunction. This cycle is difficult to break with conventional treatments alone.
At our clinic, we often see athletes, laborers, and individuals with chronic tendon pain from repetitive strain. My clinical observations have shown that conditions like Achilles tendinopathy can be incredibly stubborn, significantly impacting a person’s ability to walk, run, or even stand comfortably. This is where advanced interventions become necessary.
Introducing Brisement: A Targeted Hydrostatic Approach
So, what is brisement, also called a high-volume injection (HVI)? It’s an advanced, ultrasound-guided technique designed to address the root cause of chronic tendon pain. The term “brisement” is French for “breaking” or “disruption.” This procedure is distinct from other needle-based treatments like fenestration or tenotomy. In those treatments, the goal is to repeatedly puncture the tendon itself to stimulate a healing response.
With brisement, the focus is entirely different. We are not targeting the tendon directly. Instead, the needle is carefully guided to the space next to the tendon—specifically, the interface between the tendon and adjacent soft tissues, like the paratenon (the sheath around the tendon) or a nearby fat pad (such as Kager’s fat pad behind the Achilles tendon).
The goal of brisement is twofold:
Mechanical Disruption: To physically break up the fine, pain-causing neovessels and neonerves that have grown into the area.
Hydrostatic Decompression: To use the pressure of the injected fluid to separate tissues that have become adhered or scarred together, freeing the tendon and relieving compressive forces.
Think of it as using a precise stream of fluid to gently peel apart layers of tissue that are stuck together. At the same time, we wash away the very structures that transmit pain signals.
The Brisement Procedure: A Step-by-Step Journey
Drawing from the work of experts like Dr. O’Connor, let’s walk through how this procedure is performed, illustrating the precision and care required. For this example, we’ll focus on Achilles tendinopathy, a common and challenging condition.
1. Patient Preparation and Imaging
The first step is proper positioning. The patient is typically placed prone (lying face down), with their feet hanging off the edge of the treatment table. This position provides excellent access to the Achilles tendon. The area is then meticulously prepped and draped to maintain sterility.
Next, we use a high-frequency ultrasound probe to visualize the tendon. This is not just a preliminary step; ultrasound guidance is critical throughout the entire procedure. We examine the tendon in both long-axis (lengthwise) and short-axis (cross-section) views. This allows us to:
Pinpoint the exact area of tendinopathy, which often appears as a thickened, disorganized, and sometimes darker region on the ultrasound image.
Identify the crucial interface between the anterior (front) border of the Achilles tendon and the underlying Kager’s fat pad, which is our target zone.
2. Anesthesia
Once the target is identified, we ensure the patient’s comfort. A very fine needle (typically 25- or 27-gauge) is used to administer a local anesthetic, such as lidocaine, to numb the skin and the subcutaneous tissues along the planned needle path. This helps keep the main part of the procedure as painless as possible.
3. The High-Volume Injection
With the area anesthetized, the main procedure begins. A slightly larger needle (21- or 22-gauge) is used for the high-volume injection. The injectate is a combination of a local anesthetic (like lidocaine, for continued pain control) and a large volume of sterile normal saline.
Under continuous ultrasound guidance, the needle is advanced to the target space—the potential space anterior to the Achilles tendon. What happens next is the core of the brisement technique.
As the fluid is injected, we can see it in real-time on the ultrasound screen. The fluid begins to spread, creating a visible separation between the tendon and the adjacent fat pad. This is hydrostatic decompression in action. You can literally watch the layers of tissue peel apart.
The pressure and volume of the fluid mechanically “strip” or disrupt the delicate neovessels and neonerves that have infiltrated this space. By breaking these connections, we are directly targeting the source of the pain.
The amount of fluid used can vary significantly, with literature describing volumes anywhere from 5 to 100 cc. The endpoint is determined by either patient tolerance or when we feel significant resistance to further injection. This indicates the space has been sufficiently filled and decompressed. While large volumes are effective, caution is necessary to avoid complications like tendon rupture or compartment syndrome. Therefore, precise, real-time guidance is non-negotiable.
The Integrative Approach: How Chiropractic Care Complements Brisement
A procedure like brisement is a powerful tool. However, in our integrative model at Injury Medical Clinic, it’s one part of a larger, more comprehensive recovery strategy. This is where our expertise in chiropractic, physical therapy, and functional medicine comes into play. Dr. Cardenas provides essential medical oversight for these procedures. Meanwhile, my role focuses on restoring the body’s biomechanical function.
Here’s how we integrate this care:
Addressing the Root Biomechanical Cause: Why did the tendinopathy develop in the first place? Often, it’s due to underlying biomechanical imbalances. This could be poor foot mechanics (like overpronation), pelvic misalignment, or muscular imbalances in the kinetic chain (the interconnected system of the feet, ankles, knees, hips, and spine). As a chiropractor, my first step is to perform a thorough biomechanical assessment. I use techniques like spinal and extremity adjustments, soft tissue mobilization, and myofascial release to correct these imbalances. By restoring proper joint alignment and muscle function, we reduce abnormal load on the healing tendon and help prevent re-injury.
Post-Procedure Rehabilitation: After the brisement procedure has disrupted the pain-generating tissues, the body needs to heal correctly. This is where a structured rehabilitation program is crucial. Our physical therapy team designs a progressive loading program. This starts with gentle range-of-motion exercises to maintain mobility without stressing the tendon. It then progresses to eccentric exercises (lengthening the muscle-tendon unit under load), which have been shown to stimulate proper collagen remodeling and strengthen the tendon (Alfredson, H., Pietilä, T., Jonsson, P., & Lorentzon, R., 1998).
Enhancing Healing with Functional Medicine: From a functional medicine perspective, we look at the body’s internal environment. Healing requires the right nutrients. We may recommend specific supplements like Vitamin C, manganese, zinc, and certain amino acids (proline, glycine) that are essential building blocks for collagen, the primary protein in tendons. We also focus on reducing systemic inflammation through diet and lifestyle modifications, which creates a more favorable environment for tissue repair.
Pain and Inflammation Management: In the initial phases after the procedure, we use non-pharmacological methods to manage discomfort and support healing. This can include modalities like laser therapy or acoustic wave therapy, which can help modulate inflammation and enhance cellular repair processes. Chiropractic adjustments also strongly affect the nervous system, helping downregulate pain signals and improve overall function.
By combining the targeted medical intervention of brisement with holistic chiropractic and rehabilitative care, we create a powerful synergy. The injection provides the “reset” by eliminating the chronic pain source. Meanwhile, our therapies address the underlying cause and guide the body through a robust, complete healing process. This integrated model, overseen by Dr. Cardenas and implemented by our dedicated team, ensures that we are not just treating a symptom. We are restoring the patient to full, pain-free function.
IFM's Find A Practitioner tool is the largest referral network in Functional Medicine, created to help patients locate Functional Medicine practitioners anywhere in the world. IFM Certified Practitioners are listed first in the search results, given their extensive education in Functional Medicine