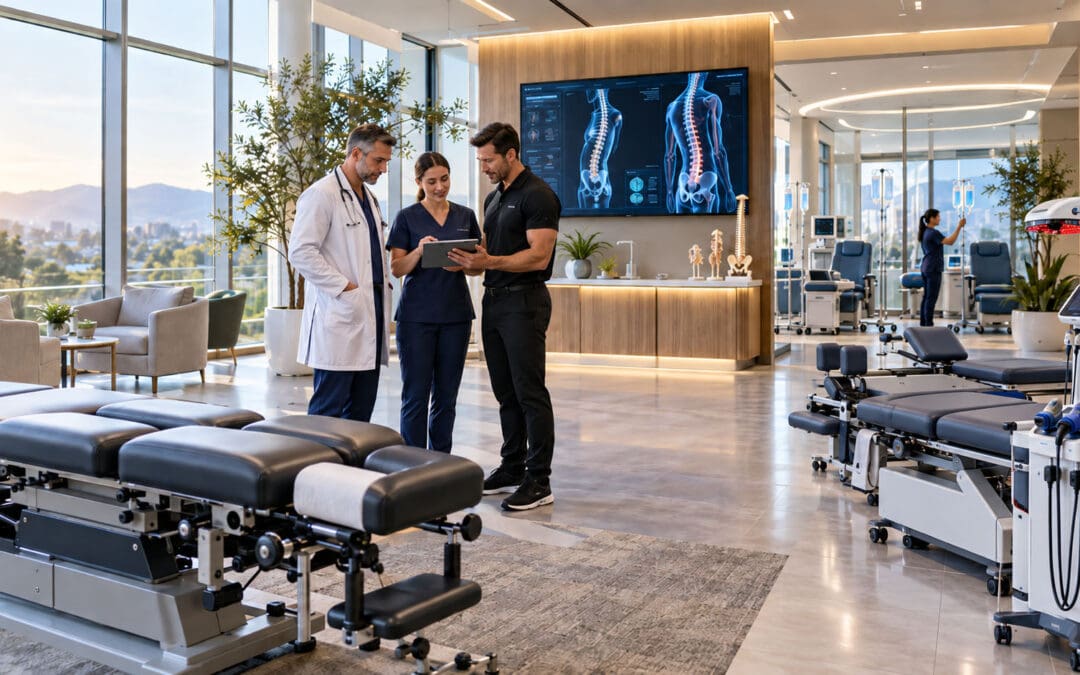
Back Clinic Imaging & Diagnostics Team. Dr. Alex Jimenez works with top-rated diagnosticians and imaging specialists. In our association, imaging specialists provide fast, courteous, and top-quality results. In collaboration with our offices, we provide the quality of service our patients’ mandate and deserve. Diagnostic Outpatient Imaging (DOI) is a state-of-the-art Radiology center in El Paso, TX. It is the only center of its kind in El Paso, owned and operated by a Radiologist.
This means when you come to DOI for a radiologic exam, every detail, from the design of the rooms, the choice of the equipment, the hand-picked technologists, and the software which runs the office, is carefully chosen or designed by the Radiologist and not by an accountant. Our market niche is one center of excellence. Our values related to patient care are: We believe in treating patients the way we would treat our family and we will do our best to ensure that you have a good experience at our clinic.
Segmental Disc Compression Patterns Generated by Loop 375 Lateral Impacts
Abstract
Loop 375 lateral impacts in El Paso generate rapid, side-directed force vectors that compress lumbar segments, tear the annulus, and accelerate disc height loss visible on structural MRI. These patterns create clear mechanism-to-injury linkages that support clinical and proximate causation for lumbar claims. At Injury Medical Clinic PA, the dual-licensed team of Dr. Alex Jimenez, DC, APRN, FNP-BC, and collaborating medical director Dr. Maria Guadalupe Cardenas, MD, documents these objective findings with Colossus-compliant notes, functional testing, and imaging timelines. Non-invasive care—chiropractic decompression and ESWT—restores disc hydration and height, reduces surgical risk, and keeps patients in control of their recovery decisions. The resulting impairment ratings are packaged inside the medical-legal causation documentation framework at https://dralexjimenez.com.
Highway-side impacts on El Paso’s Loop 375 do more than crumple doors. They deliver concentrated lateral force vectors that simultaneously load lumbar discs in compression, shear, and side-bending. The result is a recognizable pattern of segmental disc compression: annular fissures, progressive height loss, and altered load-sharing that shows up clearly on structural MRI. For personal-injury attorneys and patients, this pattern clearly links crash mechanics to documented objective injury.
How Lateral Force Vectors Create Segmental Compression
In a typical Loop 375 side-impact or side-swipe, the struck vehicle’s occupant experiences a rapid lateral acceleration. The lumbar spine, already bearing axial load, is forced into lateral bending while the upper body lags. Finite-element and cadaver studies show that axial compression plus lateral bending produces peak stresses along the posterolateral annulus—the same region where clinical annular tears most often appear.
The outer annulus, whose fibers run nearly vertical in the posterolateral quadrant, is mechanically weakest in this direction. Once a tear begins, nuclear material can migrate, and the disc loses height. Sequential MRI demonstrates the progression: an initially bright T2 fissure evolves into a broader annular disruption accompanied by measurable reduction in disc height at the involved segment (commonly L4–L5 or L5–S1).
MRI Correlation That Withstands Scrutiny
Structural MRI is the cornerstone of objective documentation. High-resolution T2 sequences reveal hyperintense annular fissures; sagittal and axial measurements quantify disc-height loss relative to adjacent normal levels. When these imaging findings are correlated with the known crash kinematics—ΔV, principal direction of force, and seat-belt usage—the clinical causation statement becomes precise: the lateral impact produced the observed segmental compression pattern and annular disruption.
Digital diagnostic imaging, functional range-of-motion and strength testing, and detailed electronic notes are packaged so they align with Colossus valuation factors. These records also support Letters of Protection and provide a clear timeline that patients and counsel can share.
Beneficence: Restoring Disc Hydration and Height
The clinical goal is root-cause recovery, not symptom suppression. Non-surgical spinal decompression creates negative intradiscal pressure that draws nuclear material centrally and allows water and nutrients to re-enter the disc. When low-energy extracorporeal shockwave therapy (ESWT) is combined with controlled traction, animal and clinical data show improved disc height, rehydration, and favorable remodeling of the annular matrix.
At the clinic, Dr. Jimenez (DC, APRN, FNP-BC, CFMP, IFMCP; Texas License #1191402, Prescriptive Authority #59628, NPI 1205907805) integrates these mechanical therapies with targeted regenerative options under the medical direction of Dr. Cardenas, MD (Board Certified Internal Medicine, Texas License #J2933, NPI 1164426748). The combination addresses both the structural compression and any concurrent metabolic or inflammatory factors that slow healing.
Non-Maleficence: Delaying or Avoiding Surgery
Invasive procedures carry risks of infection, hardware, and adjacent-segment disease. By restoring disc height and reducing annular stress through decompression and ESWT, many patients experience durable pain relief and improved mobility without immediate surgical intervention. This approach minimizes iatrogenic harm while still producing the objective measurements insurers and defense counsel expect.
Autonomy: Patient-Owned Imaging and Decision Making
Patients retain full access to their imaging timeline and functional data. They review the mechanism-to-injury linkage with both the clinical team and their attorney, then choose the care pathway that fits their goals. Coordination with existing medical providers remains seamless; the clinic’s dual-licensure model keeps chiropractic, acupuncture/electroacupuncture, and advanced medical diagnostics within one coordinated plan.
Future-Care Projections That Drive Case Value
Documented residual disc-height loss and annular disruption support projections for ongoing decompression sessions, periodic ESWT, and monitoring MRI. These future-care items are stated in plain language and tied directly to the original lateral-impact mechanism, so they withstand Colossus review and support appropriate impairment ratings.
The resulting impairment ratings are packaged inside the medical-legal causation documentation framework at https://dralexjimenez.com.
Detailed Biomechanics of Loop 375 Lateral Impacts
Loop 375’s high-speed corridors and frequent lane-change geometry produce a distinctive set of force vectors. When a vehicle is struck broadside or sideswiped, the occupant’s torso is accelerated laterally while the pelvis remains partially restrained by the seat. The resulting moment arm loads the lumbar spine in combined compression, lateral bending, and shear.
Peak annular stresses concentrate at the posterolateral annulus of L4–L5 and L5–S1. In vitro studies using complex loading protocols that include lateral bending demonstrate endplate junction failures and isolated outer-annulus disruptions—exactly the lesions seen clinically after side impacts.
These mechanics explain why patients present with segmental rather than diffuse disc changes. The MRI shows focal height loss and annular high-intensity zones at the levels that experienced the greatest lateral moment. Correlating the police report’s principal direction of force with these segmental findings supplies the proximate-causation statement required for both medical and legal purposes.
Structural MRI Protocols and Quantification
Standard lumbar MRI protocols are augmented with thin-slice T2 sequences and precise mid-sagittal height measurements. Disc height is compared with the adjacent normal disc and with published normative data. We grade annular tears by radial extent and T2 signal intensity. When serial imaging is available, the timeline shows progressive height loss beginning after the documented impact rather than from age-related change alone.
These measurements are entered into the electronic record in a Colossus-ready format: diagnosis codes, objective findings, and functional limitations appear in structured fields. The same images are released to counsel so the patient retains ownership of the visual evidence.
Clinical Examination and Functional Correlates
The physical examination maps MRI findings to clinical signs: restricted lateral flexion, positive straight-leg or femoral-nerve tension, and segmental motion restriction. Instrumented strength and range-of-motion testing quantifies the deficit. These functional data corroborate imaging and show that segmental compression produces real activity limitations—information that directly influences impairment ratings and future care needs.
Multidisciplinary Treatment: Decompression and ESWT
Chiropractic decompression tables apply computer-controlled distraction forces that cycle between hold and rest phases, generating negative intradiscal pressures sufficient to retract nuclear material and promote rehydration. ESWT delivers acoustic energy that, when combined with traction, down-regulates matrix-degrading enzymes and stimulates annular repair.
Sessions are scheduled according to the severity of height loss and annular disruption. We track progress with clinical scores and, when indicated, follow-up MRI. The dual-licensed model allows Dr. Jimenez to integrate these mechanical therapies with medical oversight from Dr. Cardenas, ensuring concurrent management of any metabolic factors.
Beneficence is realized when disc height and hydration improve and patients regain mobility and sleep. Non-maleficence is served by prioritizing non-invasive options that delay or eliminate the need for fusion or discectomy. Autonomy is preserved because every patient receives a clear explanation of the mechanism, imaging findings, and expected outcomes of each treatment choice; the patient retains possession of the imaging timeline and shares it with counsel at the patient’s direction.
Documentation That Survives Defense Scrutiny
Every encounter generates Colossus-compliant electronic notes that link the original crash kinematics to current objective findings. Digital imaging is archived with measurement annotations. Functional testing results are dated and signed. The complete package supports both the Letter of Protection and the impairment rating that is later incorporated into the medical-legal causation report hosted at https://dralexjimenez.com.
Impairment Ratings and Future-Care Projections
Residual disc-height loss and annular disruption are translated into AMA Guides impairment percentages when appropriate. Future-care projections specify the number and frequency of decompression and ESWT sessions needed to maintain restored height and prevent further annular progression. These projections are written in plain language and tied explicitly to the Loop 375 lateral-impact mechanism.
Coordination with Legal Counsel and Existing Providers
The clinic supplies counsel with a concise mechanism-to-injury summary, annotated imaging, and the functional data set. When a patient already has a primary-care or specialty physician, the dual-licensure team coordinates with that relationship rather than replacing it, preserving continuity while adding the structural and regenerative expertise needed for the injury claim.
Multidisciplinary Call to Action and Reference List
Patients injured in Loop 375 lateral impacts and their attorneys can obtain a coordinated evaluation that links crash mechanics to MRI-documented segmental disc compression, restores disc height non-surgically through decompression and ESWT, and packages the entire record for legal use.
Call to Action
Schedule a comprehensive evaluation at Injury Medical Clinic PA in El Paso. Dr. Alex Jimenez, DC, APRN, FNP-BC, and Dr. Maria Guadalupe Cardenas, MD, will map the force vectors of your collision to your current MRI findings, design a drug-free plan to restore disc hydration and height, and prepare the objective documentation your counsel needs. Contact the clinic or visit https://dralexjimenez.com to begin.
References
Che, Y.-J., Guo, J.-B., Wang, Y.-F., Zhu, L.-M., Zhou, C.-X., & Liu, Y.-L. (2021). Low energy extracorporeal shock wave therapy combined with low tension traction can better reshape the microenvironment in degenerated intervertebral disc regeneration and repair. The Spine Journal, 21(1), 91–102. https://doi.org/10.1016/j.spinee.2020.08.004
Why Getting Out of the Car Can Hurt More Than the Drive Itself
Abstract
Getting out of the car can hurt more than the drive because your hips stay flexed, your lumbar spine stiffens, trunk rotation is limited, and the first stand creates a sudden load change. This post explains seat position and road vibration without blaming one bad posture. It covers why the first steps may sting, how a chiropractic exam assesses sit-to-stand, and how hip mobility, trunk work, and spinal decompression can make exiting easier.
The parking brake clicks. The engine is off. For forty minutes the drive felt tolerable. Then you step onto the pavement in El Paso, and your lower back seizes up. Network engineers between sites, field technicians hauling kits, Amazon drivers on stop after stop, and hybrid employees finishing a commute describe the same surprise. The seat was fine. The exit was not.
Why the Drive Can Feel Fine
Sitting is acceptable, and one slumped inch is not the whole story. Reviews of posture and low back pain have not found a single causal pose that explains clinical pain (Swain et al., 2020). When researchers measure sitting time, many adults report an immediate rise in back discomfort, even though that does not prove sitting causes a lasting episode (De Carvalho et al., 2020).
A car seat adds its pattern. Hips stay bent. The lumbar spine often rests toward flexion. The trunk barely rotates because the belt, the console, and traffic keep you facing forward. A field technician may twist once for a meter. An Amazon driver may twist at every stop for a tote. A hybrid worker may not twist until the garage. Less variety means that tissues remain in a single length for an extended period.
De Carvalho and Callaghan (2011) measured lumbar posture and passive stiffness during two hours of simulated driving. Beach and colleagues (2005) found that passive flexion stiffness can rise after prolonged sitting, especially in men after about an hour. A spine that has been quiet in flexion may not love a sudden stand.
What Changes While You Are Still Buckled
Prolonged hip flexion. Hip flexors, including the iliopsoas, stay shortened while you drive. After a long sit, the hip may not extend easily. The pelvis can tip, and the lumbar joints take motion; the hip did not yield
Lumbar stiffness. Discs slowly lose some fluid under sustained load. Ligaments and capsules creep into the seated shape. Stiffness means motion is not shared evenly. One level may catch.
Reduced trunk rotation. A belted seat removes most of that. When you rotate to unbuckle, reach for a bag, or step out sideways, that turn is a new demand.
Seat position. A seat that is too far back forces you to round your body to reach the wheel. A seat too low sharpens the hip angle and hardens the stance. None of these is the sole cause. Together they change how load is shared between disc, facet, hip, and muscle.
Vibration. Road vibration is separate from posture. A systematic review linked whole-body vibration with higher odds of low back pain and sciatica, with some concern about publication bias (Burström et al., 2015). Vibration does not diagnose a disc. It is one more input during a long shift.
The First Steps Are a Different Task
Sitting and standing are not the same job. Intradiscal pressure changes with posture and load. Unsupported sitting can produce higher intradiscal pressure than easy standing, though the number depends on how you sit (Roman-Liu et al., 2023).
Sit-to-stand requires hip extension, knee extension, a forward weight shift, and then trunk rise. People with low back pain often coordinate the lumbar spine and hip differently during this task (Shum et al., 2005). If the hip is stiff, the low back may extend early.
That is why the first steps can hurt more than the drive:
The spine must change shape under body weight.
Hip extension is requested before the hip is ready.
Rotation returns all at once as you pivot out.
A bag, scanner, or tote is often added at the stand.
Cold air or a hot cab can make stiff tissue feel sharper.
Amazon drivers repeat this exit dozens of times. Network engineers may do it fewer times, but they still have to cover highway miles and then work in a ladder or crawl space. Hybrid employees may do it once, then sit again at a desk. The pattern is the same. The dose is not.
This Is Not One Bad Posture
Blaming the slouch oversimplifies a mixed evidence base (Swain et al., 2020). Two coworkers can share a truck, and only one limps to the tailgate. A useful exam asks what the exit demands, not whether your shoulders looked perfect at a red light.
Red flags need a same-day medical look: new bowel or bladder changes, saddle numbness, progressive leg weakness, fever, unexplained weight loss, or pain after a crash.
How a Back-Focused Exam Looks at the Exit
At El Paso Back Clinic, the question is mechanical. Can you stand without a catch?
Does one hip stop early?
Does lumbar motion hinge at one segment?
Does leg pain start after the stand, or did it ride the whole drive?
Dr. Alex Jimenez, DC, APRN, FNP-BC, CFMP, IFMCP, brings chiropractic assessment and board-certified family nurse practitioner training to that visit. He holds Texas APRN license #1191402 and prescriptive authority #59628 (NPI 1205907805). Dr. Maria Guadalupe Cardenas, MD, is board-certified in internal medicine and has more than 40 years of experience (Texas license #J2933, NPI 1164426748) and provides medical direction at Injury Medical Clinic PA.
A typical function check may include:
Sit-to-stand from seat height, then with arms crossed
Hip extension and rotation, side to side
Lumbar flexion, extension, and rotation
A short walk right after the sit
A nerve screen if pain travels below the knee
Questions on routes, ladder days, commute length, and group benefits
The goal is not a posture label. The goal is to see which link fails when the load changes.
Making the Transition Easier
Chiropractic care aims to restore segmental motion so the first steps are shared instead of hinged. Soft-tissue work can ease hip flexors and glute guards from the drive.
Scoot forward so both feet plant before you stand.
Lean the trunk forward as one unit, then rise. Do not twist and stand at once.
Take three slow steps before you lift a bag or tote.
On a longer stop, gently extend each hip for a few breaths.
If the low back prefers extension, skip a deep toe-touch after the drive.
The trunk has to accept load while the hips extend. Hip hinges with a light load, short carries, slow pivots, and step-ups help rebuild the exit you already do for work.
For disc-related lumbago or leg symptoms after the drive, targeted spinal decompression can reduce load long enough to retrain the stand. Add electroacupuncture when pain blocks sleep or the next shift. MLS laser or shockwave therapy is considered when the complaint is more tendon than disc. An image-guided epidural, when medically directed, is a later window for radicular pain, not the first habit.
These options are chosen for their benefit and for restraint. Non-invasive care can lower the chance that a stiff exit becomes a long medication course or an early surgical talk. You remain the decision-maker.
A Simple Exit Routine
Use this technique on a commute, a field loop, or a delivery block.
Set the seat so you are not reaching, with your hips near knee height if the cab allows.
Every 20 to 30 minutes, shift the pelvis. Change is the point.
Feet out, then stand, then reach.
Carry the bag on the side that does not twist a painful hip.
If the third step still grabs after two weeks, have the transition checked.
Many tech, logistics, and hybrid employers in El Paso offer group plans that include chiropractic and coordinated medical visits. Work injuries and crash-related exits are documented differently from a commute ache, and that distinction protects you.
Call if the catch spreads down a leg, if stairs feel weak, or if you plan the day around which door hurts less. You need a spine and hips that can change shape when the door opens.
Call 915-850-0900 or visit 11860 Vista Del Sol, Suite 128. Ask how group insurance applies to a sit-to-stand evaluation.
The One-Sided Carry: What a Laptop Bag, Tool Case, or Work Tote Can Do to Your Back and Hips
Abstract: A laptop bag, tool case, or work tote may feel harmless because each trip is short. But carrying the same load on the same side can change how your trunk, shoulder, hips, and legs share the work. This article explains asymmetrical loading, what clinicians look for, and practical ways to redistribute load and build capacity.
The Bag Is Not “Putting Your Spine Out”
Picture a network engineer leaving a parking lot with a laptop bag over the right shoulder. The bag is not extremely heavy, and the walk is only ten minutes. Yet by Thursday, the right shoulder feels elevated, the left low back feels tight, and one hip seems tired on stairs.
That pattern does not prove the bag has “misaligned” the spine. A better explanation is compensation.
When weight hangs on one side, the body has to keep the center of mass controlled while walking. The trunk may lean or stiffen, one shoulder may elevate, the pelvis may shift, and the hips may produce different forces from side to side. Classic biomechanical research found that asymmetric load carriage changed trunk muscle demands and hip and knee moments during walking (DeVita et al., 1991). Human bodies tolerate asymmetry every day. Concern grows when repetition exceeds a person’s strength, endurance, recovery, or tissue tolerance.
Why Repetition Matters More Than One Carry
Load-carriage research shows that load size and placement can alter posture, walking mechanics, and balance. A systematic review of backpack studies found changes such as more trunk flexion, altered hip and ankle motion, shorter strides, and higher cadence while carrying loads (Liew et al., 2016). Another systematic review found that load carriage can reduce postural stability, with load magnitude and placement influencing the effect (Martin et al., 2023).
These studies do not mean every worker carrying a bag will develop pain. They support a practical idea: the body adapts to repeated demands.
Think about the total “dose”:
How heavy is the bag?
How far do you carry it?
How many times per shift?
Do you always use the same side?
Are you climbing stairs or walking uneven ground?
Are you already fatigued from sitting, lifting, driving, or poor sleep?
Do you have enough trunk, hip, and shoulder endurance for the task?
A moderate load repeated many times can become more meaningful than one unusually heavy carry.
What Your Trunk and Hips Do With an Uneven Load
Carrying involves a coordinated system that includes the rib cage, spinal muscles, pelvis, hips, legs, and feet.
Trunk compensation
If a bag pulls downward on the right, your body may lean, brace, or rotate to keep its center of mass controlled. Some people stiffen through the torso; others allow more side-to-side motion. Either strategy can increase fatigue.
Shoulder elevation
A slipping strap can encourage shoulder hiking. Over time, neck and shoulder muscles may stay active longer than necessary, contributing to fatigue, tightness, headaches, or discomfort between the shoulder blades.
Hip loading
The hips help control the pelvis every time one foot leaves the ground. With an uneven load, one side may need to work differently to stabilize the body. Asymmetric carrying has been shown to change hip moments during walking, although the response depends on load, placement, speed, and the individual (DeVita et al., 1991).
Walking changes
People often shorten their stride, adjust cadence, change pelvic movement, or spend more time stabilizing when loads increase. These are normal adaptations, not proof of damage. Problems are more likely when the strategy becomes uncomfortable, inefficient, or difficult to recover from.
Signs the Carrying Pattern Deserves Attention
Occasional muscle fatigue is not automatically a medical problem. However, repeated symptoms that follow a predictable carrying pattern deserve a closer look.
Useful clues include:
pain that builds during or after carrying;
one shoulder consistently feeling higher or more tense;
aching on one side of the low back or outer hip;
symptoms that improve when the bag is removed or sides are changed;
reduced walking tolerance;
numbness, tingling, or weakness;
pain that changes how you climb stairs, bend, or lift.
Severe pain after trauma, progressive weakness, loss of bowel or bladder control, saddle-region numbness, fever, unexplained weight loss, or other major neurological or systemic symptoms require timely medical evaluation.
What a Chiropractic Assessment Should Actually Examine
At El Paso Back Clinic, the goal should not be to look at a shoulder bag and declare that the spine is “out.” A useful assessment asks what tissues and movements are struggling and why.
A clinician may examine spinal and hip range of motion, tenderness, neurological findings, gait, single-leg balance, trunk endurance, hip strength, shoulder mechanics, and how the patient carries. The examination may also consider work demands, prior injuries, training level, footwear, and recovery.
Watching the patient walk with the actual laptop bag or tool case can be especially informative.
Does the trunk lean?
Does the shoulder hike?
Does pain appear after several minutes?
Can symptoms improve by changing strap position, load distribution, or carrying side?
That information turns treatment from a generic back-pain plan into a task-specific rehabilitation strategy.
Treatment Should Improve Capacity, Not Create Dependence
For mechanical back or hip symptoms, chiropractic care may be one part of a broader plan to improve movement and reduce pain. Current guidance for chronic primary low back pain supports individualized nonsurgical care that can include education, structured exercise, and selected physical therapies such as spinal manipulation (World Health Organization, 2023).
The practical goal is to help the patient tolerate real life again.
A plan may include:
chiropractic manipulation or mobilization when appropriate;
hip and thoracic mobility work;
trunk endurance exercises;
progressive hip-abductor and gluteal strengthening;
loaded carries that gradually rebuild tolerance;
gait and stair training;
shoulder and scapular endurance work;
work-specific lifting and carrying practice.
If persistent musculoskeletal pain or muscle guarding limits rehabilitation, acupuncture or electroacupuncture may sometimes be added as an adjunct after appropriate evaluation. Evidence suggests electroacupuncture may reduce nonspecific low-back pain when combined with standard care, although certainty is limited and it should not replace diagnosis, exercise, or progressive conditioning (Hsieh et al., 2024).
The simplest fix is often not “stop carrying.” It is improving how you manage the load.
First, remove items you do not need. Bags can slowly collect chargers, tools, notebooks, bottles, and backup equipment.
Second, keep the load close to your body. A load that swings far from the trunk creates more movement to control.
Third, use two straps when practical. A well-fitted backpack can distribute load more evenly than a one-shoulder tote. For heavier occupational equipment, waist or hip support may help redistribute part of the load depending on the design.
Fourth, switch sides if the task requires one-handed or one-shoulder carrying. Changing sides doesn’t eliminate the load, but it reduces repetition of the same pattern.
Fifth, break long carries into shorter trips when possible. A rolling case or cart may be smarter than carrying everything at once.
Finally, build capacity. Stronger hips, trunk muscles, shoulders, and legs make carrying less costly. Progressive conditioning also respects autonomy: instead of telling patients their bodies are fragile, it teaches them how to prepare for the work they choose to do.
Coordinated Care for Back and Hip Symptoms in El Paso
Dr. Alex Jimenez, DC, APRN, FNP-BC, CFMP, IFMCP, combines chiropractic and medical training to evaluate mechanical, neurological, and broader health contributors to pain. When medical complexity requires oversight, he collaborates with Dr. Maria Guadalupe Cardenas, MD, a board-certified internal medicine physician with more than 40 years of experience.
That integrated model supports three principles. Beneficence means choosing care that restores function and addresses the likely cause. Non-maleficence means starting with appropriate noninvasive, drug-free strategies when reasonable while recognizing when imaging, medication, injections, or referral may be needed. Autonomy means explaining findings clearly so the patient can decide how to proceed and coordinate with an existing medical team.
A laptop bag, tool case, or work tote is rarely the whole story. The useful question is whether repeated one-sided loading is exceeding your current capacity. When assessment, load redistribution, chiropractic care, rehabilitation, and progressive conditioning match your job’s actual demands, the goal isn’t just to feel better on the treatment table. It is to walk, carry, climb, work, and recover with confidence.
The Programmer Who Forgot to Breathe: Can Shallow Screen-Time Breathing Contribute to Rib, Mid-Back, and Low-Back Stiffness?
Abstract: Long coding sessions can change how you sit, move, and breathe. When the rib cage stays compressed and the trunk barely changes position, some people notice rib stiffness, mid-back tightness, low-back fatigue, or a deep breath that feels restricted. This article explains how the diaphragm, ribs, thoracic spine, abdominal wall, and lumbar stabilizers work together, what rehabilitation may address, and which breathing or chest symptoms need medical evaluation first.
A programmer can spend two hours solving one problem and barely notice anything below the neck. Then the task ends. The shoulders drop. The person sits back, tries to inhale deeply, and suddenly feels the ribs resist, the mid-back ache, or the low back feel tired.
That experience does not prove that “bad breathing” caused back pain. Pain is rarely that simple. However, prolonged flexed sitting, low movement variety, and shallow breathing can change how the chest wall and trunk share mechanical work. Research has linked prolonged sitting with immediate increases in low-back discomfort in some adults. A small laboratory study also found that greater posterior pelvic tilt reduced thoracic expansion and respiratory measures in healthy young men (De Carvalho et al., 2020; Aramaki et al., 2021).
The Diaphragm Is Also Part of Trunk Control
The diaphragm is the dome-shaped muscle beneath the lungs. When it contracts, it descends and helps draw air into the chest. It also works with the abdominal wall, pelvic floor, multifidus, and other trunk muscles to manage pressure and support the spine during movement.
That dual role matters at your desk. Your trunk must remain stable enough for typing, reaching, standing, and lifting while still allowing the ribs and abdomen to expand. Research on chronic low-back pain suggests that breathing and diaphragm function may interact with trunk control, but the evidence does not show that diaphragm dysfunction causes every back problem. Breathing is one variable in a much larger mechanical system (Chen et al., 2026; Li et al., 2026).
What a Long Screen Session Can Change
Picture a developer leaning toward a laptop during a difficult debugging session. The pelvis rolls backward, the low back rounds, the thoracic spine stays flexed, and the lower ribs move closer to the pelvis. That position may continue for long periods with little movement outside the hands.
Several changes can follow:
Rib movement can feel limited. A compressed trunk position may make comfortable expansion harder.
Thoracic motion narrows. The mid-back spends less time extending and rotating.
Support muscles stay active. Spinal and abdominal muscles continue to provide low-level control.
Breathing may become smaller. Some people brace the abdomen, briefly hold their breath, or breathe mainly into the upper chest when concentrating.
One position becomes the problem. There is rarely one perfect posture; low movement variety may be more important than a single snapshot of alignment.
These changes can help explain why the first deep breath after a long work block feels stiff, but they do not establish a simple cause-and-effect relationship between shallow breathing and pain.
Why Rib, Mid-Back, and Low-Back Symptoms Can Travel Together
The ribs attach to the thoracic spine, so every comfortable breath includes small movements through rib joints, chest-wall tissues, the thoracic spine, the diaphragm, and abdominal muscles. If the upper body stays flexed and still, those tissues may feel temporarily stiff.
The low back can fatigue at the same time because trunk control is shared. The diaphragm helps regulate pressure while the abdominal wall and spinal muscles manage load. That is why a useful examination should look beyond “take deeper breaths.”
A clinician may assess:
thoracic and rib mobility;
lumbar control and sitting tolerance;
hip mobility and trunk endurance;
symptom reproduction with breathing or movement;
neurological findings; and
whether breathing changes during reaching, lifting, or exercise.
The goal is to identify what is actually limiting function rather than assigning every symptom to posture.
Can Breathing Exercises Help?
Possibly, as an adjunct to rehabilitation.
A 2026 systematic review of 17 randomized trials found that breathing exercises may improve pain and function in chronic nonspecific low-back pain, but the evidence was low to very low certainty because studies varied and several had a high risk of bias (Chen et al., 2026). A separate 2026 meta-analysis found moderate-certainty evidence that diaphragmatic training may reduce pain and disability when added to care, while longer-term effects still need clarification (Li et al., 2026).
The practical message is not “breathe correctly and fix your back.” You can train breathing alongside mobility, strength, coordination, and graded activity when the examination suggests it matters.
A Five-Step Mechanical Reset
For ordinary screen-related stiffness, and only when no medical warning signs are present, a simple reset can restore movement options:
Change position. Sit taller, stand, or walk briefly, then take a deep breath.
Let the lower ribs widen. Place your hands around the lower rib cage and allow gentle expansion without straining.
Move the mid-back. Add comfortable extension, rotation, or reaching instead of repeatedly stretching only the low back.
Release unnecessary bracing. If you have been gripping your abdomen, let it soften enough for normal breathing.
Reload the trunk. Follow mobility with walking, light resistance, or prescribed stabilization exercises so the change transfers into function.
The target isn’t perfect posture. It improves variability, trunk capacity, and coordination.
When Chiropractic and Rehabilitation Fit
For mechanical rib, thoracic, or lumbar complaints, chiropractic and rehabilitation may be appropriate after excluding dangerous or non-musculoskeletal causes. Care may combine spinal or rib-joint assessment, manual treatment when indicated, mobility work, progressive trunk training, ergonomic changes, and exercise.
A 2026 review found that thoracic manual techniques and breathing exercises may improve pain or disability in some low-back-pain populations, but the certainty was low and treatment effects varied (Seyedhoseinpoor et al., 2026). That supports personalized care, not a one-size-fits-all breathing plan.
At El Paso Back Clinic, the useful outcome is physical function: sitting with less fatigue, moving more comfortably, tolerating work demands, and building capacity without rushing toward invasive treatment.
Red Flags: When Breathing Is Not a Posture Problem
Difficulty taking a satisfying deep breath can be musculoskeletal, but unexplained shortness of breath can also reflect heart, lung, vascular, infectious, or other medical conditions.
Seek emergency care for sudden severe shortness of breath, unexplained chest pain or pressure, fainting, blue lips or nails, confusion, or major breathing difficulty. New breathlessness after prolonged immobility, surgery, illness, or a long trip also deserves prompt medical attention because a blood clot is one possible cause (Mayo Clinic, 2025).
A persistent cough, fever, wheezing, worsening exercise tolerance, or breathlessness that doesn’t match your activity level deserves medical evaluation. Chiropractic treatment should not delay that workup.
Integrated Care, Informed Choices
When symptoms appear mechanical, Dr. Alex Jimenez, DC, APRN, FNP-BC, CFMP, IFMCP, can connect chiropractic assessment, rehabilitation, and medical evaluation within one coordinated plan. Dr. Maria Guadalupe Cardenas, MD, a board-certified internal medicine physician with over 40 years of experience, provides medical direction when cardiopulmonary, metabolic, medication-related, or other non-musculoskeletal factors need consideration.
This approach supports beneficence, non-maleficence, and autonomy: use care that is likely to help, avoid unnecessary risk, and give patients enough information to choose among reasonable options. Prioritize non-invasive treatment when appropriate, and add imaging, laboratory testing, referral, or medical treatment when findings justify it. Care can also coordinate with the patient’s existing medical team.
The Bottom Line
Screen-time breathing is not a diagnosis. Prolonged flexion and low movement variety may reduce rib and thoracic motion and alter how the diaphragm, abdominal wall, and spinal muscles share work. For some people, that pattern can accompany rib stiffness, mid-back tightness, or low-back fatigue.
Do not obsess over every breath. Restore movement options, strengthen the trunk, vary posture, and investigate symptoms that do not behave like ordinary mechanical stiffness. If pain keeps returning or breathing feels genuinely abnormal, get evaluated before assuming the screen is the only factor.
A practical starting point is simple: notice when concentration makes your body rigid, then change position before discomfort becomes the only signal you hear. Small, repeated movement choices throughout the workday can support comfort without turning posture or breathing into another performance task that creates unnecessary worry during demanding coding sessions.
The Hip That Hurts After Sitting: Is Your Low-Back Problem Actually Being Driven by the Hip?
Abstract: Prolonged sitting holds the hip in flexion, reduces usable hip extension, and can force the lumbar spine to move more than it should. Programmers, engineers, data analysts, gamers, and remote workers often feel these symptoms as front-of-hip tightness, buttock discomfort, or low-back pain after a long session. This article explains those mechanics and when structural care, mobility, strengthening, or decompression belong in the plan.
The call ended an hour ago. You are still in the chair. When you stand, the front of one hip feels pinched, the buttock feels thick, and the low back won’t straighten. A few steps later, the back eases. That pattern is common in people who sit to think. It doesn’t prove that every desk worker has tight hip flexors. Sitting changes the hip, but a stretch does not automatically repair the spine.
What Sitting Does to the Hip
Sitting is a flexed-hip posture. The thigh stays bent toward the trunk, often near 90 degrees, for hours, and the tissues around the hip adapt to that demand (Chamberlain, 2021).
The hip is designed for large ranges of motion. The lumbar spine is built for a smaller, more controlled range.
In a typical sit, the pelvis tilts backward slightly and lumbar lordosis decreases. That sit-to-stand strategy is normal, not a diagnosis by itself (Devin et al., 2012).
Perching on the chair edge or gaming with a collapsed trunk keeps the hip bent while the low back flexes or twists.
Front-of-hip tissues can feel short because they have been held short, because the joint does not tolerate end-range flexion, or because a lumbar nerve refers symptoms to the groin or buttock.
The useful question is not “Are the hip flexors tight?” It is “Where is motion missing, and what is setting the limit?”
When the Hip Cannot Extend, the Low Back Often Pays
Hip extension takes the thigh behind the body. Walking needs only about 10 to 15 degrees of that motion. If the hip does not extend, the pelvis and lumbar spine often finish the job by extending or rotating more than they should (Gómez-Hoyos et al., 2020).
That is the core of hip-spine thinking. Offierski and MacNab described coexisting hip and lumbar problems that can mimic, amplify, or hide each other (Offierski & MacNab, 1983). Later reviews add a practical rule: if the hip cannot supply sagittal motion, the lumbopelvic region often will (Devin et al., 2012).
For a desk-based engineer or analyst, the day can look like hours of hip flexion, brief standing with a hip that no longer extends easily, extra lumbar motion to keep the trunk upright, and a return to the chair before the hip practices the missing motion. People with low back pain often show reduced hip range of motion and weaker hip extensors and abductors than pain-free adults (Pizol et al., 2024). That does not make the hip the villain in every case. It does show that the hip and low back share a job.
Reduced Gluteal Capacity Is a Loading Problem
The gluteal muscles extend and stabilize the hip. In sitting, they are lengthened, unloaded, and rarely asked to produce force. Capacity drops because they are undertrained for controlling the pelvis when you stand or walk. If the hip cannot create or control extension, lumbar extensors often work harder. The back starts doing a hip job. That can feel like a tight belt after a long coding block or a late gaming session.
Adding hip strengthening to a low-back plan can reduce pain and disability in nonspecific low back pain (Santamaría et al., 2023). That is not a reason to load the glutes on day one. If the hip joint is irritated, aggressive bridging can increase groin pinch instead of building capacity.
Hold four targets at once: the hip needs motion, the gluteals need force and endurance, the trunk needs to stabilize instead of steal extra motion, and the workday needs more than one posture.
Tight Muscle, Stiff Joint, or Nerve Irritation?
A stretch that feels good in the front of the hip does not identify the source.
Adaptive muscle stiffness
The front-of-hip muscles have spent the day in flexion. They may resist lengthening when you stand. Symptoms often ease after walking, without catching or a sharp groin pinch at the end of range. This is the usual tight-flexor pattern, not the only one.
Hip joint limits
Intra-articular problems such as femoroacetabular impingement, labral irritation, or early degenerative change often prefer the groin. Sitting, crossing the legs, or tying a shoe can pinch. Clicking or limited internal rotation raises concern that the joint, not just the muscle, is setting the barrier (Chamberlain, 2021; Enseki et al., 2023).
Extra-articular hip pain
Lateral hip pain with side-lying or stair climbing can point toward gluteal tendon irritation. Deep buttock pain can come from posterior hip muscles, the sacroiliac region, or referred lumbar symptoms.
Nerve-related pain
A lumbar disc or irritated nerve root can send symptoms into the buttock, thigh, or groin. Numbness, tingling, shooting pain, or true weakness are not flexor tightness. They need a spinal and neurological exam.
Seek prompt evaluation for fever, unexplained weight loss, unchanging night pain, progressive weakness, or bowel or bladder changes. Those signs are not stretch problems.
A Direct Plan That Respects Both Regions
El Paso Back Clinic treats this as a mechanical problem first. Dr. Alex Jimenez, DC, APRN, FNP-BC, CFMP, IFMCP, evaluates spinal motion, hip motion, strength, and nerve signs in the same visit. Dr. Maria Guadalupe Cardenas, MD, Board Certified in Internal Medicine, provides medical direction when findings suggest more than postural overload.
A useful exam compares hip and lumbar motion, sit-to-stand quality, single-leg control, and nerve tension tests. The goal is to decide whether the low back is primary, the hip is primary, or both share the load. That is beneficence: treat the driver, not only the loudest complaint.
Chiropractic structural care can improve joint mechanics in the lumbar spine, pelvis, and hips when restriction is present. The intent is to give each region its own range so one area stops compensating for the other. Gentle hip mobilization may help when the capsule, not the muscle, is the barrier. Aggressive end-range stretching is a poor first choice if groin pinching suggests impingement.
Mobility work should look like the missing task: hip extension without extra lumbar arching, rotation without twisting through the lowest lumbar joints, and sit-to-stand without a lurch. Movement variability—standing, walking, sitting, and changing sides—reduces the hours the hip spends in one angle.
Once pain allows, training should include quiet hip hinges or bridges, side-lying or standing abduction, split-stance work that asks one hip to extend, and trunk endurance that resists motion instead of creating it. A programmer who sits for ten hours does not need a max squat in week one. They need a hip that can stand and walk without handing the job to the low back.
Non-surgical spinal decompression is a targeted tool for disc-related compression and selected nerve findings. It is not a default treatment for a stiff hip. If an exam and imaging support a disc or stenosis driver, decompression may reduce neural irritation while rebuilding capacity. If the spine is quiet and the hip is the limiting factor, the plan should focus on the hip. Choosing a non-invasive path first can reduce the rush toward long-term medication or surgery when those steps are not required. That is how the plan avoids adding risk the patient does not need.
What You Gain When Both Regions Share the Work
The outcomes patients want are practical: stand after a long review without grabbing the chair, walk without a chopped stride, and sit through focused work without a pinched groin or a locked low back. The hip should supply motion and force. The low back should supply controlled motion and stability.
Autonomy means you leave with a map: which symptoms are reasonable to train through, which signs should stop a stretch, and how this plan can sit alongside the care you already receive from your medical team.
Next Step With the El Paso Back Clinic Team
If sitting leaves a mark on the hip or low back, a focused exam can separate a short, adapted muscle from a joint or nerve problem. That is the difference between stretching what is loud and treating what is driving the load. Schedule an evaluation with Dr. Alex Jimenez, DC, APRN, FNP-BC, CFMP, IFMCP, and the collaborative medical team directed by Dr. Maria Guadalupe Cardenas, MD, so structural care, hip mobility, progressive strengthening, and—only when spinal findings justify it—decompression can be matched to your exam, not to a generic desk-stretch list.
Devin, C. J., McCullough, K. A., Morris, B. J., Yates, A. J., & Kang, J. D. (2012). Hip-spine syndrome. Journal of the American Academy of Orthopaedic Surgeons, 20(7), 434–442.
When the Standing Desk Starts Hurting: Why Standing All Day Is Not the Opposite of Sitting All Day
Abstract
Buying a standing desk feels like a solution. For many programmers, engineers, remote workers, and analysts, it is not. This article explains why standing all day is not the opposite of sitting all day. It covers static loading, lumbar compression, hip position, foot fatigue, and movement variability, then shows how a structural exam, chiropractic care, decompression when indicated, and trunk-hip conditioning shift the load away from the furniture.
You did the responsible thing. After months of low-back tightness at the keyboard, you raised the desk and promised to stand through stand-ups and tickets. For two weeks it felt like progress. Then the low back felt heavy by afternoon, one hip locked, and the feet ached. By dinner, standing no longer felt like relief.
That pattern is common among programmers, engineers, remote workers, and analysts who treat furniture as the solution. A standing desk can be useful. It is not a cure. The spine needs a changing load, not one perfect posture.
The Myth of the Perfect Desk Posture
The sales pitch is simple: sitting compresses the discs, and standing unloads them, so more standing should mean less pain. The body does not work that way.
Sitting and standing are both static postures. In both, the pelvis, lumbar segments, and hips hold a relatively fixed shape while the eyes stay on a screen. The muscles that keep you upright do not rest. They hold. After enough minutes, they fatigue, the pelvis drifts, and the lumbar curve collapses or over-arches. Pain follows the drift, not the desk brand.
Research on sit-stand workstations is mixed. Some reviews show a modest drop in low-back discomfort when people alternate positions (Agarwal et al., 2018). A Cochrane review of workplace standing and walking interventions found no clear reduction in musculoskeletal symptoms (Parry et al., 2019). Changing position tends to matter more than choosing one “better” position and staying there.
What Static Loading Actually Does
Static loading means a tissue is compressed, stretched, or contracted without enough change in length or force. Holding a grocery bag with a straight arm is the same idea. The bag is not heavy. The hold is.
In a standing workday, that holds stacks up:
The lumbar discs and facet joints accept a steady compressive force.
Hip and gluteal muscles co-contract to keep the pelvis from tipping.
Calves and foot muscles lock to keep you from swaying.
Blood return from the lower legs slows because the muscle pump is not cycling during walking.
Prolonged constrained standing has been linked to low-back discomfort, leg fatigue, foot pain, and venous pooling (Waters & Dick, 2015; EU-OSHA, 2021). Standing more than about four hours a day, especially without walking breaks, is also associated with a higher risk of chronic venous problems (Hirsch et al., 2024). The standing desk concentrated these loads into eight hours of “optimal posture.”
Lumbar Compression: Sitting Is Not Always Worse
Classic studies suggested sitting raised disc pressure compared with standing. A 2022 systematic review found that sitting often produces higher pressure in healthy discs, but later studies and studies of degenerated discs often show little difference between the two postures (Li et al., 2022).
That matters if you already have disc irritation or chronic lumbago. Switching desks may not unload the segment that hurts. Locked knees, a forward head, and a distant mouse can raise lumbar shear even as you feel “more active.” Laboratory work found standing produced the most fidgeting and the highest front-to-back shear, while both prolonged sitting and prolonged standing increased low-back discomfort (Le & Marras, 2016; Park & Srinivasan, 2021). Alternating sit-stand blocks changed trunk stiffness and muscle activity more favorably than either posture alone.
If your low back hurts after two hours of sitting, two hours of standing is not automatically medicine. It is a different static load.
Hips, Feet, and the Standing Fatigue Pattern
Desk workers who stand for long blocks often describe a cluster:
A dull lumbar ache below the belt line
One hip that feels pinched or stuck
Tightness across the front of the thighs
Heaviness in the calves
Tired, hot feet by mid-afternoon
Standing with the pelvis tucked under flattens the lumbar curve and keeps the hip flexors short. Standing with an exaggerated arch jams the lumbar facets. Neither version includes the motion those joints were built for: flexion, extension, rotation, and weight shift. Without walking, the calf pump is quiet, fluid pools, and the plantar fascia takes a continuous load. A thick mat can delay the complaint. It does not remove the need to move.
Movement Variability Beats Longer Standing
Tissues tolerate changing forces better than identical forces. Discs like cycles of load and unload. Hips like a changing angle. Feet like a push-off.
A useful work block is not “stand until it hurts, then sit until it hurts.”
Sit for focused typing with the lumbar curve supported.
Stand for shorter review or call blocks with soft knees and weight shifting.
Walk two to five minutes between tickets or meetings.
Change the mouse side or foot position before symptoms peak.
The goal is not to collect standing minutes. The goal is to interrupt the hold.
Change the Load, Don’t Just Change the Furniture
A standing desk is a tool. So is a chair. Neither one evaluates a stiff thoracic spine, a rotated pelvis, a weak hip abductor, or a disc that does not tolerate axial load.
El Paso Back Clinic starts with the structure, not the catalog. A focused exam looks at lumbar motion, hip extension and rotation, trunk endurance, foot and ankle stiffness, and nerve tension if pain travels into the leg. Imaging and medical screening are added when red flags appear.
Dr. Alex Jimenez, DC, APRN, FNP-BC, CFMP, IFMCP, evaluates both the mechanical pattern and the medical context. His dual licensure as a Doctor of Chiropractic and a board-certified Family Practice Nurse Practitioner allows structural care to work alongside appropriate diagnostics. Dr. Maria Guadalupe Cardenas, MD, Board-Certified in Internal Medicine, provides medical direction and laboratory oversight when metabolic or vascular issues could be amplifying fatigue or delaying recovery.
That collaboration is the ethical core of the visit. Beneficence means the plan exists to restore function and spare a larger intervention the patient may not need. Non-maleficence means starting with non-invasive, drug-sparing options instead of unnecessary surgery or long-term medication dependence. Autonomy means the patient sees the findings and chooses the next step with their existing medical team still in the loop.
What Care Looks Like When the Desk Is Not the Diagnosis
Chiropractic structural care
Adjustments and mobilization restore motion where the lumbar spine, pelvis, and hips have locked into a standing or sitting pattern so one joint is not doing the work of three.
Non-surgical decompression when indicated
If exam and imaging point to disc-related lumbago or radicular irritation, computer-guided non-surgical spinal decompression may be appropriate. In selected patients, adding decompression to standard physical care has improved pain, motion, endurance, and function compared with physical therapy alone (Amjad et al., 2022; Schueren et al., 2025). It is a targeted option when disc load, not furniture, is the limiter.
Mobility and progressive trunk-hip conditioning
Remote workers and engineers also need hip extension they can use at a desk: split-stance hip-flexor and calf lengthening, thoracic rotation, ankle rocks, and pain-free lumbar motion. Once irritability drops, the program targets weak areas with hip abduction, anti-extension trunk work, sit-to-stand control, and short carries.
A Practical Desk Reset
You do not need a new desk to start changing the load.
Cap uninterrupted standing at 20 to 30 minutes until hips and feet tolerate more.
Cap uninterrupted sitting the same way.
Use shoes with a stable heel if you stand at home.
Raise the monitor so you don’t fold your neck.
Walk during calls that do not require a shared screen.
Stop standing the moment the low back starts to brace. Bracing is a warning, not a badge.
If pain, numbness, or leg heaviness persists after you rotate positions, bring that data to a structural exam.
The Point
Desk workers did not fail the standing desk. Sitting overloads the lumbar spine in one pattern. Standing overloads it in a different way. The solution is a spine, pelvis, and hip complex that can change shape, share load, and recover. Change the load. Do not just change the furniture.
If standing still leaves a heavy low back, a locked hip, or tired legs, schedule a structural evaluation at El Paso Back Clinic. Dr. Alex Jimenez, DC, APRN, FNP-BC, CFMP, IFMCP, and Dr. Maria Guadalupe Cardenas, MD, coordinate chiropractic alignment, decompression when indicated, mobility training, and medical oversight on one plan. Bring your desk-setup notes and leave with a load strategy for Monday.
The Server-Rack Crouch: How Mid-Back Stiffness, Hip Restriction, and Awkward Reaching Overload the Lumbar Spine
Abstract: Data center technicians and network engineers crouch behind racks, kneel on hard floors, pull cables, and lift gear in tight aisles. When the mid-back cannot rotate, and the hips cannot flex well, the lumbar spine takes on extra bend, twist, and shear. This article maps that kinetic chain, shows what a structural exam should measure, and outlines alignment, mobility work, mechanical rehab, lifting strategy, and spinal decompression to keep a mechanical problem from becoming a disc or nerve injury.
The job does not look like heavy construction. You slide a switch into a dim rack, kneel to dress fiber, and then stand when a ticket hits. By day three, the low back feels thick and unreliable. Calling that “bad posture” does not tell you what to change.
The real issue is load sharing. The lumbar spine is built to carry compression and resist excess rotation. It is not built to supply the turn your mid-back should provide, or the hip bend your hips should provide, while you also reach and lift. When those neighbors stiffen, the low back becomes the available joint—and available joints get overloaded.
The Kinetic Chain Behind the Rack
Treat the trunk as a three-part system.
The thoracic spine and rib cage should rotate and extend so the arms can reach without dragging the pelvis.
The hips should flex and extend so you can drop or rise without folding the lumbar discs to their end range.
The lumbar spine should stay relatively stable while those two regions move.
When thoracic rotation is limited, the trunk borrows from the lumbar segments. Mobilizing restricted thoracic joints increases thoracic rotation and reduces lumbar rotation during the same turn (Yasuda et al., 2023). Modeling also shows that a stiffer thoracic spine raises lumbar disc stress and L5 pars stress (Morimoto et al., 2024). That is the server-rack crouch: you rotate to see a port, the ribs do not turn, and L4–L5 or L5–S1 supplies the missing degrees.
Hip restriction writes the same story in the sagittal plane. If hip flexion is short, a squat or kneel-to-stand uses extra lumbar flexion. Available hip flexion is linked to how much the lumbar spine flexes during a squat lift (Patterson et al., 2022). People with poorer hip and lumbar mobility also place higher bending stress on the spine during everyday lifts (Dolan & Adams, 1993). On the floor, this means hinging to pick up a box rather than rounding through the belt line.
Awkward reaching multiplies both problems. A reach around a rack post is flexion plus rotation plus a long lever. Confined-space research shows spinal load stays high in restricted height, though kneeling can cut shear compared with stooping because the trunk can stay more upright (Weston et al., 2020). Behind a rack, you often experience the worst mix: a stooped torso, rotated shoulders, and a load at arm’s length, then a sudden stand.
Why This Pattern Progresses
A single shift rarely herniates a disc. The pattern does. Repeated end-range lumbar flexion and rotation under load stress the annulus, facets, and ligaments. Over months, you may notice morning stiffness, a catch when standing from a kneeling position, or buttock pain after a long pull. Those are mechanical warnings. If the segment keeps moving past its useful range while a disc is already irritated, nerve roots can become inflamed. That is a load problem, not “tight muscles.”
What a Structural Assessment Should Measure
A useful exam maps missing motion and excess motion.
Mid-back and rib cage
Seated and quadruped thoracic rotation with the pelvis held still
Thoracic extension, watching for lumbar substitution
Rib and segmental joint play through the levels used in reaching
Hips and pelvis
Hip flexion, extension, and rotation
Hip-hinge quality from standing and from a half-kneel
Pelvic control during sit-to-stand and floor-to-stand
Lumbar spine and nerves
Segmental motion and tenderness
Repeated-movement testing to see whether flexion or extension changes symptoms
Nerve tension signs if pain or tingling travels below the knee
Imaging and a neurologic exam when weakness or progressive numbness appears
Dr. Alex Jimenez, DC, APRN, FNP-BC, CFMP, IFMCP, uses that map with medical screening. Dual licensure lets structural findings sit next to a review of inflammation and medication risk. Dr. Maria Guadalupe Cardenas, MD, Board Certified in Internal Medicine, provides collaborative oversight so care stays coordinated with your existing medical team. That is beneficence: the plan exists to protect the disc and the person.
Alignment First: Restore the Joints That Should Move
If the mid-back is locked and the hips are stiff, adjusting only the sore lumbar joints may provide temporary relief, but the improvement often fades by the next session.
Alignment at El Paso Back Clinic restores motion where it belongs:
Thoracic and rib work to return rotation and extension to the cage
Pelvic and hip work so the femur can flex without flattening the lumbar curve
Specific lumbar adjustments after neighboring regions can share load
Patients keep autonomy here. You should know which joint is being treated, why, and how you’ll measure change at the next visit.
Non-maleficence sits in the same step. Skilled, non-invasive adjustments and graded loading can reduce the rush toward long-term medication or surgery while the problem is still mechanical. Surgery has a place for true neurologic emergencies. Most back problems become that case only after the same compensation runs for years.
Mobility Restoration You Can Own
Clinic work does not replace the shift.
Thoracic rotation in a half-kneel, ribs turning, pelvis quiet
Hip-flexor length after long kneeling, so standing does not yank the lumbar spine
Hip-hinge rehearsal so the crease is at the hips, not at the belt
Ankle motion, because a stiff ankle forces an extra lumbar fold when you drop
Short sessions beat heroic stretching after the damage is done. Two minutes before a rack walk and two minutes after is a plan most crews can keep.
Mechanical Rehabilitation and Lifting Strategy
Mobility without strength leaves a new joint unprotected.
Hip-dominant hinges and split-stance pulls so the glutes lift the torso
Anti-rotation holds so the lumbar spine can resist twist while the arms reach
Tall-kneeling and half-kneeling work that mirrors floor-to-stand cable tasks
Gradual loading of lift height and mass so the hips take the extra demand
Lifting rules:
Get the load close before it leaves the floor or the cart
Turn the feet instead of twisting the belt line
Prefer a kneel with an upright trunk over a full stoop when the aisle is low
Split the task: slide, then lift, then turn
Use a partner or lift aid for awkward chassis
Confined work will never be perfect. The goal is fewer cycles at end-range lumbar flexion and twist.
When Spinal Decompression Belongs in the Plan
If the disc is already irritated, alignment and exercise may not be enough in the first weeks. Non-surgical spinal decompression uses controlled traction to reduce load on an injured disc while you rebuild the kinetic chain. In lumbar radiculopathy, adding decompression to routine physical therapy improved pain, lumbar motion, endurance, and disability more than therapy alone over four weeks (Amjad et al., 2022).
Decompression is not a substitute for finding the stiff thorax or the restricted hip. It is a tool to calm a loaded segment so those corrections can stick. At Injury Medical Clinic PA in El Paso, decompression is paired with alignment and, when indicated, medical review by Dr. Cardenas so inflammation and nerve status are not ignored.
A Direct Plan for the Next Cutover
If your low back catches when you stand from behind a rack, treat it as a mechanical diagnosis.
Get a structural exam that measures thoracic rotation, hip motion, and lumbar control.
Restore motion to the mid-back and hips, then protect the lumbar segments.
Rebuild hinge strength and anti-rotation capacity for kneeling and reaching.
Change the lift: closer load, feet turn first, upright kneel in a low aisle.
Use decompression when disc or nerve signs are present, under a plan you understand.
You remain the decision-maker. Integrative care at El Paso Back Clinic is designed to work with your current physicians, not around them. The aim is simple: keep the lumbar spine from doing a job it was never meant to do.
IFM's Find A Practitioner tool is the largest referral network in Functional Medicine, created to help patients locate Functional Medicine practitioners anywhere in the world. IFM Certified Practitioners are listed first in the search results, given their extensive education in Functional Medicine