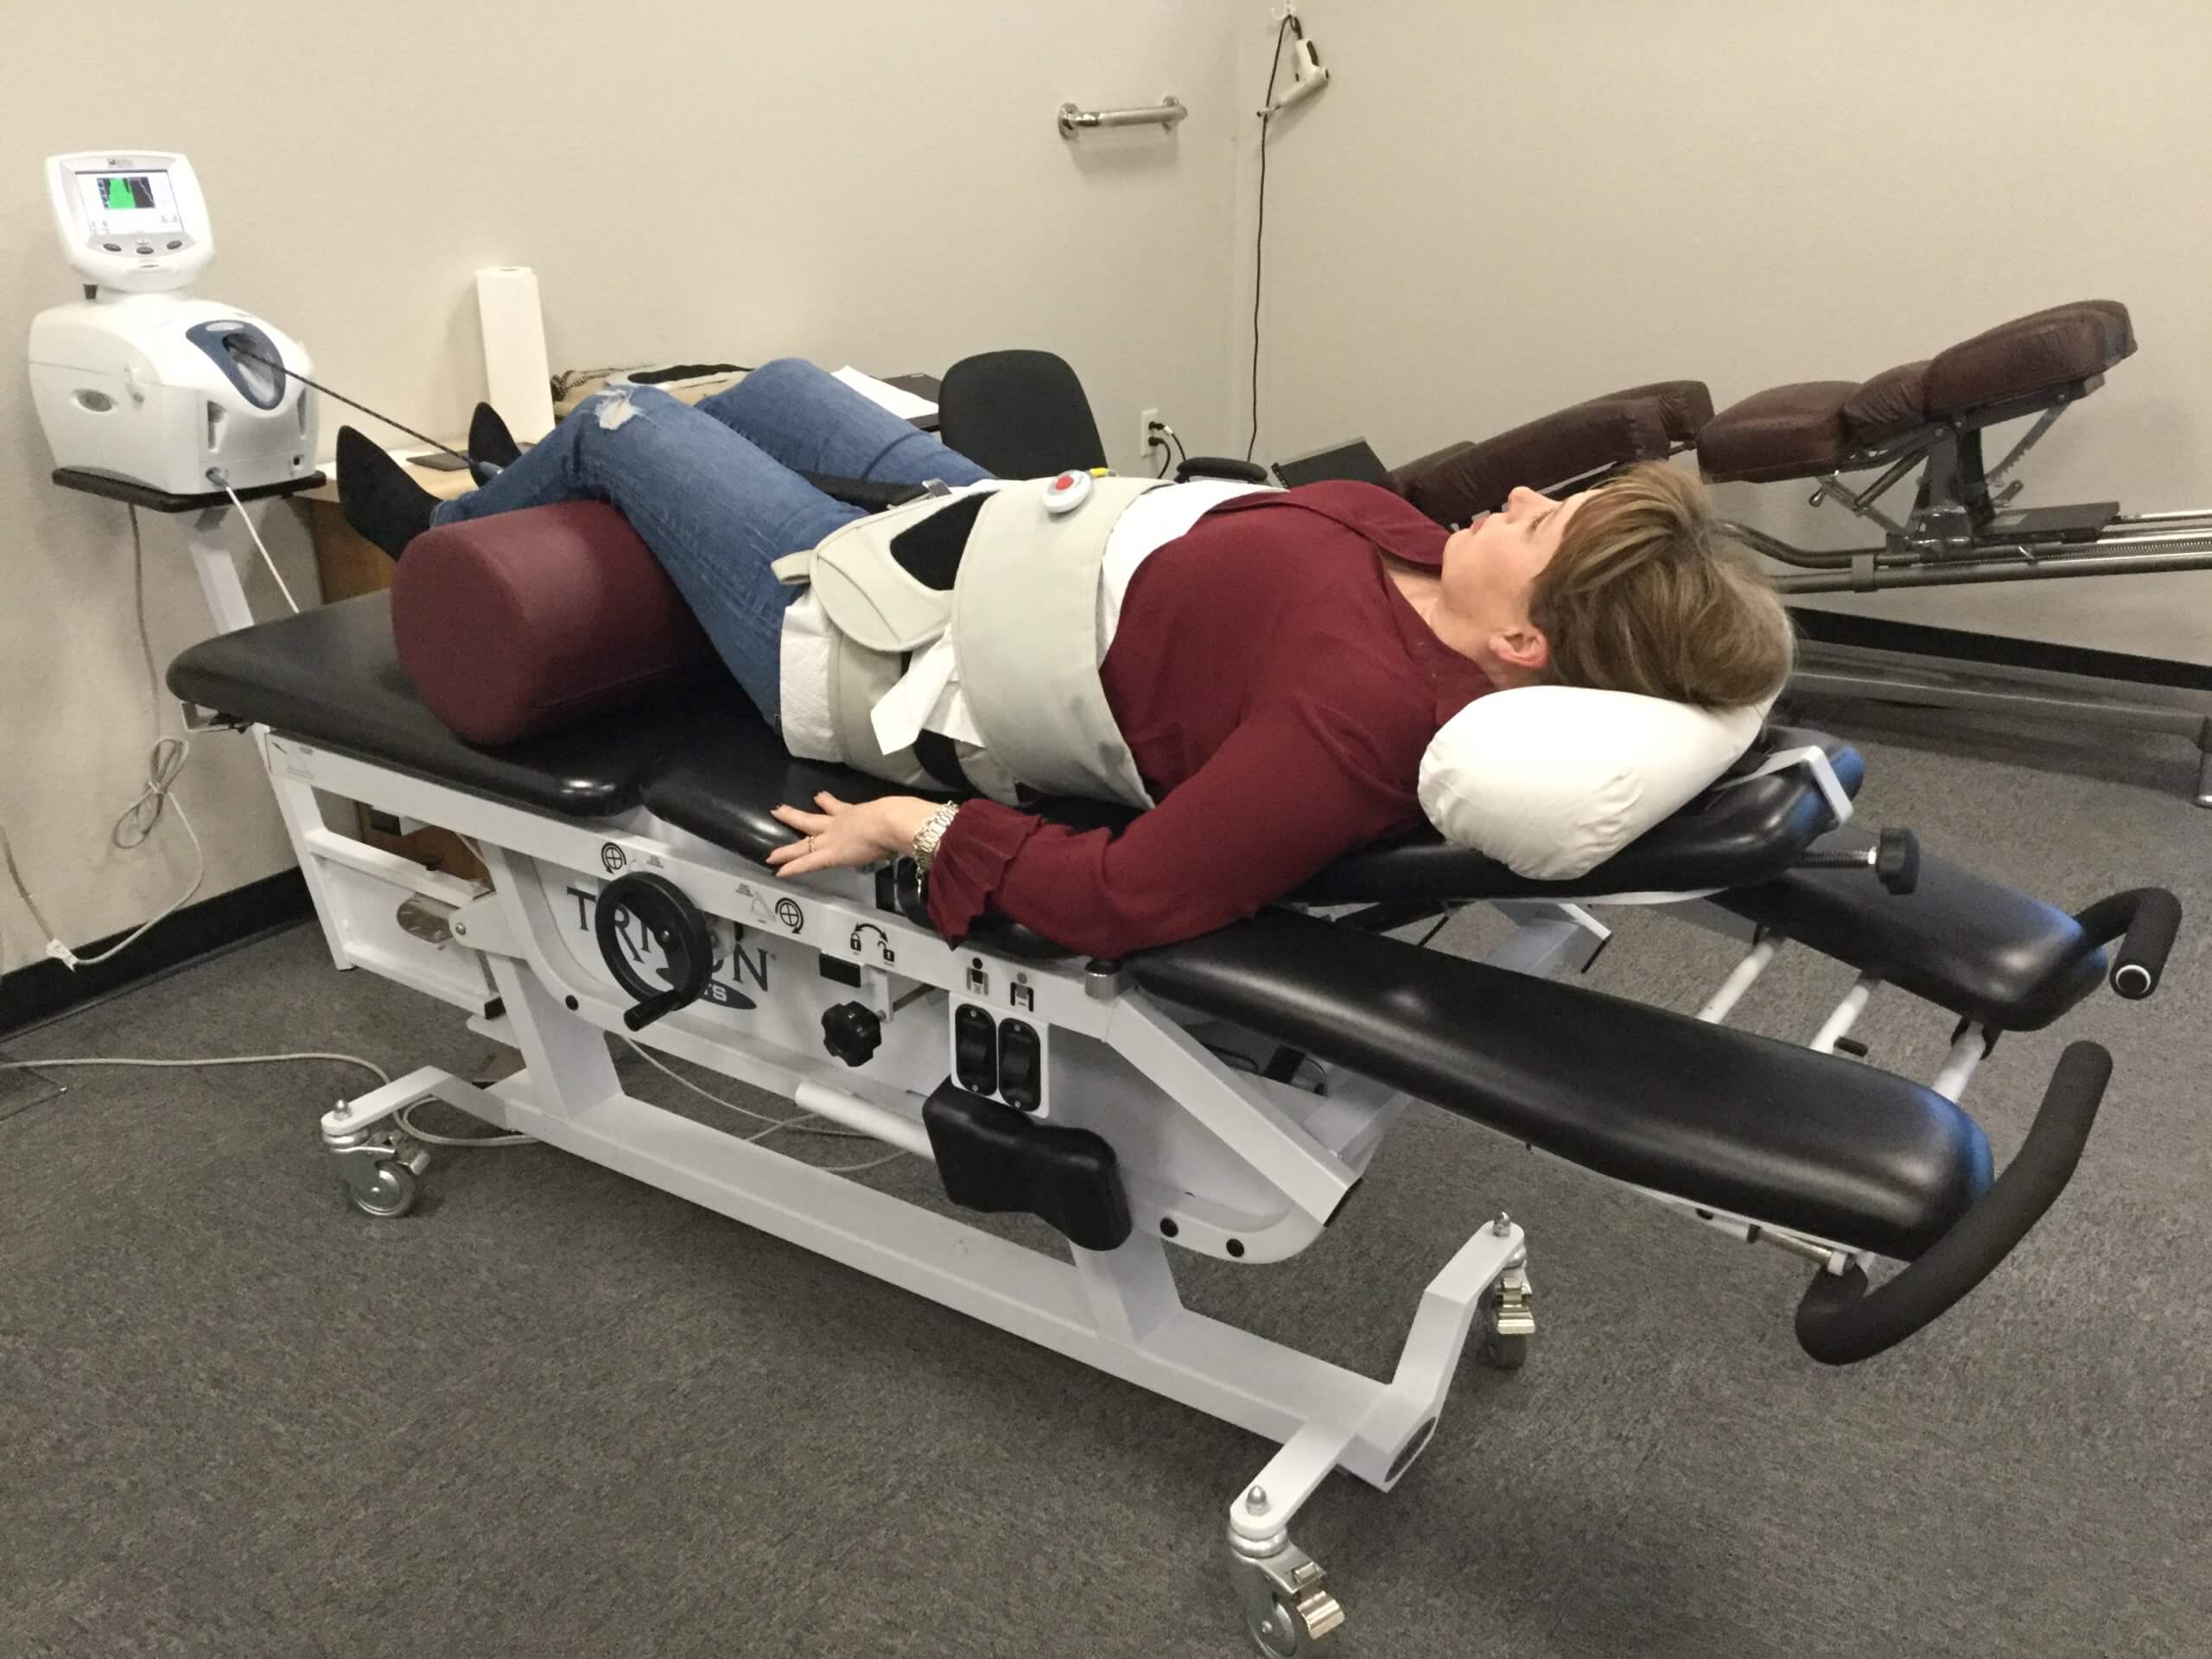
Sports Spine Specialist Chiropractic Team: Athletes strive to achieve their body’s maximum performance by participating in numerous training regimens consisting of strenuous exercises and physical activity and ensuring they meet all of their body’s nutritional requirements. Through proper fitness and nutrition, many individuals can condition themselves to excel in their specific sport. Our training programs are designed for athletes that look to gain a competitive edge in their sport.
We provide sport-specific services to help increase an athlete’s performance through mobility, strength, and endurance. Occasionally, however, the excess workouts can lead many to suffer injuries or develop underlying conditions. Dr. Alex Jimenez’s chronicle of articles for athletes displays in detail the many forms of complications affecting these professionals while focusing on the possible solutions and treatments to follow to achieve overall well-being.
Server Rack to Desk Chair: Why Data Center and IT Work Can Trigger Chronic Low-Back Pain—and What You Can Do About It
A shift can change quickly. For one hour, you sit and answer tickets. The next, you are standing on a server-room floor, crouching behind a rack, reaching for cables, or lifting hardware. By day’s end, your low back may feel tight, tired, or familiar.
For El Paso’s IT professionals, data center technicians, and network teams, recurring low-back pain rarely comes down to one “bad posture.” Sitting, standing, bending, twisting, and lifting can contribute to symptoms, but no single exposure consistently explains every case (Swain et al., 2020). The better question is which combined loads, habits, and recovery limits keep your back irritated.
Why Tech Work Can Become a Mechanical Load Problem
Your lumbar spine is built to move and carry load. Problems can appear when tissues face more stress than they comfortably recover from.
Long desk sessions reduce movement variety. Prolonged standing can also become uncomfortable; substantial occupational standing has been associated with more low-back symptoms, though it has not been proven that standing itself causes pain (Coenen et al., 2018). Add crouching, cable work, twisting, and equipment lifting, and the demand changes again.
The goal is not to fear movement. It is to improve how well your body handles it.
Sitting, Hip Stiffness, and the “Locked Up” Feeling
After hours seated, many workers stand feeling stiff through the hips and lower back. It is tempting to blame “tight hip flexors,” but low-back pain is more complex than one muscle group.
Limited hip motion can change how you bend, squat, or reach. The lumbar region may then take on more motion during some tasks. Hip mobility, trunk control, and movement variety can therefore be reasonable rehabilitation targets without claiming that tight hips automatically cause back pain.
Standing on Concrete Is Not Automatically Better Than Sitting
A standing desk may help, but standing all day is not a cure. Technical workspaces may require long periods on firm surfaces while monitoring equipment.
Variation is usually practical: sit, stand, walk, change foot position, and move when the job permits. NIOSH identifies static posture, heavy physical work, lifting, bending, and twisting among contributors to work-related musculoskeletal stress (National Institute for Occupational Safety and Health [NIOSH], 2024a).
Think “best next position,” not “perfect position.”
Crouching, Cable Work, and Rack-Side Repetition
Working behind equipment can place you in deep hip flexion, kneeling, squatting, rotation, or sustained forward bending. None is inherently dangerous. Trouble may develop when exposure is prolonged, repeated, heavily loaded, or performed while fatigued.
Bring tools closer. Raise work when possible. Use a kneeling pad or stable support when appropriate. Alternate sides instead of always rotating one way. Brief movement breaks can reduce unnecessary repetition.
Lifting Hardware: Control the Load, Not Just Your Back
Servers, batteries, monitors, and UPS components can be awkward or hard to grip. Safe lifting is not simply “keep your back straight.” Weight, distance, height, twisting, frequency, grip, and repetition matter. The Revised NIOSH Lifting Equation estimates physical stress from two-handed lifts and supports safer job design (NIOSH, 2024b).
Get close to the load, use a stable stance, avoid rushed twisting, and use team lifts or assistance when appropriate. Lifting limits should reflect the task and your current capacity.
What a Structural Assessment Should Actually Look For
Recurring low-back pain deserves more than a quick label.
At El Paso Back Clinic, a mechanical assessment can consider spinal and pelvic motion, painful patterns, hip mobility, trunk endurance, lifting mechanics, neurological findings, and positions that change symptoms. The goal is not to claim every painful back is “out of alignment,” but to identify modifiable findings and whether conservative care is appropriate.
Imaging is not necessary for every episode. History and examination help determine when testing may be appropriate. New bowel or bladder problems, saddle numbness, progressive leg weakness, major trauma, fever, or systemic symptoms require prompt medical evaluation.
Mechanical Rehabilitation: Build Capacity for Your Real Job
Rehabilitation should prepare you for work, not only help you feel better on a treatment table. Clinical guidelines support exercise and selected manual therapies for many people with acute or chronic low-back pain (George et al., 2021).
For an IT professional, rehabilitation might include hip mobility, trunk endurance, hinging, graded lifting, strength, walking tolerance, and desk-position changes. A data center technician may also need loaded carries, squat tolerance, kneeling transitions, reaching, and controlled rotation.
The plan should progress with your response. Some people need mobility; others need strength, endurance, or confidence with painful movements. Patient autonomy matters: you should understand what is tested, why treatment is suggested, alternatives, and how progress will be measured.
Where Chiropractic Care and Decompression Fit
Chiropractic care may be one part of conservative treatment when examination indicates manual care is appropriate. Guidelines include spinal manipulation among options that may help some people with chronic low-back pain, especially when paired with active care rather than used alone (World Health Organization [WHO], 2023).
“Decompression” requires careful thinking. WHO does not recommend routine traction for chronic primary low-back pain because the supporting evidence is uncertain (WHO, 2023). Decompression should not be sold as a guaranteed disc fix or universal answer.
If decompression is considered, it should follow examination, fit the symptom pattern, have clear goals, and be reassessed. Beneficence means choosing care for your clinical needs—not applying the same protocol to everyone.
Integrated Care When Back Pain Is More Than Mechanical
Persistent pain can be influenced by sleep, stress, metabolic health, medication use, recovery, and other medical factors. An integrated team can help when those issues matter.
Dr. Alex Jimenez, DC, APRN, FNP-BC, CFMP, IFMCP, bridges chiropractic structural care, mechanical rehabilitation, and functional medical assessment. Dr. Maria G. Cardenas, MD, Board Certified in Internal Medicine, provides medical direction and oversight for complex medical or metabolic concerns and clinically appropriate laboratory evaluation.
Collaboration does not remove your voice. You remain the informed decision-maker.
A Better Back Strategy for El Paso Tech Workers
Whether your day moves from an El Paso desk to a server room, network closet, help-desk station, or equipment floor, your back needs more than perfect posture. It needs movement variety, smart load management, recovery, and enough strength for the work.
Start with small changes: interrupt long sitting, vary standing, improve workstation reach, keep loads close, plan awkward lifts, and build capacity gradually. If pain keeps returning, limits work, radiates into the leg, or changes how you move, seek a qualified evaluation.
At El Paso Back Clinic, our goal is to identify changeable drivers, explain your options clearly, and coordinate structural chiropractic care, mechanical rehabilitation, and medical oversight when indicated. We build the safest plan around your findings, goals, and informed choices. That approach supports safer movement, stronger function, and more confident workdays ahead.
References
Coenen, P., Willenberg, L., Parry, S., Shi, J. W., Romero, L., Blackwood, D. M., Maher, C. G., Healy, G. N., Dunstan, D. W., & Straker, L. M. (2018). Associations of occupational standing with musculoskeletal symptoms: A systematic review with meta-analysis. British Journal of Sports Medicine, 52(3), 176–183. https://doi.org/10.1136/bjsports-2016-096795
George, S. Z., Fritz, J. M., Silfies, S. P., Schneider, M. J., Beneciuk, J. M., Lentz, T. A., Gilliam, J. R., Hendren, S., & Norman, K. S. (2021). Interventions for the management of acute and chronic low back pain: Revision 2021. Journal of Orthopaedic & Sports Physical Therapy, 51(11), CPG1–CPG60. https://doi.org/10.2519/jospt.2021.0304
Swain, C. T. V., Pan, F., Owen, P. J., Schmidt, H., & Belavy, D. L. (2020). No consensus on causality of spine postures or physical exposure and low back pain: A systematic review of systematic reviews. Journal of Biomechanics, 102, 109312. https://doi.org/10.1016/j.jbiomech.2019.08.006
World Health Organization. (2023). WHO guideline for non-surgical management of chronic primary low back pain in adults in primary and community care settings. World Health Organization. https://www.who.int/publications/i/item/9789240081789
Testosterone and Androgen Physiology in Women: Subcutaneous Injections in Coordinated Care
Abstract: Testosterone is a normal hormone in women. The ovaries, adrenal glands, and many local tissues help make and use it. Levels fall slowly with age, not all at once at menopause. A single blood test rarely proves deficiency. The strongest research support for testosterone therapy in women is for distressing low sexual desire after menopause, after other causes are checked. Subcutaneous injections can provide steadier levels in some studied groups, but evidence in women is thinner and remains off-label. Integrative chiropractic care does not replace medical decisions about hormones. It can help patients gain pain relief, better mobility, and improved sleep while the medical team keeps treatment coordinated and safe.
Testosterone is a female hormone
Androgens are often called male hormones. That label is incomplete. Testosterone is the main circulating active androgen and a normal part of female biology. Women keep lower amounts than men—typically 10 to 20 times lower—but those amounts still guide important physical and metabolic functions (Cleveland Clinic, n.d.; Davis & Wahlin-Jacobsen, 2015). For much of adult life, a woman’s circulating testosterone is higher than her circulating estradiol (Davis & Wahlin-Jacobsen, 2015).
Testosterone works in two ways:
Directly, on androgen receptors in muscle, bone, brain, fat, skin, and sexual tissues
Indirectly, when local enzymes turn it into estradiol or into the stronger androgen dihydrotestosterone (DHT)
These pathways help explain effects on sexual function, tissue upkeep, and metabolism even when blood levels look low (Davis & Wahlin-Jacobsen, 2015; Labrie et al., 2017).
Where women’s androgens come from
Women do not rely on one gland. Production is shared.
The ovaries release some testosterone and larger amounts of precursors
The adrenal glands release DHEA and DHEA-sulfate (DHEAS), a large precursor pool
Peripheral tissues—fat, skin, muscle, and other organs—convert those precursors into the small amounts of hormone they need
This last step is called intracrinology. Many tissues make the hormone they need on site and then break it down before much of it returns to the blood (Labrie et al., 2017). A blood testosterone result is only the visible tip of a larger local system.
Enzymes in tissues can convert DHEA to testosterone, make DHT, or turn testosterone into estradiol. The same precursor can become an androgen in one tissue and an estrogen in another. Local enzymes, not just the lab, decide the outcome (Labrie et al., 2017; Schiffer et al., 2018).
A long slope, not a sudden cliff
Estradiol falls sharply at menopause. Androgens do not. DHEA and DHEAS begin to fall from about the third decade of life and may be down by roughly 60% by menopause (Davis & Wahlin-Jacobsen, 2015). A woman in her forties is already below her own earlier peak.
Midlife data measured by mass spectrometry found median testosterone falling from about 0.56 nmol/L in the early forties to about 0.42 nmol/L in the late fifties, with a low point near ages 58–59. In women of similar age, testosterone did not differ by menopausal stage. Natural menopause itself is not a stand-alone reason to administer testosterone (Wang et al., 2025).
Two exceptions matter:
Surgical menopause (both ovaries removed) cuts the ovarian share at once
Premature ovarian insufficiency creates an earlier deficit than the usual age-related slope (Davison et al., 2005; Soman et al., 2019)
The postmenopausal ovary can also continue to produce some testosterone for years after estradiol output has collapsed (Davis & Wahlin-Jacobsen, 2015).
Why one lab number rarely settles the question
Measuring female testosterone is challenging. Routine immunoassays were built for the much higher male range. Liquid chromatography–tandem mass spectrometry (LC-MS/MS) is more reliable. Most circulating testosterone is bound to sex hormone-binding globulin (SHBG), so free hormone can change when SHBG changes even if total testosterone stays the same (Rosner & Vesper, 2010).
What moves SHBG—and the free fraction:
Oral estrogen and high thyroid hormone tend to raise SHBG and lower free testosterone
Obesity and insulin resistance tend to lower SHBG and raise free testosterone
Androgen excess, including polycystic ovary syndrome (also discussed as polyendocrine metabolic ovarian syndrome, or PMOS), also lowers SHBG (Luo et al., 2024; Teede et al., 2023)
Low SHBG is also a metabolic clue and has been linked to higher diabetes risk in women (Ding et al., 2009). Guidelines do not diagnose androgen deficiency based on a single value. A level is a baseline and a safety check, not the whole diagnosis (Davis et al., 2019; Parish et al., 2021).
What the evidence supports—and what it does not
The clearest evidence is in sexual function. Higher endogenous testosterone tracks modestly with better desire (Maseroli & Vignozzi, 2022). In randomized trials, testosterone improved desire, arousal, orgasm, pleasure, and satisfaction and reduced sexual distress in postmenopausal women with low desire (Islam et al., 2019).
Androgen receptors sit in bone, muscle, fat, vessels, and the brain. That map is real. This is not the same as a proven benefit. Trials supporting sexual-function gains have not firmly shown better body composition, bone, mood, or cognition to the same standard (Davis, 2025; Islam et al., 2019). Some tissue effects may also come from local conversion to estradiol.
Too much androgen is the other problem: acne, unwanted hair, cycle changes, and higher cardiometabolic risk in PMOS/PCOS (Teede et al., 2023). Risk can appear at both ends of the female range (Luo et al., 2024). The target is a physiologic band, not “more is better.”
International groups have not endorsed a broad “female androgen deficiency syndrome,” because no blood cutoff cleanly separates symptomatic women from normal variation (Davis et al., 2019; Wierman et al., 2014). The one consensus indication is hypoactive sexual desire disorder (HSDD) in postmenopausal women—low desire that causes distress—after other causes are addressed (Parish et al., 2021). There is still no FDA-approved testosterone product for women in the United States. Prescribing remains off-label, and long-term heart and breast data in women are limited (Islam et al., 2019; Panay et al., 2024).
What subcutaneous testosterone injections are
A subcutaneous (SubQ) injection places testosterone into the fatty layer under the skin, usually in the abdomen or thigh, with a short, thin needle. An intramuscular (IM) injection goes deeper into muscle.
In men and in some gender-affirming care settings, weekly SubQ testosterone esters can reach therapeutic levels with smaller peaks and troughs, less pain, and easier self-use than some IM schedules (Figueiredo et al., 2022). That data should not be copied wholesale onto women.
Women need much smaller doses
Female physiologic ranges are far lower
Randomized evidence in women is mainly transdermal, not SubQ (Davis et al., 2019)
Guidelines do not establish a subcutaneous route for women and do not endorse compounded products as first-line (Parish et al., 2021)
If a clinician considers low-dose SubQ testosterone cypionate in oil, it is an individualized, off-label choice. The goal is to keep exposure within the premenopausal physiologic range, monitor for acne, hair changes, voice changes, or metabolic shifts, and document informed consent (Davis et al., 2019; Jimenez, 2026b). If this route is used at all, start low, titrate to symptoms plus labs, use the same assay method over time, and do not treat menopause itself as an automatic indication (Wang et al., 2025). Compounded prefilled low-dose syringes are not FDA-approved for women. They are a delivery tool, not proof that therapy is indicated.
What patients gain from integrative chiropractic care
Hormone questions and musculoskeletal problems often show up together. Women with midlife androgen decline may also notice joint stiffness, slower recovery, fatigue, and poorer sleep (Davis, 2025; Jimenez, 2026a). After an auto accident or work injury, neck pain, low-back pain, and delayed stiffness can stack on top of that picture.
Integrative chiropractic care does not replace a hormone plan. It focuses on what the patient can gain:
Pain relief through restored joint motion and less mechanical strain
Improved mobility so walking, lifting, work, driving, and home tasks feel more possible
Better sleep when night pain, muscle tightness, and poor recovery ease
Stronger return to activity after crashes, work strain, or chronic back and neck pain
Chiropractic adjustments, soft-tissue care, and rehabilitation are non-invasive and drug-free. Used well, they can lower the chance that pain is managed only with long-term medication or rushed toward surgery. That is a simple safety idea: first do no harm, then add only what the person needs.
Integrative care also means working with the patient’s existing medical team. Supervising clinicians handle hormone dosing, lab review, and medication decisions. Chiropractic care adds movement, recovery, and function so the whole plan stays coordinated rather than split into separate silos.
How the El Paso team works together
At Injury Medical Clinic PA in El Paso, Texas, Dr. Alexander Jimenez, DC, APRN, FNP-BC, CFMP, IFMCP, ATN, CCST, provides chiropractic care, functional-medicine framing, and dual-licensed nurse-practitioner evaluation. In clinical observation, he describes testosterone as one part of a wider plan, not a stand-alone energy shot. He notes that women have androgen receptors across muscle, bone, and brain; that levels often fall by the mid-forties compared with the mid-twenties; and that low-dose, monitored strategies may support libido, energy, and musculoskeletal integrity in selected patients when labs, symptoms, and safety checks line up (Jimenez, 2026a, 2026c). He also stresses that SubQ use in women is not the same as male testosterone replacement and should not be sold as routine wellness care (Jimenez, 2026b). More clinical notes appear on dralexjimenez.com and LinkedIn.
Off-label hormone decisions need medical oversight. Dr. Maria Guadalupe Cardenas, MD, board-certified in internal medicine (NPI #1164426749, Texas MD License #J2933), has more than 40 years of experience as an internist. She serves as Medical Director and Collaborative Physician at Injury Medical Clinic PA. This multidisciplinary setup is common in integrative and injury clinics: an MD provides medical direction while a chiropractor delivers hands-on spinal and rehabilitation care.
Together, the team can connect:
Medical screening and comorbidity review
Chiropractic care for pain, mobility, and sleep-related musculoskeletal strain
Functional medicine review of sleep, gut, thyroid, iron, and metabolic drivers that also change SHBG
Personal injury care and rehabilitation after crashes, work injuries, or delayed symptoms
Clear communication with the patient’s other physicians so care stays safe and well coordinated
Putting the pieces together
A careful visit starts with the story—desire, distress, energy, sleep, pain, injuries, medicines, and surgery—then an exam and labs used as a baseline, not a verdict. Other causes come first: relationship strain, depression, pain, vaginal dryness, thyroid disease, and medication effects. For many women, that means no testosterone. For some postmenopausal women with HSDD, a carefully dosed, monitored plan may be discussed. If SubQ is chosen, it stays small, measured, and reversible while chiropractic care rebuilds the capacity to move and recover.
Testosterone is a normal female hormone made in more than one place and used inside many tissues. It declines on a long slope. Blood tests tell only part of the story. The honest evidence base is strongest for distressed low sexual desire after menopause, not for menopause itself. Subcutaneous injections can offer steady delivery in other groups, but in women they remain an individualized, off-label option that must stay within a physiologic range.
The safest frame is coordinated care: medical direction for hormone decisions, chiropractic and rehabilitation for pain relief, mobility, and sleep, and a plan that prefers non-invasive options when they can help a person function without adding avoidable risk.
“Your body works as a unified system—your hormones directly dictate how well your spinal muscles heal and protect your joints. You don’t have to navigate chronic discomfort or confusing hormonal shifts alone; reach out to our team today to learn how safe, monitored subcutaneous protocols can be seamlessly coordinated with your physical care to help you live without limits.”
Davis, S. R., Baber, R., Panay, N., Bitzer, J., Perez, S. C., Islam, R. M., Kaunitz, A. M., Kingsberg, S. A., Lambrinoudaki, I., Liu, J., Parish, S. J., Pinkerton, J., Rymer, J., Simon, J. A., Vignozzi, L., & Wierman, M. E. (2019). Global consensus position statement on the use of testosterone therapy for women. The Journal of Clinical Endocrinology & Metabolism, 104(10), 4660–4666.
SubQ Testosterone for Women: Dosing, Monitoring, and Muscle Support
Abstract: Testosterone is not a male-only hormone. Women make more of it than estrogen by weight throughout much of their adult lives, and those levels decline with age. The strongest research supports low-dose therapy for postmenopausal women who have distressing low sexual desire. Subcutaneous injections place a modest, consistent amount of the hormone into the fat under the skin so blood levels can return to a typical female range. This article explains how that route works, who may be a candidate, how clinicians monitor the dose, how muscle and bone support movement, and how integrative chiropractic care in El Paso can work alongside medical oversight to treat the spine, joints, and hormones as one system.
Why Women Need Testosterone, Too
Testosterone is not just a leftover male hormone; women produce it in significant amounts. Across most of adult life, a woman’s ovaries and adrenal glands produce more testosterone than estrogen by mass. That output falls with age and drops further after the ovaries are removed (Davis et al., 2019; Hatzilabrou, 2025).
When levels sit at the low end of a woman’s own range, some women notice a persistent, unwanted loss of desire. That problem has a name: hypoactive sexual desire disorder, or HSDD. Distress is the key. A quiet fade that does not bother her is not the same as a loss that troubles her every day (Davis et al., 2019; Parish et al., 2021).
Pooled randomized trials in thousands of women show that restoring testosterone into the normal premenopausal range can improve desire, arousal, orgasm, pleasure, and satisfaction, and can lower sexual distress. The gains are real and consistent, but they are moderate, not magic, and a strong placebo response is part of the picture (Islam et al., 2019; Hatzilabrou, 2025).
What Subcutaneous Injections Actually Do
A subcutaneous (SubQ) injection delivers medicine into the fatty layer just under the skin, not deep into muscle. Typical sites are the abdomen or outer thigh. The needle is short and thin. Oil-based testosterone—often testosterone cypionate—then seeps out slowly, which can keep blood levels steadier than a large intramuscular shot (FOLX Health, n.d.; Hone Health, 2024).
Think of it as a small, measured drip rather than a flood. Women need far less than men, often about one-tenth of a typical male dose. Clinics that use weekly SubQ cypionate often start in a low milligram range and then adjust to a lab result, not to a feeling (Highland Longevity, n.d.; Hone Health Help Center, n.d.).
Keep these route facts in view:
Most high-quality trials in women used patches, creams, or gels, not weekly shots (Hatzilabrou, 2025).
One older implant study in women was positive for desire and bone density, but fixed pellets can overshoot the female range and cannot be turned down once placed (Hatzilabrou, 2025).
No published milligram conversion exists from a 300-microgram patch to a SubQ syringe. The honest method is to dose to a measured blood level (Davis et al., 2019; Hatzilabrou, 2025).
No testosterone product is FDA-approved for women in the United States. Use is off-label and requires informed consent (Cedars-Sinai, n.d.; Parish et al., 2021).
Some compounding programs offer low-concentration, prefilled single-dose syringes of testosterone cypionate in MCT oil for SubQ use. A ready syringe does not change the rules. Exposure still has to stay inside the female physiologic band (Hatzilabrou, 2025; Medivant Health, n.d.).
The Target Is Narrow, Not “Bigger Is Better”
A healthy young woman typically has a total testosterone level of about 15 to 46 ng/dL. That is a sliver of the male range. The job of therapy is to land inside that band and stay there (Hatzilabrou, 2025; Braunstein et al., 2011).
Pushing past the ceiling does not add extra desire. It shows up as acne, extra facial hair, scalp thinning, voice change, and other androgen effects (Islam et al., 2019; Parish et al., 2021).
A practical path looks like this:
Confirm HSDD with real distress after other causes are checked.
Draw a baseline total testosterone with a sensitive LC-MS/MS test, not a routine immunoassay built for men (Rosner et al., 2007).
Start low.
Recheck the level and symptoms at about 8-12 weeks.
Assess benefit at 3 to 6 months. If distressing low desire has not improved, stop rather than climb (Davis et al., 2019; Parish et al., 2021).
Baseline testosterone does not diagnose HSDD. It is a safety tool once treatment starts (Hatzilabrou, 2025).
Two problems are often mistaken for low desire. Antidepressants, especially SSRIs, can blunt desire on their own. Genitourinary syndrome of menopause—dryness, atrophy, and pain with sex—can look like low desire when the real issue is pain. Local estrogen, not a systemic androgen, is built for that problem (Parish et al., 2021; Cedars-Sinai, n.d.).
What the Body May Gain Beyond Desire
Sexual function is the outcome with the firmest trial support. Other claims need a quieter voice.
Muscle and strength. Testosterone helps muscle protein building in both sexes. Some women report better lean mass and training response when testosterone levels return to a mid-physiologic range. Large pooled trial data in women have not shown a robust body-composition effect at the low doses used for HSDD, so frame this as possible support, not a guarantee (Islam et al., 2019; Hatzilabrou, 2025).
Bone. One small two-year implant trial found faster gains in spine, hip, and total-body density when testosterone was added to estradiol. Guidelines still do not list bone as an approved reason to prescribe it because the study was small and not designed to prevent fractures (Davis et al., 1995; Wierman et al., 2014).
Energy and mood. Early and smaller studies sometimes showed better well-being. Dedicated trials and systematic reviews have been mixed or null for mood, fatigue, and cognition. Societies do not endorse testosterone as a general menopause tonic (Islam et al., 2019; Dichtel et al., 2020; Cedars-Sinai, n.d.).
Red blood cells. Testosterone can raise red-cell production. That is a monitoring issue at higher exposure, not a reason to treat ordinary anemia in women (Hatzilabrou, 2025).
For the spine and joints, even modest improvements in muscle and bone health matter. Stronger hip and core muscles help the pelvis stay level. Better bone quality supports the vertebrae that a chiropractor adjusts. After a car crash, a work injury, or months of guarded movement, patients who can train without crashing energy often stay in rehab longer (Jimenez, n.d.-a).
Safety, Side Effects, and the Long View
Short- and medium-term data at physiologic doses are generally reassuring for the day-to-day effects clinicians watch: acne, extra hair, and oily skin. Those effects are usually dose-related and often fade if the dose is cut (Islam et al., 2019; Nachtigall et al., 2011).
What is missing is the long view. Adequately powered trials have not settled cardiovascular and breast outcomes over many years. That gap—not a proven harm signal—is a main reason no female product has been approved (Hatzilabrou, 2025; Cedars-Sinai, n.d.).
Therapy is not for pregnancy, breastfeeding, or people trying to conceive. Women with high baseline heart or breast-cancer risk need an especially clear shared decision (Hone Health Help Center, n.d.; Parish et al., 2021).
How Integrative Chiropractic Care Fits
Hormones don’t exist apart from the skeleton. Low energy, weaker muscles, and slower recovery make spinal joints stiffer and make rehab after an auto accident harder. Integrative care treats that loop instead of handing a woman only a syringe or only an adjustment.
At Injury Medical Clinic PA in El Paso, Texas (11860 Vista Del Sol, Suite 128), we build care as a team. Dr. Alexander Jimenez, DC, APRN, FNP-BC, CCST, CFMP, IFMCP, ATN, is dual-licensed as a chiropractor and board-certified family nurse practitioner. His clinical writing stresses that female testosterone use is not a copy of male replacement: the best randomized evidence is still transdermal; SubQ use in women is an individualized off-label choice, and the goal is a physiologic range with a stop rule if desire does not improve (Jimenez, n.d.-b).
Dr. Maria Guadalupe Cardenas, MD, is his internist and is board-certified in internal medicine (NPI #1164426749, Texas MD License #J2933), with more than 40 years of experience. She serves as medical director and collaborative physician. In this model, the internist provides medical direction, reviews labs and overall health, and helps keep advanced or off-label therapies within safe bounds. The chiropractor restores joint motion, posture, and neuromuscular control. Functional medicine looks at sleep, gut health, thyroid, iron, and medications that can blunt desire. Personal injury and rehabilitation services rebuild strength after crashes, falls, and sports injuries, so a hormone plan isn’t asked to do the work of a weak core or an unhealed disc (Jimenez, n.d.-a).
That mix is common in integrated injury clinics: an MD directs the medical lane while a DC treats the mechanical lane. For a woman on low-dose testosterone, the practical payoff is simple. If the muscles around the spine hold better, adjustments last longer. When bone and lean mass improve, fall risk and “I feel fragile” complaints may ease. If pain and sleep improve, desire often has a clearer path—without pretending testosterone is a cure for every menopausal complaint.
A Clear Path Forward
Testosterone treatment in women is neither a wellness trend nor a male protocol scaled down by guesswork. It is a narrow, evidence-backed option for postmenopausal HSDD with distress, given at a female physiologic dose, watched with the right lab, and stopped if it does not help.
Subcutaneous injections can deliver that modest, steady dose into the fat under the skin. They ask for discipline: start low, measure, stay inside the range, and pair the hormone with the rest of the care—local vaginal treatment when dryness is the real problem, medication review when an antidepressant is the real problem, and hands-on musculoskeletal care when the spine and hips cannot carry the load.
In El Paso, that whole-person path is the point of the collaboration between Dr. Cardenas’s internal medicine oversight and Dr. Jimenez’s chiropractic, functional medicine, and injury rehab work. The hormone is only one tool. The goal is a woman who can move, recover, and feel like herself again.
Legal Peptides and Integrative Chiropractic Care: A Clear Guide
Abstract
This article explains legal peptide use in plain language. Legal peptide use means giving, making, or prescribing certain short chains of amino acids that regulatory bodies such as the Food and Drug Administration (FDA) have officially approved for medical use. Readers will learn how approved drugs differ from compounded products and research-only chemicals. The article then reviews the New Mexico Board of Nursing’s September 2026 peptide FAQs. It covers a valid patient-provider relationship, telehealth, advertising, nutrition, and muscle care. The last sections show how integrative chiropractors and nurse practitioners work together, and how Dr. Alexander Jimenez, DC, APRN, FNP-BC, and Dr. Maria Guadalupe Cardenas, MD, run that model at Injury Medical Clinic PA in El Paso.
What Legal Peptide Use Means
Peptides are short chains of amino acids. The body already makes many of them. They act like small messages that can change appetite, hormone release, inflammation, and tissue repair (Findlay, 2026; Vibrant Health of Colorado, 2026).
Legal peptide use means giving, making, or prescribing certain short chains of amino acids that regulatory bodies such as the Food and Drug Administration (FDA) have officially approved for medical use (Findlay, 2026; Peptide Laws, n.d.). In everyday terms, a peptide plan is safer when:
A regulator has officially approved that product for medical use.
A licensed clinician examines the patient and writes a prescription.
Any compounded version follows federal compounding law and state pharmacy rules.
The chart shows a reason, informed consent, and follow-up (ByrdAdatto, n.d.; LumaLex Law, n.d.).
Insulin, semaglutide, tirzepatide, tesamorelin, and bremelanotide (PT-141) are examples of peptides with FDA-approved products for specific conditions (Findlay, 2026; DJ Holt Law, 2026). Approval covers a product and its use. It does not make every similar vial on the internet legal.
Approved, Compounded, or Research-Only
FDA-approved medicines have finished clinical trials and manufacturing review. A clinician may use an approved drug off-label when science and judgment support that choice, but the product itself is still an approved drug (DJ Holt Law, 2026; ByrdAdatto, n.d.).
Compounded peptides are custom medicines made for one named patient when the law allows it. They are not FDA-approved. They may differ in formula, stability, and oversight (New Mexico Board of Nursing, 2026). After branded GLP-1 shortages eased, federal policy tightened around copies of those products (DJ Holt Law, 2026; Peptide Laws, n.d.).
Research-only chemicals are often sold as “not for human use.” Popular names include BPC-157, TB-500, and several growth-hormone secretagogues. That label does not make clinical use legal. The FDA treats marketing for human treatment as a drug claim (Findlay, 2026; LumaLex Law, n.d.). Status can also change as compounding committees review bulk substances (DJ Holt Law, 2026).
State boards rarely ban peptides as a whole class. They do ask whether the prescriber stayed in scope, did a real exam, and used a lawful pharmacy (Peptide Journal, 2026; ByrdAdatto, n.d.).
What the New Mexico Board of Nursing Said
In September 2026, the New Mexico Board of Nursing published clinical-practice FAQs on peptide therapies. The Board said the page is guidance, not a legal opinion, and it does not change the Nursing Practice Act (New Mexico Board of Nursing, 2026). The answers still give a clear map.
Key points include:
APRNs may prescribe compounded medicines within their population focus and prescriptive authority if they have the education and judgment to do so. The Board uses LACE: licensure, accreditation, certification, and education.
GLP-1 medicines are among the most watched peptides because they help and they carry risk.
A valid patient-provider relationship must exist before prescribing.
A compounded GLP-1 vial must stay patient-specific. It cannot be shared.
Pharmacies should be licensed and able to share sterility testing.
Patients must be told when a product is compounded rather than a brand-name FDA-approved drug.
Reckless prescribing—not peptide use alone—invites discipline (New Mexico Board of Nursing, 2026).
New Mexico grants nurse practitioners full practice authority. Texas generally requires a collaborating physician (Peptide Journal, 2026). The clinical standard still looks the same: exam, reason, consent, monitoring, and a clean pharmacy.
The Exam, Telehealth, and Honest Ads
The Board listed what should happen before GLP-1 or related peptide care starts (New Mexico Board of Nursing, 2026):
A health history and a review of current medicines
A check for higher-risk problems, such as family medullary thyroid cancer or MEN-2, pancreatitis, gallbladder disease, kidney disease, pregnancy plans, eating disorders, or frailty
A physical exam and baseline labs when they are needed
Consent that covers benefits, common side effects, serious risks, other options, how long care may last, lifestyle changes, and weight regain after stopping
A written plan and later checks of weight, nutrition, tolerance, and dose
Telehealth can be used when the standard of care is still met. A questionnaire alone is not enough. The prescriber must also be licensed in the state where the patient is located (New Mexico Board of Nursing, 2026). Ads must be truthful. Claims of guaranteed weight loss do not meet professional standards. The Federal Trade Commission watches those claims (New Mexico Board of Nursing, 2026). A med-spa name does not change the duty of the person who evaluates and prescribes.
Food and Muscle Still Come First
The Board was clear: medicine is not the whole treatment. Providers should counsel patients on protein, resistance exercise, lean-mass protection, vitamins, and long-term habits. Skipping that work can lead to muscle loss, frailty, and poor results after the drug stops (New Mexico Board of Nursing, 2026). Integrative clinics make the same point. Peptides work best when you address food, sleep, and movement (Nourish House Calls, n.d.; Evolution Integrative Medicine, n.d.).
How Integrative Chiropractic Care Fits
Teams of integrative chiropractors and nurse practitioners (NPs) work together in integrative medical offices. Most of the time, chiropractors do the manual therapies, biomechanics, and structural rehabilitation. Nurse practitioners, on the other hand, conduct clinical evaluations and have the medical authority to prescribe and oversee therapies (ProCredits, n.d.; Jimenez, 2026a). That split protects both the patient and the license.
Chiropractic care links to peptide treatment by making muscles and bones stronger:
Adjustments and mobilization restore joint motion and lower mechanical stress on nerves and soft tissue.
Better motion lets a person load a tendon, hip, or spine pattern with less guarding.
Rehab—easy isometrics, then controlled loading—tells muscle, tendon, and bone to remodel.
Protein-forward eating provides the building blocks those tissues need.
A legal metabolic peptide, when indicated, may help appetite, blood sugar, and body composition so rehab is easier to finish.
Any tissue-support peptide is an add-on to loading, not a replacement for it (El Paso Back Clinic, n.d.; Gruber Chiropractic, n.d.).
Dr. Jimenez has written that peptides should not be sold as a shortcut to grow cartilage, discs, or ligaments. Food cannot unlock a stuck joint. An adjustment cannot replace protein. Each tool has a job (Jimenez, 2026a).
The El Paso Team: Dr. Jimenez and Dr. Cardenas
Injury Medical Clinic PA in El Paso shows how those roles work in daily care. Dr. Alexander Jimenez, DC, APRN, FNP-BC, CCST, CFMP, IFMCP, ATN, is a dual-licensed chiropractor and board-certified family nurse practitioner. He leads conservative care, rehabilitation, functional medicine, and personal-injury documentation (Jimenez, n.d.).
Dr. Maria Guadalupe Cardenas, MD, is board-certified in internal medicine (NPI #1164426749; Texas MD License #J2933). With more than 40 years of experience as an internist, she serves as medical director and collaborative physician. This multidisciplinary setup is common in integrative or injury clinics, where an MD provides medical direction alongside a chiropractor. The team integrates chiropractic care from Dr. Jimenez with medical oversight by Dr. Cardenas, plus functional medicine, personal injury care, rehabilitation, and related services (Jimenez, n.d.; El Paso Back Clinic, n.d.).
A simple path for crash, sports, or chronic back pain recovery looks like this:
Map the problem with history, exam, and movement testing.
Restore motion with chiropractic and soft-tissue care.
Rebuild muscle and bone loading with graded rehab.
Address nutrition and metabolic gaps.
Add a legal, patient-specific peptide only after the reason, labs, and consent are on the chart.
Clinical Observations on Strength and Recovery
Clinical observations shared by Dr. Jimenez describe peptides as possible signaling helpers, not magic. Progress often looks better when spinal care is paired with inflammation control, body-weight support, protein intake, and sleep (Jimenez, 2026a; El Paso Back Clinic, n.d.). Other clinics describe peptides for recovery, metabolism, gut integrity, sleep, and connective tissue (New Life Physicians, n.d.; RevitalIV, n.d.). Those descriptions are not the same as FDA approval. Patients should ask which product is approved, which is compounded for them alone, and which is still experimental.
Questions to Ask Before Starting
Before any peptide begins, ask four plain questions:
Is this an FDA-approved product or a compounded one?
Who is the licensed prescriber, and which state does the patient live in?
What exam, labs, and follow-up will I receive?
How will chiropractic care, exercise, and nutrition work with the medicine?
Boards expect those answers in the record (New Mexico Board of Nursing, 2026; ByrdAdatto, n.d.). Legal peptide use is a medical act. Integrative chiropractic care is a movement and strength act. When a clinic keeps both lines clear, patients build stronger muscles and bones—and, when appropriate, receive carefully chosen peptide support without a gray-market detour.
Abstract
Subcutaneous testosterone injections place hormone therapy in the fat layer just under the skin instead of deep inside a muscle. Men and women can both receive this type of shot when a clinician decides it is appropriate. The smaller needle is often easier to use at home, and weekly levels can stay more even than with a deep muscle shot. This article explains how the method works, how testosterone supports muscle and bone, and how integrative chiropractic care in El Paso can sit beside medical hormone care. It is an option for people who don’t want pellets or a deep intramuscular injection.
What a Subcutaneous Shot Is
A subcutaneous (SubQ) injection goes into the thin layer of fat beneath the skin. Common sites are the belly and the outer thigh. The needle is short and thin. An intramuscular (IM) shot goes deeper into muscle, often the glute or thigh, and usually requires a longer needle.
Both routes can use the same familiar esters, such as testosterone cypionate or enanthate. The medicine is not a brand-new drug. The change is where the oil sits. Fat has less blood flow than muscle, so the hormone often leaves the depot more slowly. Average blood levels can land in a similar place. The shape of the week is often calmer.
For about eighty years, deep muscle injection was simply the habit. In The Quiet Case for the Subcutaneous Needle, Dr. Thomas A. Hatzilabrou, M.D., of Worldborne Medical, makes a narrow claim: move the same ester from muscle to fat, and therapy can become easier to live with without giving up the average level guidelines care about (Hatzilabrou, n.d.).
That claim is about a route, not a brand.
Why the Weekly Curve Matters
The Endocrine Society and the American Urological Association tell clinicians to restore testosterone to a mid-normal range in men who truly need treatment, match the plan to the person, and check labs on a schedule.
Two plans can share the same average and still feel like different weeks. A deep IM shot can spike high, then sag before the next dose. People feel that sag as low energy, low mood, or a crash. Modeling of testosterone enanthate found that SubQ dosing blunts that peak-to-trough swing. The average is the number on the lab report. The swing is the number a person lives in (Hatzilabrou, n.d.; Figueiredo et al., 2022).
A review found SubQ testosterone to be feasible, practical, and reasonable for routine use, with comparable mean levels. A 52-week study of weekly SubQ enanthate found that 92.7% of men were in the target range by week 12, and more than 95% reported no injection-related pain.
One dosing rule matters at every switch visit. A milligram under the skin may not equal a milligram in the muscle. After a change, assess the level and how the person feels. Do not assume syringe-for-syringe equality.
SubQ Testosterone for Men and for Women
Both men and women can receive SubQ testosterone when a licensed clinician chooses that plan. The smaller needle is often more convenient for women and for anyone who prefers not to receive a deep glute injection.
The research is not even, and that honesty belongs here.
In men with low testosterone, SubQ shots have produced target-range levels and better comfort than IM.
In gender-affirming care, people who switched from IM to SubQ often preferred SubQ, and levels still reached the intended range.
In women, no testosterone product is FDA-approved in the United States. Use is off-label. The goal is a physiologic, premenopausal-range level—not a male dose. The strongest randomized evidence in women is still transdermal gel, not injection (Hatzilabrou, n.d.).
So SubQ can be easier as a technique. It is not automatically the best-proven female route. Any plan in women should stay inside a safe female range, with labs to prove it. Start low. Go slow. Watch skin, hair, voice, and mood.
What This Route Wins On
If average exposure is close to a tie, daily life breaks the tie.
A short, fine needle is easier to use on your own.
Pain and dread before the shot are usually lower.
There is no awkward reach to the glute and less concern about the sciatic path.
The week can feel steadier.
Cost can stay low because the same generic esters are used.
There is no skin-to-skin transfer risk like gels and patches.
Needle fear is common. It turns a five-minute task into the one a person keeps putting off. A delayed dose becomes a missed dose. A missed dose becomes “this isn’t working.” An easier shot is not a luxury. It is how long-term care survives.
Safety does not get lighter because the needle is shorter. High red-cell count, fertility changes, prostate checks in men, and androgenic effects in women track with the hormone level, not with “IM versus SubQ.” Monitoring stays the same.
How the Home Shot Is Done
A clinician teaches the first doses. The usual steps are simple:
Wash hands. Set out a clean syringe, a short needle (often 25- to 30-gauge and about half an inch), an alcohol wipe, and a sharps container.
Choose a clean site on the abdomen or outer thigh. Rotate sites.
Pinch a fold of skin. Insert the needle at about a 45-degree angle. Inject slowly.
Do not share syringes. Place used needles in a sharps box.
Xyosted is one FDA-cleared weekly auto-injector for men that is used in the abdomen. Some clinics use compounded syringes. The treating clinician still manages the dose, storage, and follow-up.
This method is straightforward for people who don’t want pellet placement or a deep muscle shot. It is still an injection. It is a middle-path option.
What Testosterone Does for the Body
Testosterone helps the body maintain lean muscle, support bone health, recover after strain, and maintain energy and drive. When levels stay too low, people often feel weak, foggy, and slow to bounce back. Stairs feel taller. Rehab after a sprain, a fall, or a car crash lasts longer.
That is the link to musculoskeletal health. Weaker muscles mean less support around the spine, hips, and knees. Joints take more load. Guarding becomes a habit. Sleep and mood often fall with the strength loss.
A steadier hormone curve does not replace exercise or alignment work. It can give muscle and bone a clearer internal signal while those programs run.
How Integrative Chiropractic Care Fits
Hormone therapy works inside the body. Chiropractic care works on the frame that carries the body.
When the spine and pelvis are restricted, muscles stay tight. Joints load on one side. The nervous system stays loud. That mix can blunt the gains people hope to see from hormone care. Integrative chiropractic care aims to restore motion, ease muscle tightness, and improve how the body shares load. Strength work then has a better platform for these gains.
In my clinical observations, patients often report easier hip and low-back mechanics after treatment for spinal and pelvic restrictions alongside other therapies. I have also seen some men do better when large, infrequent depot shots are changed to smaller, more frequent SubQ doses. The mid-cycle crash—fatigue, irritability, a sense that “the shot wore off”—often settles when the curve flattens. Labs still decide the number. The person decides whether the week feels livable (Jimenez, n.d.).
Chiropractic care does not replace testosterone. Testosterone does not replace an adjustment, a rehab plan, or a strength progression. Together they treat the signal and the structure.
The El Paso Team Model
Injury Medical Clinic PA uses a multidisciplinary model. I serve as clinical director, a chiropractor, and a board-certified family nurse practitioner. Dr. Maria Guadalupe Cardenas, MD, is board-certified in internal medicine (NPI #1164426749, Texas MD License #J2933). She has more than 40 years of experience as an internist and serves as medical director and collaborative physician.
This setup is common in integrative and injury clinics. The MD provides medical direction, internal medicine risk review, and hormone oversight. The chiropractic and rehab team addresses alignment, soft tissue, personal injury recovery, and return to work or sport. Functional medicine adds labs, nutrition, sleep, and gut-muscle links so the plan isn’t just a shot.
A person in this model may move through:
Medical review of symptoms, medicines, fertility goals, and safety screens
Targeted hormone and metabolic labs
Chiropractic care for spinal and pelvic mechanics
Rehabilitation for strength, balance, and daily demands
Nutrition and recovery habits that support hormone work
Follow-up labs for testosterone, hematocrit, and PSA when indicated
Main East Side clinic: 11860 Vista Del Sol, Suite 128, El Paso, TX 79936. Office: 915-850-0900 or 915-412-6677.
Who This Option May Suit
SubQ testosterone may be worth a supervised talk when:
Labs and symptoms support treatment, and the person can learn a home shot.
Deep IM shots cause pain, fear, or missed doses.
Pellets feel like too much commitment or are difficult to fine-tune.
Gels are messy or raise transfer concerns at home.
The goal is a steadier week, not a bigger peak.
It is a poor first choice when fertility is an immediate goal, when there is a prostate or breast cancer concern, when hematocrit is already high, or when a woman needs the route with the strongest female trial data. Those calls belong in the clinic.
Conclusion
The quiet case for the subcutaneous needle is simple. Same ester. Different depot. Comparable average levels for many patients. It’s a shot that most people can keep getting. Pair that with integrative chiropractic care, and the aim isn’t just a better lab printout. The aim is a body that can still move.
This article is educational. The FDA does not review compounded medicines in the same way it reviews approved branded products. The prescribing clinician makes final treatment decisions after a full evaluation.
Integrative Nerve Block and Forehead Lesion Removal: A Step-by-Step, Evidence-Based Guide for Patients and Clinicians
Abstract: In this educational post, I walk you through a patient-centered, step-by-step approach to performing a supraorbital and supratrochlear nerve block. This approach helps comfortably remove a small forehead lesion. I present the latest findings from leading researchers on regional anesthesia safety, dosing, and anatomical precision. I also explain how integrative chiropractic care, functional medicine, and medical oversight fit into a modern multidisciplinary practice. You will learn the anatomy of the supraorbital and supratrochlear nerves. Specifically, you will discover why targeted nerve blocks reduce pain with minimal medication. You will also see how we coordinate between internal medicine and chiropractic. You will also learn how we embed rehabilitation, personal injury protocols, and functional strategies into the patient’s care plan at Injury Medical Clinic PA in El Paso, Texas.
About Our Integrative Care Team
I am Dr. Alex Jimenez, DC, APRN, FNP-BC, CFMP, IFMCP, ATN, CCST. I practice at Injury Medical Clinic PA (Mission Plaza Injury Medical Clinic) in El Paso, Texas. Dr. Maria Guadalupe Cardenas, MD (Board Certified in Internal Medicine; NPI #1164426749; Texas MD License #J2933) provides medical oversight for modern, integrative musculoskeletal and functional care. Dr. Cardenas has served patients for more than 40 years. As our medical director and collaborative physician, she ensures evidence-based protocols, safety, and continuity of care. Together, we integrate:
Chiropractic and manual therapies
Medical diagnostics and procedural oversight
Functional medicine and systems biology
Personal injury care and comprehensive rehabilitation
Neuromuscular re-education and ergonomic guidance
Patient-Friendly Roadmap: Forehead Lesion Removal with Precision Nerve Blocks
Today, I describe the process and reasoning behind using a supraorbital and supratrochlear nerve block to comfortably remove a small forehead lesion. This approach minimizes systemic anesthetic exposure. Moreover, it improves pain control at the exact site of care. It allows a calm, efficient procedure.
Why Use Regional Nerve Blocks for Forehead Lesions?
Targeted analgesia: Blocking the supraorbital and supratrochlear nerves numbs sensation to the forehead and anterior scalp, producing a painless window for dermatologic procedures.
Reduced need for multiple local injections: Instead of repeatedly infiltrating the lesion with anesthetic, a well-placed block numbs the area broadly, lowering the total dose.
Faster onset and reliable effect: These superficial branches are accessible, allowing precise anesthesia with low-volume lidocaine, minimizing risk when properly dosed and monitored.
Patient comfort and safety: Patients often report lower anxiety and discomfort when they experience quick, controlled analgesia before lesion excision.
The Anatomy: Finding the Target Safely
When planning a forehead block, topographical anatomy and tactile confirmation guide safe technique.
Supraorbital nerve: A branch of the ophthalmic division (V1) of the trigeminal nerve, exiting through the supraorbital notch or foramen typically located along the superior orbital rim. Clinically, we palpate just above the eyebrow in a vertical line superior to the center of the pupil. This region carries cutaneous sensation for the mid-forehead and anterior scalp.
Supratrochlear nerve: Also from V1, it emerges more medially, above the inner canthus of the eye, and travels along the medial superior orbital rim to supply sensation to the medial forehead and glabellar region.
Understanding this anatomy avoids intravascular injection. It protects the globe and ensures predictable coverage with small volumes.
Step-by-Step: My Clinical Technique
To keep the experience clear and comfortable, I narrate each step. This includes reassuring the patient and dosing safely.
Identify landmarks: I palpate the orbital rim and align my injection points:
For the supraorbital nerve: just superior to the mid-pupillary line above the eyebrow.
For the supratrochlear nerve: at the medial orbital rim above the inner canthus.
Prepare the skin: I clean the area thoroughly with alcohol to reduce microbial load.
Pinch and stabilize: I gently pinch the skin to control superficial motion and provide mild counter-stimulation that can reduce the perception of needle entry.
Needle placement and bone touch: Using a fine-gauge needle, I advance carefully until I lightly contact bone at the superior orbital rim—this tactile stop confirms I am at the correct depth and location without traversing deeper structures.
Aspirate and inject safely: After confirming safety, I inject approximately 0.5 mL of lidocaine at each site. With careful technique, I feel a soft bulge against my thumb, confirming adequate local spread near the nerve.
Pressure and observation: I apply gentle pressure to limit bruising, monitor for comfort, and reassess coverage.
Supplemental local infiltration: If needed for the lesion margins, I add a small ring of local infiltration around the lesion to strengthen anesthesia precisely where the excision will occur.
Proceed with the procedure: Once comfort is confirmed, we remove the lesion with attention to aseptic technique and cosmetic incision alignment.
Physiological Basis: How Local Anesthetics Work
Sodium channel blockade: Agents like lidocaine enter neuronal membranes and block voltage-gated sodium channels, preventing the depolarization needed to conduct pain signals. This effect is reversible and concentration-dependent.
Fiber sensitivity: A-delta and C fibers (pain-transmitting) are more susceptible to blockade than larger motor fibers in this region, which is why sensation is selectively reduced without affecting facial expression.
pH and onset: Lidocaine is weakly basic; tissue pH influences ionization and the speed of membrane penetration. Forehead tissue is typically well perfused, supporting consistent onset.
Safety margin: Low-volume, superficial injections at the specified sites minimize the risk of intravascular injection and systemic toxicity while providing broad cutaneous anesthesia.
Evidence-Based Considerations: Dosing, Safety, and Monitoring
Contemporary literature highlights practical safeguards and dosing strategies for facial regional blocks:
Use the lowest effective dose to achieve sensory blockade, especially in facial procedures with small fields (NYSORA – Peripheral nerve blocks).
Watch for early signs of local anesthetic systemic toxicity (LAST), such as perioral numbness, tinnitus, metallic taste, or CNS changes; keep resuscitation protocols ready if using larger volumes, though small facial blocks carry an extremely low risk (American Society of Regional Anesthesia – LAST checklist).
Consider the patient’s comorbidities, medications, and allergies, particularly with internal medicine oversight to ensure whole-person safety.
In our clinic, Dr. Cardenas reviews medical risk factors and ensures that protocols match the patient’s cardiovascular, neurologic, and metabolic profile, integrating internal medicine safeguards into a musculoskeletal and procedural workflow.
Integrative Chiropractic Care: Why It Fits and How We Use It
Chiropractic and functional rehabilitation enhance outcomes before and after minor procedures by optimizing soft tissue tone, posture, and neuromuscular control.
Pain modulation and autonomic balance: Gentle cervical and thoracic mobilization, myofascial release, and breathing retraining downregulate sympathetic drive that can heighten pain perception, facilitating smoother procedures and better recovery. Clinical observations in our practice show that patients experience lower tension and improved tolerance when we apply pre-procedural soft tissue techniques judiciously (El Paso Back Clinic – Clinical observations and outcomes).
Postural optimization: Forward head posture and frontal muscle overuse can contribute to tension headaches and frontal neuralgia; chiropractic care, ergonomic counseling, and targeted corrective exercise reduce strain on the supraorbital and supratrochlear pathways.
Scar management and tissue glide: Following lesion removal, gentle scar mobilization and instrument-assisted soft tissue techniques can improve collagen alignment and prevent restriction of the frontalis and corrugator supercilii fascia, improving comfort and aesthetics.
Integrative care is not just about manual techniques—it is about aligning nervous system regulation, tissue health, and biomechanics to support healing. Paired with precise anesthesia and medical oversight, this approach provides comprehensive, individualized care.
Functional Medicine Integration: Systems-Based Support for Healing
We incorporate functional medicine principles to support tissue repair, immune balance, and skin health:
Nutritional support: Adequate protein, vitamin C, zinc, and omega-3 fatty acids support collagen synthesis, angiogenesis, and inflammation resolution. For patients with recurring skin lesions or delayed healing, we assess dietary intake and relevant labs.
Inflammation mapping: We screen for systemic inflammatory drivers (sleep apnea, gut dysbiosis, chronic stress) and address them with lifestyle, sleep hygiene, and targeted nutraceuticals when appropriate (IFM – Functional medicine approaches to inflammation).
Dr. Cardenas’s internal medicine oversight complements this approach by evaluating comorbidities, adjusting medications, and coordinating lab work to ensure safety and efficacy.
Personal Injury and Rehabilitation: Restoring Function and Confidence
In personal injury cases—such as facial trauma from accidents—regional nerve blocks, minor procedures, and rehabilitation may be combined:
Acute care coordination: Medical evaluation to rule out orbital fractures, cranial nerve injuries, or hematomas, followed by precise analgesia and wound management.
Rehabilitation pathway: Chiropractic-guided cervical stabilization, vestibular exercises if indicated, and postural retraining to reduce head strain and promote healing without exacerbating neural sensitivity.
Return-to-work planning: Ergonomic adjustments, task modification, and graded exposure to activities to prevent flare-ups in the frontal musculature and peri-orbital tissues.
Our clinic focuses on structured progressions and measurable outcomes, ensuring patients move from acute comfort to long-term resilience.
Clinical Observations: What We See in Practice
Drawing from my clinical experience and shared outcomes reported through our channels:
Patients frequently report improved tolerance and reduced anxiety with a clear explanation of the nerve block process and gentle stabilization of the injection site.
Low-volume, well-placed lidocaine blocks provide reliable anesthesia for forehead lesions without distorting tissue architecture, making cosmetic closures more precise.
Integrating soft tissue work and breathing strategies before the procedure helps attenuate anticipatory pain and sympathetic arousal, making the block feel less intense.
Post-procedure, patients benefit from simple forehead mobility drills, hydration, and nutritional support to optimize scar remodeling—leading to smoother outcomes and fewer adhesions.
In personal injury settings, coupling procedural precision with spine care and functional rehab accelerates return to normal activities and reduces downstream pain syndromes.
For more insights into our integrative protocols and case studies, visit our practice resources:
El Paso Back Clinic: https://elpasobackclinic.com/
Professional profile: https://www.linkedin.com/in/dralexjimenez/
Our Multidisciplinary Workflow: Safety, Clarity, and Results
Here is how we structure patient care at Injury Medical Clinic PA:
Intake and evaluation:
Medical history, medications, allergies, and risk factors
Anatomic mapping and functional assessment
Coordinated plan:
Internal medicine oversight by Dr. Cardenas
Procedural planning by me with a clear anesthesia strategy
Functional and chiropractic support to regulate nervous system tone and improve tissue health
Intervention:
Pre-procedural soft tissue preparation when appropriate
Supraorbital and supratrochlear nerve blocks
Lesion removal with attention to aesthetics and aseptic technique
Recovery and follow-up:
Scar care, nutrition, and movement guidance
Ergonomic and postural coaching
Monitoring and adjustments coordinated between disciplines
This approach ensures patients receive precise, compassionate care grounded in modern evidence.
Practical Tips for Patients
Ask about the plan: Understanding your nerve block and lesion removal steps reduces anxiety and improves your experience.
Share your history: Disclose medications, bleeding risks, allergies, and prior reactions to local anesthetics.
Prepare for recovery: Plan for gentle care of the site, adequate hydration, and nutrition; avoid picking or excessive facial expressions until sutures are removed.
Follow movement and posture guidance: Simple exercises and ergonomic habits support better outcomes and comfort.
Why This Matters: Precision Care with Whole-Person Support
Facial procedures deserve meticulous technique. By combining anatomical precision, low-dose regional anesthesia, and integrative care, we honor both the science and the human experience of healing. With Dr. Cardenas’s medical leadership, evidence-based protocols, and chiropractic-functional rehabilitation, we deliver care that is safe, efficient, and tailored to your needs.
Key Takeaways
Supraorbital and supratrochlear nerve blocks provide targeted, efficient analgesia for forehead lesion removal.
Low-volume lidocaine with careful anatomical technique enhances safety and cosmetic outcomes.
Integrative chiropractic and functional medicine support nervous system regulation, tissue healing, and long-term resilience.
Internal medicine oversight ensures comprehensive risk management and continuity of care.
A multidisciplinary pathway—from evaluation to rehabilitation—optimizes patient comfort and outcomes.
Evidence-Based Excision of a Dysplastic Nevus With Integrative Chiropractic and Functional Medicine Support
Abstract
In this educational post, I guide you through a precise, evidence-based approach to excising a dysplastic nevus with moderate atypia using a pain-free field block technique and narrow margins. I explain my step-by-step method, the anatomical and physiological rationale for local anesthesia and intradermal infiltration, and the clinical decision-making behind margin selection. I also introduce our multidisciplinary model in El Paso, Texas, where I work alongside Dr. Maria Guadalupe Cardenas, MD, our internal medicine medical director, to integrate chiropractic care, functional medicine, personal injury care, rehabilitation, and patient-centered follow-up. Throughout, I present the latest findings from leading dermatologic surgery and pain science researchers, connect these principles to chiropractic neurophysiology, and describe how integrative chiropractic care fits into peri-procedural and long-term outcomes.
Dysplastic Nevus Excision: My First-Person Clinical Approach
I am Dr. Alexander Jimenez, DC, APRN, FNP-BC, CFMP, IFMCP, ATN, CCST. Today, I share my clinical approach to excising a dysplastic nevus with moderate atypia—an area previously shaved and biopsied about one month prior—using narrow but appropriate margins and a meticulous, pain-minimizing anesthesia technique. As the patient sits comfortably, I begin by cleaning the site with alcohol, re-prepping to reduce transient skin flora before marking the excision plan.
Clinical context: The original lesion measured approximately 5 by 6 millimeters. With moderate atypia, evidence supports complete removal with narrow margins when severe atypia or melanoma features are absent.
Excision planning: I use a sterile template to visualize an elliptical excision, aiming for about 2-millimeter margins around the residual scar. Because the original lesion was 5 x 6 mm, the post-biopsy excision boundary effectively spans about 5 mm beyond the original footprint to ensure complete removal of dysplastic tissue, both visible and microscopic, along the shave plane.
Creating a Pain-Free Field Block: Technique and Rationale
My goal in minor surgical procedures is a pain-free patient experience. I set up a field block—a circumferential ring of local anesthetic that interrupts sensory nerve conduction—so the patient does not feel the needle or the intradermal distension.
Anesthetic choice: I use 1% lidocaine with epinephrine.
Lidocaine blocks voltage-gated sodium channels on nociceptive and mechanoreceptive fibers, preventing depolarization and conduction of pain signals.
Epinephrine induces local vasoconstriction via alpha-adrenergic receptors, prolonging lidocaine’s residence time, reducing bleeding, and minimizing systemic absorption, thereby extending anesthesia duration and improving hemostasis.
Spray analgesia: Before needle entry points, I apply a brief vapocoolant “freeze spray.” The cold exposure rapidly reduces superficial nociceptor firing (TRPM8-mediated cold sensing and transient gating of pain fibers), ensuring the patient feels no needle prick. He confirms: “No pain.” This instant desensitization is especially helpful in field blocks that require multiple passes.
Needle Control, Intradermal, and Subcutaneous Delivery: Why It Works
I insert the needle at a chosen point, advance subcutaneously, and inject as I withdraw. Before exiting the skin, I rotate the bevel and repeat on the opposite side. This “inject-on-withdrawal” method creates an even distribution of anesthetic parallel to dermal nerve plexuses.
Physiological basis:
The dermis contains a dense network of free nerve endings and mechanoreceptors. Intradermal distension with anesthetic rapidly silences A-delta and C-fiber nociceptors via sodium channel blockade.
Subcutaneous infiltration saturates the tissue beneath the lesion, interrupting deeper cutaneous nerve branches that feed the operative field.
Technique advantages:
By threading the needle just past midline and injecting on withdrawal, a visible wheal forms—a sign of intradermal spread.
Slightly bending a longer needle allows steering to contour around the template. This helps me remain just outside the marked ellipse, preventing anesthetic pooling in the incision path while fully covering perilesional innervation.
Multiple entry points may be necessary for large or anatomically curved sites. With cooling spray and prior subcutaneous saturation, new entry points remain pain-free.
The patient confirms repeatedly: no pain. This validates that the circumferential anesthetic fence is intact and effective.
Margin Selection for Moderate Atypia: Evidence-Based Considerations
A dysplastic nevus with moderate atypia warrants complete excision, but the margin need not be wide if there is no severe atypia or melanoma in situ. Contemporary studies suggest that 2 mm clinical margins often achieve histologic clearance for moderate atypia, particularly when initial shave biopsy delineated architecture and ruled out more aggressive pathology (Kittler et al., 2020; Swetter et al., 2019).
Why narrow margins:
Preserve healthy tissue and reduce scarring while achieving oncologic adequacy for moderate atypia.
Epinephrine-assisted hemostasis reduces bleeding and improves visibility, allowing precise adherence to planned margins.
Post-excision pathology:
We send the specimen for histologic assessment to confirm clear margins and exclude residual atypia. If margins are positive or close, we discuss re-excision based on the pathologist’s recommendations and the patient’s goals.
Step-by-Step Workflow: From Prep to Incision
Second prep: I re-clean the site and confirm sterile field integrity.
Template marking: I trace an ellipse aligned with skin tension lines (Langer lines) to enhance cosmetic outcomes and minimize wound tension.
Field block completion: Intradermal wheals surround the template; subcutaneous anesthesia saturates the bed beneath the lesion.
Patient check-in: I ask about sensation; he reports no pain.
Incision and removal: With a sharp blade, I incise along the outside of the template, dissect through the dermis and minimal subcutis to remove the lesion and scar bed en bloc. I maintain hemostasis with epinephrine and use meticulous cautery only when appropriate for the site.
Layered closure: Where needed, I approximate with deep absorbable sutures to reduce tension, then close the epidermis with fine non-absorbable sutures aligned to natural creases. This supports rapid healing and improved cosmesis.
Integrative Chiropractic Care in Dermatologic Procedures: Why It Matters
While excising a skin lesion may seem purely dermatologic, integrative chiropractic care supports peri-procedural comfort, autonomic regulation, and recovery. At Injury Medical Clinic PA (Mission Plaza Injury Medical Clinic) in El Paso, I collaborate closely with Dr. Maria Guadalupe Cardenas, MD (Board Certified Internal Medicine; NPI #1164426749; Texas License #J2933). Our model leverages chiropractic neurophysiology, functional medicine, and internal medicine oversight to optimize patient outcomes.
Chiropractic neurophysiology:
Gentle cervical and thoracic mobility work can reduce sympathetic overactivity and anxiety, thereby lowering perceived pain via descending inhibitory pathways (periaqueductal gray modulation).
Soft tissue techniques around the shoulder girdle and thoracic cage relieve myofascial tension that can amplify cutaneous pain through central sensitization.
Autonomic balance:
Breathing mechanics, rib cage mobility, and vagal tone optimization help stabilize heart rate and blood pressure during minor procedures. Patients report better comfort and less discomfort from injections when sympathetic tone is moderated.
Functional ergonomics:
Post-procedure, appropriate postures and scapular mechanics reduce strain on healing sites in the back, shoulder, or trunk areas, decreasing shear forces across the incision and promoting better scar formation.
Internal Medicine Oversight: Safety, Risks, and Comorbidities
Dr. Cardenas provides medical direction and co-management for patients with complex medical histories. Together, we tailor anesthesia choices, wound plans, and follow-up based on comorbidities.
Hypertension and cardiovascular disease:
Epinephrine in lidocaine is generally safe for small dermatologic fields, but we confirm medication lists (beta-blockers, MAO inhibitors) and assess cardiovascular stability. Internal medicine oversight ensures risk stratification and informed consent aligned with the patient’s health status.
Diabetes and wound healing:
Glycemic control is vital to prevent infection and optimize collagen synthesis and cross-linking in the wound. We coordinate glucose monitoring and provide nutrition guidance consistent with functional medicine principles that support wound healing (adequate protein, vitamin C, and zinc).
Anticoagulants and antiplatelets:
For patients on warfarin, DOACs, or aspirin, we plan hemostasis strategies, pressure dressings, and post-op monitoring. Most dermatologic excisions proceed without stopping therapy, but Dr. Cardenas ensures that decisions align with evidence and safety.
Functional Medicine and Nutritional Support for Skin Healing
As a Certified Functional Medicine Practitioner (CFMP, IFMCP), I incorporate nutritional and lifestyle strategies to enhance skin repair.
Nutrient optimization:
Protein targets (1.2–1.6 g/kg/day in older adults during recovery) support fibroblast activity and collagen deposition.
Vitamin C and zinc are essential cofactors in collagen hydroxylation and DNA synthesis; deficiencies prolong healing time.
Omega-3 fatty acids can modulate inflammatory cytokines, promoting resolutive healing without impairing necessary inflammatory phases.
Glycemic control and inflammation:
Stable blood sugar reduces advanced glycation end-products that stiffen collagen and impair tensile strength of healing tissue.
Sleep and stress:
Adequate sleep supports growth hormone and tissue repair, while stress reduction techniques blunt cortisol’s catabolic effects on skin.
Personal Injury Care Integration: Biomechanics and Scar Protection
In personal injury cases, excision sites often lie across regions of high biomechanical load. Our integrative chiropractic and rehabilitation approach minimizes scar widening and pain flares.
Biomechanics:
Assess regional movement patterns to reduce shear across the healing incision.
Educate on movement strategies—log-rolling, hip hinge, and scapular setting—to protect the site in the first 1–2 weeks.
Myofascial release:
Gentle, indirect techniques adjacent to the excision (not on the wound) decompress fascial layers that, if tight, can pull on the scar and provoke pain.
Graded activity:
As collagen matures (weeks 3–6), we introduce light isometrics and, later, controlled mobility to align collagen fibers along lines of stress and improve scar pliability.
Keep the area clean and protected for the first 24–48 hours; petrolatum-based occlusion maintains moisture and accelerates re-epithelialization.
Scar modulation:
Silicone sheets or gels reduce hypertrophic scarring by regulating hydration and fibroblast activity.
Gentle massage after complete epithelialization (usually after suture removal) remodels scar tissue, improving mobility and sensation.
Sun protection:
UV exposure can cause hyperpigmented scars; broad-spectrum SPF 30+ prevents cosmetic discoloration and protects collagen integrity.
Collaborative Model at Injury Medical Clinic PA: Roles and Workflow
Our El Paso clinic exemplifies integrative care, common in injury and functional medicine settings, where an MD provides medical direction alongside a chiropractor. Dr. Cardenas, MD, serves as the medical director and collaborative physician, and I lead integrative chiropractic and functional care.
Pre-procedure:
Medical review: Dr. Cardenas assesses comorbidities, medications, and risk factors.
Chiropractic preparation: I provide autonomic regulation techniques and positioning strategies to enhance comfort and reduce nociception.
Procedure:
Evidence-based anesthesia and excision: I perform a field block and precise excision, with hemostasis and ongoing patient communication.
Post-procedure:
Follow-up: Internal medicine oversight ensures safe healing. Functional medicine guidance supports nutrition and lifestyle modifications.
Rehabilitation: Chiropractic-directed movement strategies, scar protection, and graded return to activity.
Clinical Observations from Practice: Patient Comfort and Outcomes
Across my clinical work in El Paso, patients often report extraordinarily low pain during our field blocks. As reflected in today’s case, the patient experienced no pain during multiple entries and intradermal distension—exactly the outcome we aim for.
Patient Education and Safety: What to Expect After Excision
Normal sensations: Mild tightness or itch as healing progresses; avoid scratching.
Red flags: Excessive bleeding, spreading redness, purulent discharge, fever, or severe pain—contact us immediately.
Activity:
Keep the area dry for the first day unless instructed otherwise.
Avoid stretching or heavy lifting that places tension across the excision line until cleared.
Follow-up:
Suture removal typically occurs within 5–14 days depending on body location and tension.
Pathology results guide any additional steps. If margins are clear, we move to standard surveillance; if not, we discuss re-excision.
Latest Research Insights Supporting This Approach
Local anesthesia with epinephrine is safe and effective for most dermatologic procedures, enhancing duration and hemostasis without increasing necrosis when used within recommended doses (Krunic et al., 2004; Alam & Dover, 2008).
Narrow margins for moderate atypia in dysplastic nevi can be appropriate when clinical-pathologic correlation rules out severe atypia or melanoma (Swetter et al., 2019; Kittler et al., 2020).
Vapocoolant sprays reduce injection pain by activating cutaneous cold receptors and transiently inhibiting nociception (Gallagher et al., 2009).
Layered closure aligned with tension lines optimizes cosmetic outcome and reduces dehiscence risk (Borges, 1984; Alam & Wrone, 2007).
Integrative care models with chiropractic and internal medicine collaboration can improve patient satisfaction, reduce pain, and support functional recovery via autonomic modulation and biomechanical optimization (Goertz et al., 2018; Schneider et al., 2015).
Why Integrative Chiropractic Care Fits in This Treatment Plan
Whole-person care: Skin health intersects with systemic physiology—autonomic tone, metabolic status, and biomechanics. Chiropractic and functional medicine address these intersections.
Peri-procedural calm: Breathing and gentle mobilization improve patient comfort and experience during minor surgery.
Long-term outcomes: Scar integrity and function rely on movement patterns, tissue nutrition, and stress regulation—core areas where chiropractic and functional medicine strategies excel.
Our Commitment to Modern, Evidence-Based, Patient-Centered Care
At Injury Medical Clinic PA, our mission is to provide modern, evidence-based care that respects the patient’s experience, safety, and long-term health. By integrating internal medicine oversight from Dr. Cardenas with chiropractic and functional medicine strategies, we ensure that each procedure—from a simple excision to complex injury rehabilitation—benefits from rigorous science and compassionate execution.
IFM's Find A Practitioner tool is the largest referral network in Functional Medicine, created to help patients locate Functional Medicine practitioners anywhere in the world. IFM Certified Practitioners are listed first in the search results, given their extensive education in Functional Medicine