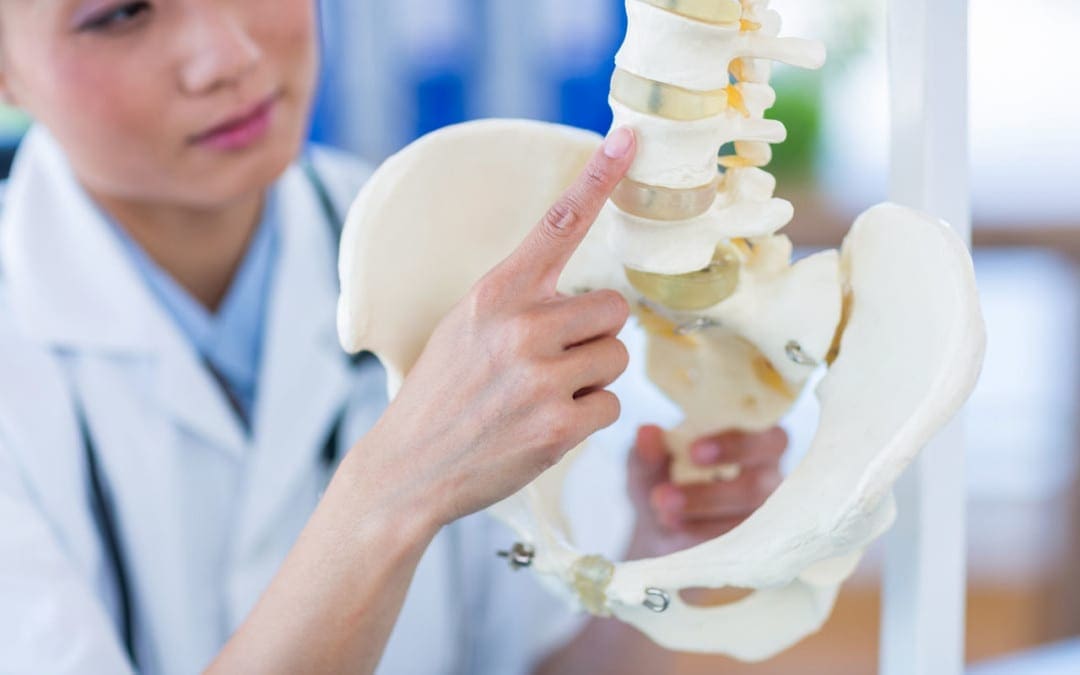
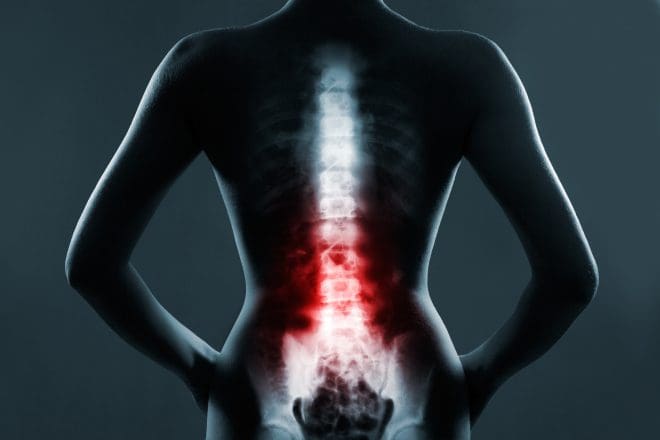
Increase in sports-related fractures among young and active people
Any type of bone fracture, especially when the spine is involved, comes with the most common and debilitating symptom is severe pain.
Managing pain correctly is vital to the proper healing of a fractured bone.
Unfortunately, the common treatments prescribed to manage fracture pain can cause significant side effects, especially when used beyond the short-term or acute phase of pain.
Bone fractures cannot be always be avoided, but when it comes to osteoporosis, everyone can take steps to help minimize the risk of developing the condition.
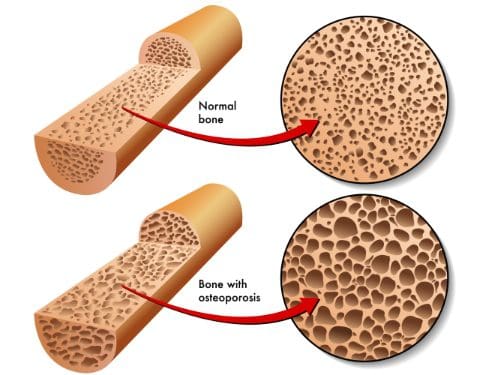
How to Prevent Osteoporosis and Bone Fracture
First, understand that osteoporosis is not a normal part of the aging process.
It is an irreversible and degenerative disease that causes bones to become porous over time.
Prevention should begin as early as possible, as this will benefit an individual later in life.
It’s never too late to begin taking steps!
Protecting the bones begins with the most important thing and that is diet.
Most individuals’ diet does not fill the recommended daily values of calcium and Vitamin D.
Both are essential for strong bone health and density.
Diet must be well-balanced with an abundance of:
Green leafy vegetables
Fruit
Dairy sources high in calcium:
Milk
Yogurt
Cheese
However, vitamin D is typically highest in sources of wild-caught fatty fish like salmon and tuna.
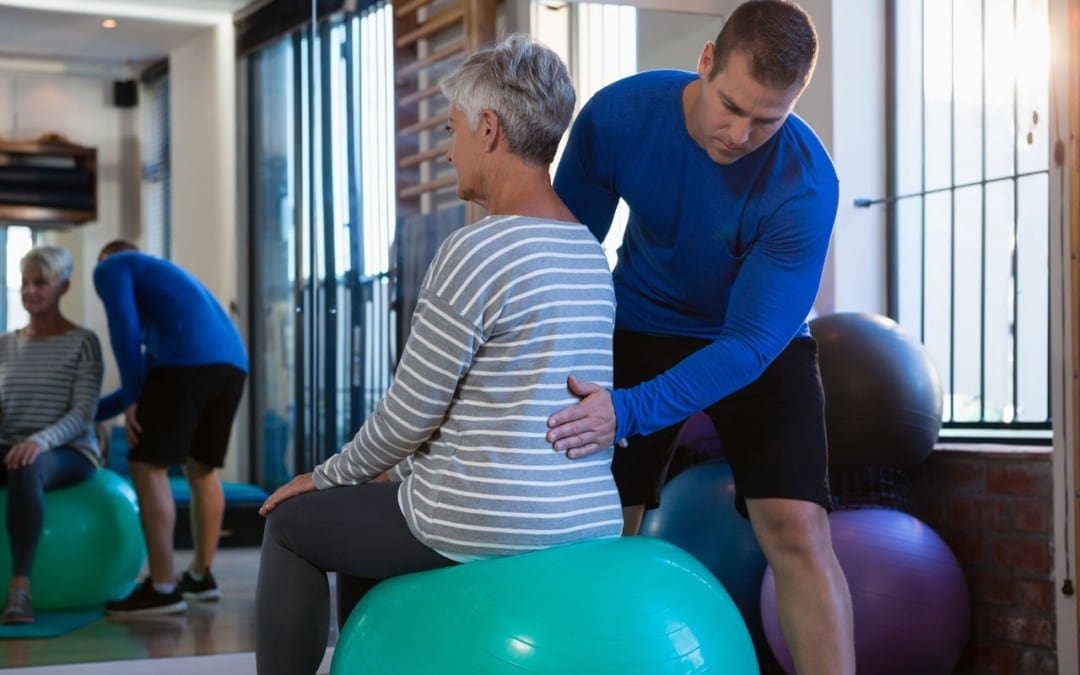
Regular exercise is the next important step to help reduce the risk and keep bones strong.
Do exercises that are both:
Weight-bearing (high/low-impact aerobics or walking/jogging)
Muscle-strengthening (weightlifting and exercise bands)
Yoga and Pilates can also help to improve:
Strength
Balance
Flexibility
These are essential in the prevention of bone fractures from falls.
Engage in exercise that you enjoy, this way you will stick with it on a regular basis.
Try for two to three sessions a week if you�re beginning and try to work up to five.
While diet and exercise are extremely important to prevent osteoporosis, there are some areas that should be removed from the lifestyle or limited.
Smoking
Alcohol
These chemicals in bothcigarettes and heavy alcohol consumption are known to be significant contributors to bone loss.
Injury Medical & Chiropractic Clinic offers not only chiropractic treatment, but exercise, and diet programs set up by professional life/health coaches that are customized to each patient. Set up an appointment today, we can help!
Chronic Body Pain Treatment El Paso, TX Chiropractor
Aracely Norte suffered a slip-and-fall accident which tremendously limited her ability to work, affecting her quality of life. Due to the chronic pain she experienced, Aracely had difficulty engaging in her regular, everyday responsibilities. After her lawyer recommended Dr. Alex Jimenez, chiropractor, Aracely found the relief she was looking for.
Chronic pain is a common issue that can occur due to a variety of reasons, including injuries and underlying conditions, however, chiropractic care can help eliminate chronic pain symptoms from the source.
NCBI Resources
As with most conditions, prevention is the most�effective treatment. If you have a family history or fall under any of the risk factors, there are things you can do to minimize the effects or prevent the conditions completely.
Your chiropractor can talk to you about lifestyle changes, exercise, and�diet�as well as supplements that you can take. Chiropractic adjustments can also be effective for many patients with osteopenia and osteoporosis as long as the chosen technique is a low force technique like Activator.
The percentage of individuals that are affected by fatigue, headaches, and overall pain is continuously growing. For the most part, these symptoms can all be linked back to a hormone imbalance. Hormone imbalances are more common than individuals realize and can affect people of all ages. Originally, hormone testing was completed through a blood draw (serum testing). However, as science is improving, there are now better, more functional ways of testing.��
As more and more studies are done, it is becoming more clear that salivary testing is superior to serum (blood) testing for hormones. There are two forms in which hormones exist in the human body, free (5%) and protein-bound (95%). Due to the protein-bound hormones being bound, they become too large to pass through into the salivary glands. This meaning that they are not bio-available and can not be delivered to the receptors in the tissues of the body.� The unbound hormones, or free hormones, are the relevant hormones that are found in the saliva. Considering the fact that free hormones are not as abundant, the hormone levels found in saliva are significantly less than those found in serum. However, many patients who are treated with serum hormone results are often overdosed because of the lack of correlation between bio-availability.
Labrix by Doctor’s Data
Similar to the D.U.T.C.H�hormone testing previously discussed, this company Labrix offers a variety of hormone testing as well.
Neurotransmitters:
NeuroBasic: ideal for monitoring therapeutic interventions of neurotransmitter imbalances previously tested or when symptoms are indicating an imbalance. This test measures Serotonin, Dopamine, Epinephrine, Norepinephrine, Glutamate, Glycine, Histamine, and Phenethylamine
Comprehensive Neurotransmitter: best when a comprehensive look at neurotransmitter secretion and metabolism of markers is needed. This test measures Serotonin, GABA, Dopamine, Norepinephrine, Epinephrine, Glutamate, Glycine, Histamine, and Phenethylamineand DOPAC, 3-MT, Normetanephrine, Metanephrine, 5-HIAA, Tryptamine, Tyrosine, Tyramine, and Taurine.
NeuroHormones:�
NeuroHormone Complete Plus:� provides insight on how the HPA axis function may be contributing to patients’ symptoms, such as mood swings, fatigue, and pain. In addition, this test is ideal for those who are at risk for breast cancer, PCOS, or a strong family history of autoimmune disease.�This test is recommended for women only.� This test measures�Estrone, Estradiol, Estriol, Progesterone, Testosterone, DHEA, Cortisol x 4, Serotonin, GABA, Dopamine, Epinephrine, Norepinephrine, Glutamate, Glycine, Histamine, Phenethylamine
NeuroHormone Complete: useful for patients (men or women) who are experiencing any type of mood disorder, addiction, fatigue, chronic illness, confusion, weight issues, low libido, PMS, or chronic pain. This test measures Estradiol, Progesterone, Testosterone, DHEA, Cortisol x 4, Serotonin, GABA, Dopamine, Epinephrine, Norepinephrine, Glutamate, Glycine, Histamine, Phenethylamine.�
NeuroAdrenal: Included in this test is a full diurnal cortisol pattern, DHEA, and 6 primary neurotransmitters to help those with symptoms such as depression, anxiety, addiction, chronic illness, and low libido. This test measures DHEA, Cortisol x 4, Serotonin, GABA, Dopamine, Epinephrine, Norepinephrine, Glutamate, Glycine, Histamine, Phenethylamine
Salivary Hormone:�
Comprehensive Plus: provides an assessment of breast cancer risk. This test is a considerationfor women only who have an increased risk for developing breast cancer, other hormonally sensitive cancers, PCOS or a family history of autoimmune disease. This test measures estrone, estriol, and Estrogen Quotient.
Women’s Helth and breast Profile: includes two risk assessment ratios, the Estrogen Quotient and the Pg/E2 ratio
Comprehensive Hormone: �assessment of hormonal status and endocrine function and includes estradiol, progesterone, testosterone, DHEA and four cortisols. This profile is useful with male and female patients because it looks at the full diurnal cortisol pattern; it is especially important in patients who are experiencing the full diurnal pattern ( weight gain, high blood sugar, elevated lipids, chronic fatigue)
Short Comprehensive: useful in men and women whose primary symptoms are related to sex hormone imbalances (elevated or depressed E2, P or T)
Basic Hormone: a basic evaluation of the sex hormones and a brief glimpse at the adrenal function with the AM cortisol level. Best for men who are experiencing decreased libido, erectile dysfunction, loss os stamina, decreased mental sharpness and metabolic syndrome. Best for women who are experiencing hot flashes, anxiety, night sweats, breast tenderness, irritability, forgetfulness, and acne.�
Comprehensive Adrenal Function: provides insight into the body�s stress response. This test measures sIgA
Adrenal Function: comprehensive view of adrenal function, DHEA, and cortisol levels. This is best for people who are fatigued, nervous, weak, crave sugar, have headaches, irritability, and depression
Diurnal Cortisol: Similar to the test above but for patients who do not need DHEA testing
Melatonin: Provides a snapshot of the sleep/wake cycle during a one day period
Salivary Hormone + CAR :
CAR: has the capability to test all the same markers as above but adds Cortisol Awakening Response “CAR” to all of them.�
For more information regarding testing and hormones tested, please visitlabrix.com��
LABRIX BASIC BOX CONTENTS:
Upon opening every box (no matter the labrix test) the patient will see a requisition form, a billable stamp, and a FedEx envelope. Under these two items, a styrofoam box (insulated cooler) with the imprint “doctorsdata.com” will be present. Once the patient lifts the lid off of the styrofoam box, they will see two more pieces of paper.� The first being a list of symptoms (patient survey) on a white sheet of paper that the patient is to fill out and place back in the styrofoam box and the second a small instruction manual.
Neurotransmitter Tests Breakdown
For the Neurotransmitter Tests, the patient is provided with the basic kit described above. The only sample type required for the neurotransmitter tests is urine.
The contents of the styrofoam box include a small plastic cup, a clear plastic bag consisting of a white tube, a dropper, an absorbent pad, and a Lab-Brix ice pack. The first step is to freeze the ice-pack and keep it frozen until ready to ship.�
In order for this test to have proper results, the patient should collect their sample with their first or second-morning urine upon waking. Then, select on the requisition form which urine ( first or second ) the sample was collected from. It is also important to note on the requisition form what time the patient woke and what time the sample was collected. The urine sample should be collected midstream. Patients will collect their sample in the plastic cup provided, not directly in the tube. Next, the patients will use the dropper provided to transfer 10 ml of the sample from the cup into the tube. Ensure the lid is screwed on tightly and gently rock the tube back and forth for 3-5 seconds to mix the urine with the preservative. The patients will then wrap the absorbent pad around the tube (not inside the tube), and place the sample tube back in the plastic bag. The bag is then to be placed in the freezer for 4-6 hours, and is to be kept frozen until ready to ship!�
Neurotransmitter + Hormone Tests Breakdown
The Neurotransmitter + Hormone analysis tests consist of urine and saliva samples. This basic test kit includes everything above. However, upon opening this styrofoam box the patient will find two plastic bags. The first being a plain plastic clear bag with a dropper, white test tube, and absorbent pad. The second plastic bag is a biohazard bag that has multiple colors on the outside and consists of 4 clear small straws, an absorbent pad, and 4 small saliva collection tubes of various colors.�
The urine sample is instructed to be taken the same way as the neurotransmitter test.
The patient should collect their sample with their first or second-morning urine upon waking. Then, select on the requisition form which urine ( first or second ) the sample was collected from. (Remember, the individual is� to note on the requisition form time they woke and what time the sample was collected). Patients will collect their sample mid-stream in the plastic cup provided, not directly in the tube. Next, use the dropper provided to transfer 10 ml of the sample from the cup into the tube. Be sure to check that the lid is screwed on tightly and gently rock the tube back and forth for 3-5 seconds to mix the urine with the preservative. The patients will then wrap the absorbent pad around the tube (not inside the tube), and place the sample tube back in the plastic bag. The bag is then to be placed in the freezer for 4-6 hours, and is to be kept frozen until ready to ship!��
The salivary collection has a few more steps considering it is 4 samples rather than one. The timing for the salivary testing is critical, so timers are encouraged. As the patient wakes up, a timer should be set for 30 minutes later. This is when the first salivary sample (the pink tube) is to be collected. Before this test, the patient should not eat, drink, brush or floss. The second collection (green tube) is to be taken right before lunch, around noon. The third (orange tube), is to be collected in the evening before dinner, and the final collection (blue tube) before bed at night.�
For all salivary collections, each tube needs to be 3/4 of the way full. The straws provided are the patient’s choice to be used. As soon as the tube is 3/4 of the way full, snap the saliva lid tightly, put into the bag in which it came, and freeze for 4-6 hours, until ready to ship. Patients are to record the date and times of the saliva collections on the bag and requisition form.�
Salivary Hormone
Considering the salivary hormone testing is done using 4 saliva samples, the instructions are the same as the saliva collection in the test mentioned above. However, to review them again,�the timing for the salivary testing is critical, so timers are highly encouraged.
As the patient wakes up, a timer should be set for 30 minutes later. This is when the first salivary sample (the pink tube) is to be collected. Before this test, the patient is not to eat, drink, brush or floss. For the second collection (green tube), it should be collected right before lunch, around noon. The third (orange tube), is to be obtained in the evening before dinner, and the final sample (blue tube) before bed at night.�
For all salivary collections, each tube needs to be 3/4 of the way full. The straws provided are to be used at the patient’s discretion. As soon as the tube is 3/4 of the way full, snap the saliva lid tightly, put into the bag in which it came, and freeze for 4-6 hours, until ready to ship. Patients are to record the date and times of the saliva collections on the bag and requisition form.�
Salivary Hormone + CAR Breakdown
Aside from the basic components, the styrofoam box includes 6 colored salvia collection tubes, 6 straws, and an absorbent pad. The tests that fall under this category require 6 samples throughout the day. It is important to remember to write down the time the samples were collected as well as the time when the patient first woke up. The first sample (yellow tube) is to be taken as soon as the patient is awake but has not gotten out of bed. In order to accomplish this properly, it is best the patient sets the tube next to their bed the night before. This makes it easy to collect first thing in the morning. It is very important that the patient sets an alarm for 30 minutes after they wake up ( second test, pink tube)and for 1 hour after they wake up (third test, lavender tube). These tests are all to be done prior to eating breakfast, brushing and flossing teeth. The fourth collection (green tube) is to be taken before lunch and the fifth (orange tube) before dinner. The sixth and final sample (blue tube) is to be collected at least one hour after dinner. Just as the other saliva samples mentioned above, these tubes are to be filled 3/4 of the way, tightly closed, placed back in the bag they came in and frozen for 4-6 hours, or until they are ready to ship.
SHIPPING INSTRUCTIONS FOR ALL TESTS:
Shipping should be done Monday-Friday as this will ensure the sample will be delivered to the lab on time. Make sure all paperwork is filled out properly and place contents back in the styrofoam box in the following order:�
sealed plastic bag with frozen specimen tubes
frozen ice pack�
requisition form, symptom sheet, and payment (if applicable)�
Next, place the lid back on the box and place the entire styrofoam box in the cardboard collection kit. Close the cardboard box and place it inside the FedEx shipping envelope provided. The patient will then write their name and address on the Billable Stamp and tear off the customer receipt for their records. Then, place on the FedEx envelope. The final step is to schedule a pick-up. In order to do this, the patient will call the FedEx toll-Free number at 1-800-463-3339 and select “schedule a pickup”. This MUST be a scheduled pick up from an address and NOT a dropbox.�
* It is important to note that patients should avoid eating avocados, eggplant, tomatoes, bananas, melons, pineapples, plums, nuts, nut butter, wine, cheese and chocolate 48 hours before and during the testing period as these could impact the results.
* Patients should keep in mind that strenuous exercise, alcohol, coffee, tea, tobacco or any other product containing nicotine is to be avoided 24 hours before and during the collection period.
Labrix is a great company that allows patients a noninvasive way to have their hormone levels checked. Almost every patient who walks in the door can benefit from this test. I highly recommend this test because hormone levels can change based on age, PMS symptoms, fatigue, blood sugar issues, or stress! These results are accurate and have a decently quick turn around time. Gaining insight and taking control of your body is now easier than ever. – Kenna Vaughn, Senior Health Coach
The scope of our information is limited to chiropractic, musculoskeletal and nervous health issues as well as functional medicine articles, topics, and discussions. We use functional health protocols to treat injuries or chronic disorders of the musculoskeletal system. To further discuss the subject matter above, please feel free to ask Dr. Alex Jimenez or contact us at 915-850-0900.
*All information and photos/video content for this article are directly sourced from labrix. Please see labrix for more information and credit.
The discs that cushion the vertebrae are made up of a tough outer layer and a softer inner layer. When the outer layer is damaged and the inner layer comes out into the spine, it is referred to as�disc herniation.
Often the symptoms of a herniated disc include back pain, as the inner layer of the disc puts pressure on nerves in the spine. A herniated disc can impact the sciatic nerve, leading to sciatica.
If you know that your sciatica was caused by a herniated disc then try these exercises and stretches to help reduce back and leg pain.
Exercises that help relieve sciatica from a herniated disc
If your spine specialist or chiropractor informed you that a herniated disc is what caused the pain also known as lumbar radiculopathy they may recommend� three sciatica exercises:
Prone on elbows into Press-up
Upper back extension
Opposite arm and leg extension
These stretches can help provide relief when the root cause of sciatica from herniated or bulging disc.
Prone Elbows/Press-Up
This exercise is to ease sciatica from herniated disc pain and pressure in the lumbar spine/low back.
How to:
Lay on stomach
Slowly push up until rested on forearms
Beginners hold for 30 seconds
Once strength is gained and you feel comfortable then hold for 3 to 5 minutes
Gently lower to the floor
Repeat 10 times
Once comfortable holding for 5 minutes then perform an extended arms version, which is like push-ups raising your arms to the point where your elbows lock
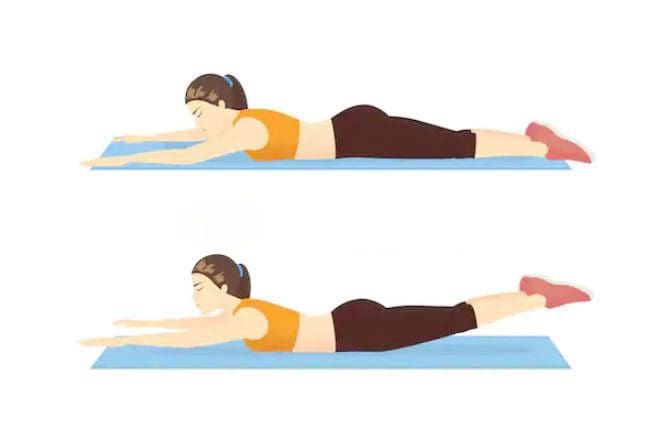
Upper Back Extension
This exercise is to strengthen and stabilize the low back muscles.
How to:
Lay on your stomach with a small pillow or rolled towel under your hips
Rest your arms at your sides
Slowly lift your upper body up off the floor, contracting your low back muscles as you rise
Hold the lifted position for 3 seconds
Slowly lower your body to the ground
Repeat 10 times
Throughout this exercise, keep movements fluid and controlled.
Opposite Arm and Leg Extension
This exercise is to stabilize your spine and strengthen your low back, hamstring and gluteus muscles.
How to:
Lay on your stomach with a small pillow or rolled towel under your abdomen
Extend both arms in front of you
Contract your abdominal muscles as you slowly lift both your right arm and left leg
Hold for 3 seconds. Lower your leg and arm down
Repeat with your left arm and right leg
Hold for 3 seconds
Repeat the exercise 5 to 10 times on each side
As you alternate the lifts, make sure to keep abdominal muscles contracted to get the full benefit.
How do these exercises relieve sciatica from herniated disc
These exercises and stretches are designed to move the pain from the leg and into the low back.
This is centralization/localization.
This is a good thing, as the goal is to get the pain centralized and back at the source.
When the leg pain goes away, it means the pressure on the sciatic nerve and related nerves has been removed.
If sciatic pain stretches down to the foot, you will feel these exercises, meaning that the pain and electrical sensations will move through the ankle and knee. Which means you’re doing it correctly.
This does not mean that the pain is immediately going to centralize to the low back, it does take time because you are trying to stretch and straighten out this long nerve.
But you will notice sciatica pain does not go as far down the leg.
Therefore�these exercises need to be done consistently and be made a part of your routine.
What to know before exercising
Before starting these stretches, consider three recommendations:
Get a doctor�s approval
A spine specialist should clear you to perform these stretches and exercises before you start.
While these exercises are safe, get a doctor�s permission before starting physical activity.
Know the cause so your exercise program helps and not makes the condition worse
Sciatica from herniated disc means a different type of exercise than sciatica caused by piriformis syndrome.
Knowing this information will help you choose an exercise plan that provides maximum relief.
Don�t push too hard
Don’t aggravate sciatica, listen to your body and go slow.
Experience any pain or symptoms:
Weakness
Tingling
Numbness
Contact a spine specialist immediately!
Sciatic nerve pain caused by a herniated or bulging disc is a common problem.
But incorporating these exercises and stretches can provide sustained relief.
The sciatic nerve is a large nerve that travels from the lower back down both of the legs and into the feet. When pressure is placed on the nerve, such as from a herniated disc, it can lead to the symptoms commonly referred to as sciatica.
The sciatic nerve can be impacted by a number of different things, including injury and degenerative diseases.
Difference Foot Orthotics Make to *REDUCE FOOT PAIN* & Correct Posture | El Paso, TX (2019)
Custom made foot orthotics can help control foot motion and posture. Healthcare professionals prescribe custom foot orthotics to help patients focus on their foot posture and mobility control. Research studies have ascertained that using custom foot orthotics for posture and mobility control can help fix excessive foot pronation and supination to prevent a variety of foot health problems. The subsequent video describes how custom foot orthotics will help control foot posture and mobility to improve health and wellness.
NCBI Resources
Sciatica is a common back ailment that affects approximately 1 in 10 adults in the United States. It is most prevalent in people between the ages of 25 and 45. Sciatica is characterized by a shooting pain that originates in the lower back and travels down through the hip, buttock, and back of the leg.
The pain can be so severe that it inhibits mobility and can prevent people from working, taking care of their homes, or just enjoying their life. Traditionally, doctors have treated the condition with medications and some invasive therapies, but chiropractic treatments have been found to be extremely effective in alleviating the pain and curing the condition.
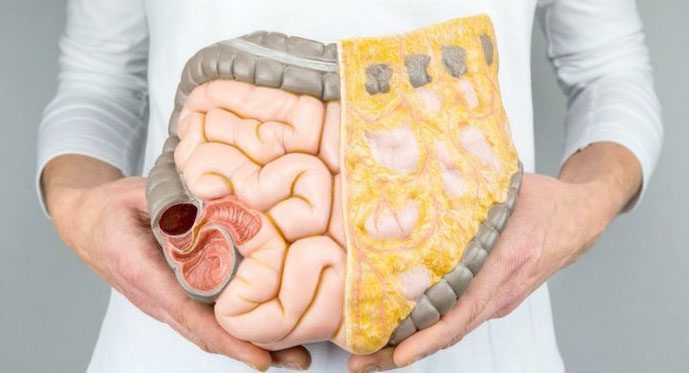
Children are not born with a fully developed microbiome, and a baby’s diet has a large impact on the foundation set for a healthy guts future (Biotics Education Team, 1).� Setting up a child to have healthy gut flora from early stages can help them:
In the TEDDY study published in Nature Medicine, it shows that a child’s microbiome goes through 3 transitional phases:
Developmental phase (3�14 months)
Transitional phase (15�30 months)
Stable phase (31�46 months)(Stewart et al., 3)
Throughout the developmental stage, those with a higher breastfeeding rate were associated with increased levels of Bifidobacterium.� “However, once the infants were weaned, there was a rapid loss of the�Bifidobacterium spp.,�and a quick turnover occurred in the microbiome, which featured a higher population of bacteria within the�Firmicutes�phylaphase (Biotics Education Team, 1)”.� Once infants begin to wean off milk, it is helpful to start providing them with probiotic powders.
Prebiotics are the dietary fiber that the live organisms in the probiotics need to eat in order to flourish.
Some foods that include prebiotics are:
Vegetables
Fruits
Legumes
It is great to start toddlers on prebiotics and probiotics because it can help them to continue to have a healthy gut. A healthy gut can help prevent many issues that adults face later on in life (Veereman-Wauters, 4) Having a healthy gut can help to protect the gut from harmful bacteria and fungi, it can aid in sending signals to the immune system, regulate inflammation, create a supportive barrier in the cell lining of the colon and reduce the risk of cancer (Lewis, 2)�
Probiotics are safe for most children and can reduce the risk of upper respiratory tract infections and well as helping to reduce their risk of allergies. It is beneficial to have toddlers on probiotics and prebiotics so they do not develop a “leaky gut”. By starting children on probiotics and prebiotics young, it can aid their overall health for life.
ProbioMax� for Toddlers
Prebiotic and Probiotic Support for Toddlers*
�Overall, it is best to start building the child’s microbiota through the maternal diet in pregnancy, expose them to environments, and talk with their pediatrician about starting them on probiotics. It’s better to start young and build a healthy foundation than to be diagnosed in their 20’s with leaky gut from something that could have been prevented. – Insight from Kenna Vaughn, Health Coach�
NCBI Resources:
Our knowledge of microbiota is rapidly developing and changing. A relatively young field, the science of gut bacteria has been quickly taken up by industry. Most drugstores sell probiotics in some form or another, and yogurt and other fermented foods are frequently hailed as healthy for the gut because they contain live bacteria. Probiotics are food or supplements that contain living microbes intended to support or improve your microbiome’s health. If your favorite yogurt contains �live and active cultures,� you are getting a dose of probiotics along with your breakfast. These microbes are thought to bolster or replace the bacteria communities in the gut of people.
�Cites:
Biotics Education Team. �Impact of Diet on Baby’s Microbiome.� Biotics Research Blog, blog.bioticsresearch.com/impact-of-diet-on-babys-microbiome.
Lewis, Sarah. �Probiotics and Prebiotics: What’s the Difference?� Healthline, Healthline Media, 3 June 2017, www.healthline.com/nutrition/probiotics-and-prebiotics.
Stewart, Christopher J., et al. �Temporal Development of the Gut Microbiome in Early Childhood from the TEDDY Study.� Nature News, Nature Publishing Group, 24 Oct. 2018, www.nature.com/articles/s41586-018-0617-x.
Veereman-Wauters, Gigi. �Application of Prebiotics in Infant Foods.� The British Journal of Nutrition, U.S. National Library of Medicine, Apr. 2005, www.ncbi.nlm.nih.gov/pubmed/15877896.
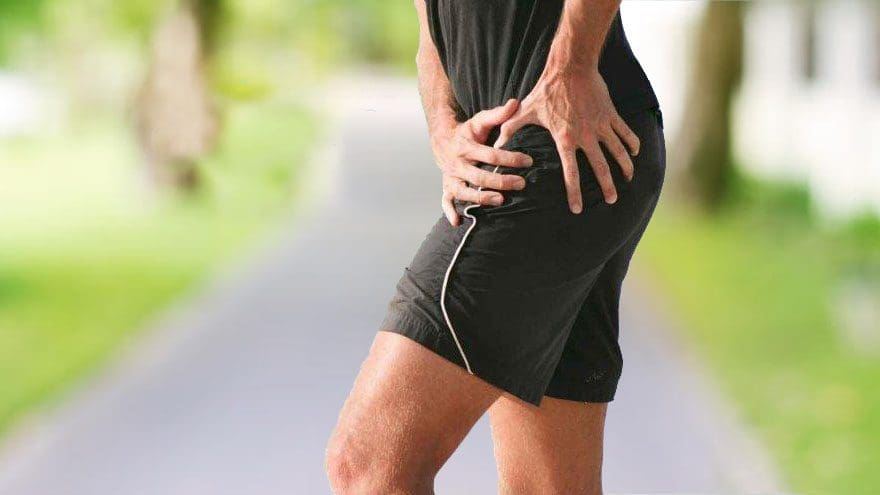
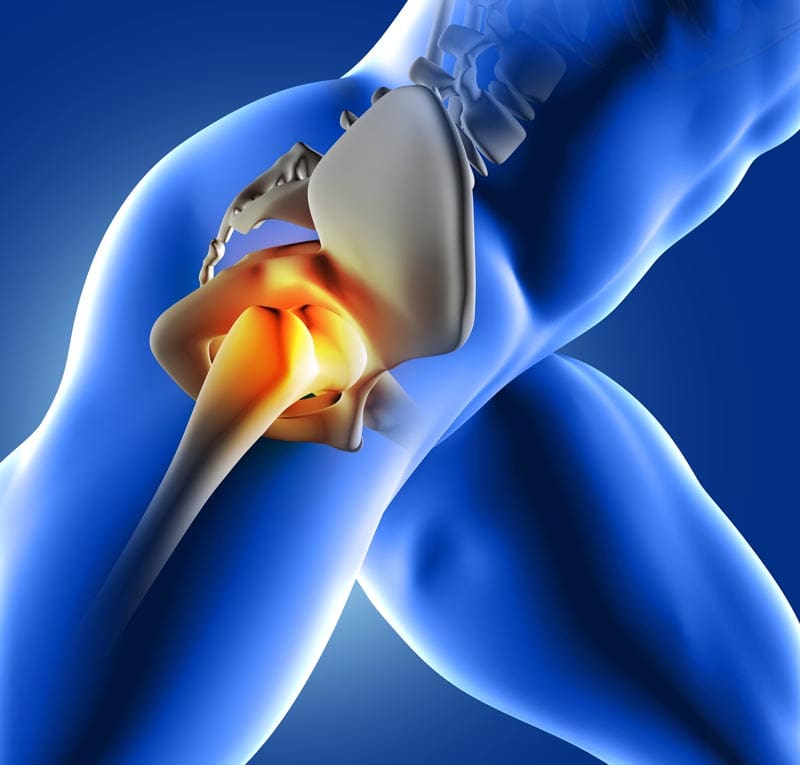
Athletes both recreational and fully competitive can be impacted by injuries to the muscles and ligaments around the hip.
These injuries interfere with performance levels and sometimes end participation completely.
�Excessive pronation along with shoes with poor shock absorption has been found to be an underlying cause for various leg/hip injuries.
Custom made Orthotics improve the biomechanics of the feet and reduce the extent of pronation helping to prevent sport-related leg/foot injuries.
Over Foot Pronation
Research has determined that athletes with more foot pronation have a higher probability of sustaining a leg injury, including iliotibial band syndrome that comes from excessive tightness of the hip muscles.
People involved in sports or recreational activities lower their likelihood of developing traumatic and overuse hip injuries through chiropractic treatment and using custom foot orthotics.
The amount of pronation during standing and while running at a standard speed is determined by measuring the angles of the footprints.
Athletes with more pronation have a higher likelihood of an overuse injury.
Standing (static) and running (dynamic) prints show the amount of pronation and is a predictor of developing an overuse injury.
Athletic performance and injury prevention involve regularly checking the alignment of patients� feet in the standing position.
Hip Injuries & The Hamstring
Many hip injuries develop from poor biomechanics and improper movement, especially when running.
Smooth muscle coordination provides balance and support for the pelvis and is needed for optimum sports performance.
This includes:
Hamstring muscles
Hip abductor muscles
Tensor fascia lata or the iliotibial band
When there is an issue with the feet and ankles, abnormal motion like over-rotating the entire leg is the perfect set-up for pulls, sprains, and strains.
50% of standing consists of heel strike and maximum pronation.
The hamstring muscles function to control the knee and ankle when the heel strikes and absorb the impact.
The theory behind orthotic support is that orthotics help the hamstrings control the position of the calcaneus and knee, so there is less stress on the hip and pelvis.
Hip Injuries & Over-Pronation
Orthotics can correct excessive pronation and treatment of hip problems. These are some of the problems/pathologies that can develop.
These conditions develop in athletes who push their body’s to the limit going for optimal performances.
Conclusion
Overpronation and poor shock absorption contribute to leg injuries � from:
Foot
Lower leg
Knee
Thigh
Hip
These conditions can be prevented with custom-made orthotics.
Foot biomechanics evaluation is a must
To avoid hip injuries, athletes need regular evaluations of foot alignment and function
Wear well-designed and solid-constructed shoes
Chiropractors can prevent arch breakdown and foot problems with custom orthotics, and also treat numerous injuries to the lower extremities, especially the hips.
Excessive Foot Pronation can Affect *FOOT POSTURE & MOBILITY* | El Paso, TX (2019)
The following video discusses how excessive foot pronation can ultimately affect foot posture and mobility. Several factors can affect foot posture and mobility, such as excessive foot pronation. Excessive foot pronation is most prevalent among the general population, therefore, it is considered to be one of the most common factors for abnormal foot posture and mobility, which can lead to a variety of health issues like overuse injuries. Excessive foot pronation and even supination can ultimately affect overall health and wellness.
Hip Labrum tears in athletes can occur from a single event or recurring trauma. Running may cause labrum tears due to the labrum being utilized more for weight-bearing and taking excess forces while at the end-range motion of the leg. Sporting activities are probable causes, specifically those that require frequent hip rotation or pivoting to a loaded femur as in ballet or hockey. Constant hip rotation places increased strain on the capsular tissue and harm to the iliofemoral ligament. This subsequently causes hip instability putting increased stress on the labrum and causing a hip labrum tear.
What’s Afoot
Chiropractic�seeks to find the cause of the conditions it is used to treat, including pain, instead of just treating symptoms. Because of this, the chiropractor will work to find the cause of the pain, in this case, overpronation and overpronation, and correct it � or the effects of the condition � in addition to treating the back pain.
Overpronation and oversupination can cause a variety of injuries and conditions that affect not only the feet and ankles, but also the knees,�hips, and back as well. Some of the more common injuries and conditions include:
Flat feet or posterior tibial tendon dysfunction
Ankle Sprains
Achilles tendinitis
Arch pain
Plantar fasciitis
Corns
Shin splints
Heel pain
Tight calves
Calluses
Knee pain
Patellar tendonitis
Tight hip flexors
Back pain
Sciatica
Herniated disks
NCBI Resources
Muscle imbalances in the hip, such as tight hip flexors, can cause low back pain � or at least contribute to it. When the hip flexor muscles are too tight, it causes what is known as an anterior pelvic tilt.�Hip flexors�can become too tight if the person sits for extended periods of time or engages in activities like cycling and jogging. A chiropractor can guide you through exercises that will help release the tight muscles and stop the micro spams that occur as a result.
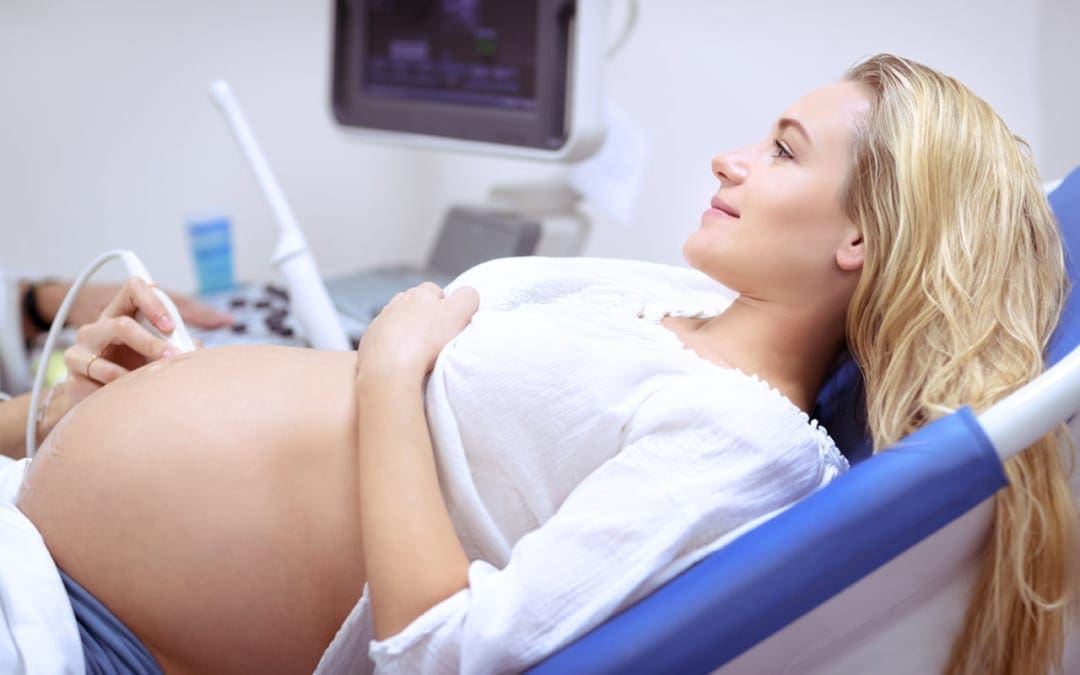
As humans, we depend on microbiomes to stay alive. Microbiomes are essential in fighting off germs and maintaining health. The development of microbiomes begins in utero where the microbes have been isolated to the placenta, fetal membranes, amniotic fluid, and umbilical cord blood, but are mainly transferred from mother to child during birth in a process referred to as “seeding” (1,2). “Seeding”� occurs as the child passes through the mothers vaginal canal and becomes coated in her microbiome. In addition to this, small amounts of microbiomes get transferred to the child as the mother breastfeeds. This early introduction from mother to infant serves as an inoculation process with long term health outcomes for the newborn (2). With the number of cesarean births being higher this decade than in the past, you may find yourself asking, “How does a cesarean birth affect my child’s microbiomes?”
Vaginal
With vaginal births still being the most common way of delivery (68%), these children are seen to have overall better health throughout their lifetime than those born via cesarian (2). Vaginal birth is the most effective way to spread the microbiomes to the child’s skin, but studies have found that microbiomes do differ between ethnic groups. Microbiomes are made up of multiple bacterias and specifically, women with a higher pH have a smaller community of protective biomes. It has also been seen that the gut microbiota in pregnant women with gestational diabetes, tend to have an increased abundance of disease-associated microbes (2). That being said, the pH and mothers gut microbes play a significant role in the types of microbiomes that get transferred to their child.
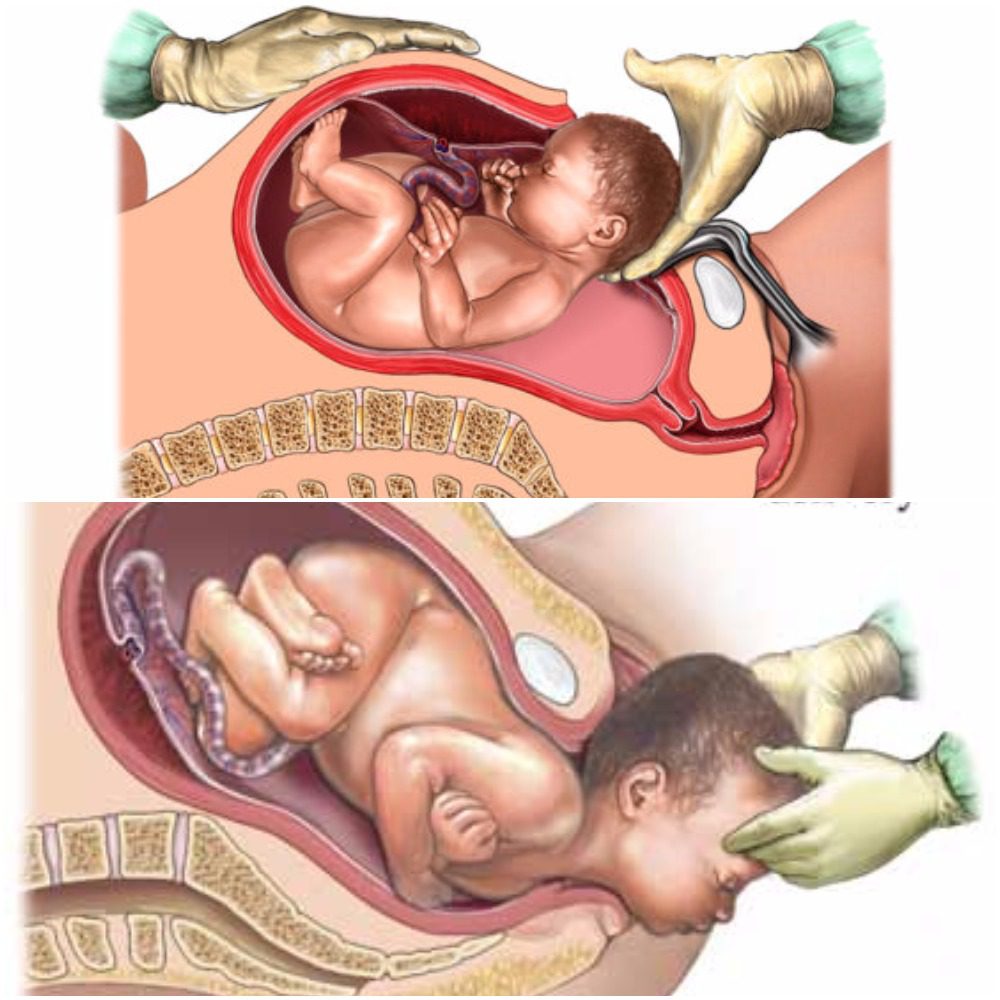
Cesarean
There are generally two ways a child ends up being born via cesarean, labor ending in a cesarean, or a planned cesarean with no labor attempted. Children who are born via cesarean with labor attempted first, have a slightly higher number of microbiomes due to the vaginal fluids exposed to them during labor than that born elective cesarean. The most effective way a mother can transfer microbiomes to their newborn via cesarean is to “incubate” a cloth for 1 hour in their vaginal canal. When the infant is born,� the doctors rub the child’s mouth, eyes, and skin with the cloth that was previously incubated within minutes after birth (2). This process ensures that the child will have microbiomes more closely related to those born vaginally. Children born elective cesarean without using the incubation method, show fewer gut microbiomes related to their mother, but rather have more skin and oral microbes, and bacteria due to the operating room (2).
Children who are born via cesarean, whether labor was attempted first or not, are more likely to develop immune-related disorders such as asthma, allergies,� inflammatory bowel disease, and obesity (2). This is directly linked to not being “seeded” by the mother. Furthermore, adults who were born via cesarean contain a fecal microbiota that is drastically different than adults who were born vaginally (2).
The purpose of the female reproductive system is to reproduce and birth. Therefore, the best route will always be vaginal if it is safe for baby and mom. This being said, a cesarean is not a bad way to bring a child into the world. The child will just face more skin irritability and have a greater risk of developing health issues due to not receiving the same microbiomes as a child born vaginally. – Kenna Vaughn, Health Coach Insight
References:
(1) Aagaard, Kjersti, et al. �The Placenta Harbors a Unique Microbiome.� Science Translational Medicine, U.S. National Library of Medicine, 21 May 2014, www.ncbi.nlm.nih.gov/pmc/articles/PMC4929217.
(2) Dunn, Alexis B, et al. �The Maternal Infant Microbiome: Considerations for Labor and Birth.� MCN. The American Journal of Maternal Child Nursing, U.S. National Library of Medicine, 2017, www.ncbi.nlm.nih.gov/pmc/articles/PMC5648605/.
As people grow into adults, maintaining normal flexibility gets to be much more challenging and losing flexibility can result in a lot of pain to the musculoskeletal system.
Unfortunately, many of us do not retain flexibility throughout the day, even when attempting to be active. Many jobs are largely sedentary, and even leisure activities keep us stuck in one place. In order to remain functional, joints and muscles need to be used, which means they need to be properly stretched without being overworked. The balance is often very delicate, fortunately, chiropractic adjustments increase flexibility.
Chiropractic’s Role in Flexibility
Most adults are not concerned with being able to twist like a pretzel, however, they do want to be able to maneuver through daily life without a lot of pain. One of the main things accomplished in most chiropractic visits is that the chiropractor will look for misalignments in the spine and seek to correct them with a combination of chiropractic adjustments and exercises.
Adjustments
When the spine is misaligned it can affect many different areas of the body including flexibility. Someone who is not flexible will have a limited range of motion (ROM) and treatments are designed to improve this and restore natural posture.
But being flexible is about more than moving better. When the body is stiff, even simple movement results in pain because it is blocked by the misalignment. When this is adjusted/corrected, blood flow improves and the process of improving flexibility becomes less taxing.
Nutrition
There is more to a chiropractor’s day than correcting misalignments in the spine. Chiropractic is holistic in nature and in order to be truly successful, it relies on the patient to be a cooperative participant in treatment. Giving nutritional advice is a big part of this.
While advice can vary from patient to patient, generally, when a person struggling with flexibility adds protein and fatty acids into their diet it can help joints and muscles to be properly nourished. People should also monitor their intake of processed and pre-packaged foods as these can contribute to inflammation.
Training Exercises
Because of many factors in our lives, as well as the effects of aging, people’s range of motion inevitably decreases as time goes by, especially if nothing is purposefully done to maintain it. Flexibility exercises are commonly strongly suggested by chiropractors as they strive to help their patients with range of motion (ROM) and flexibility issues.
In many cases, such as those where someone is suffering from tendinitis or bursitis, the truly therapeutic exercises are resistive exercises. These, however, are limited, unless a higher level of flexibility is achieved.
Flexibility programs are implemented in order to make a given joint have a wider level of extensibility, which may be achieved by either traditional static stretching or Proprioceptive Neuromuscular Facilitation (PNF) techniques, which incorporates a slow reversal hold.
Working with a chiropractor on a regular basis for help in gaining flexibility can help assure that a patient moves forward at an appropriate pace that is in line with their age and fitness level. This will help them achieve a higher level of success in their chosen sport or similar activity, and/or become more productive in their daily lives while experiencing less pain.
*FIX BAD POSTURE* with Custom Orthotics | El Paso, TX (2019)
Proper Posture
Your spine does more than keep your body upright: it�s the brain that communicates to the rest of the body. Posture even affects your emotional well-being, including self-confidence!
Poor posture takes a serious toll on health. Here are a few of the negative results:
Muscle soreness
Subluxations
Blood vessel constriction
Nerve constriction
As the years go by the problems worsen, which results
Maintaining proper posture involves sitting, standing, and lying down properly. Here is an excerpt from the American Chiropractic Association website on how to:
Sit the right way
Keep your feet on the floor or on a footrest, if they can’t reach the floor
Don’t cross your legs. Your ankles should be in front of your knees
Keep a small gap between the back of your knees and the front of your seat.
Your knees should be at or below the level of your hips.
Bear your weight primarily on the balls of your feet.
Keep your knees slightly bent.
Keep your feet about shoulder-width apart.
Let your arms hang naturally down the sides of the body.
Lie down the right way
Find the mattress that is right for you. While a firm mattress is generally recommended, some people find that softer mattresses reduce their back pain. Go with your comfort
Sleep with a pillow. Special pillows can help with postural problems resulting from a poor sleeping position
Avoid sleeping on your stomach
Healthy Feet Equals A Healthy Spine
The feet are complex structures which function�to provide protection and support to the body in relation to the spine and head posture. The feet are essential towards balancing the body�s entire weight, allowing it to walk, run, stand, and, jump. Consequently, foot complications may cause severe issues throughout the spine, hips, knees, and ankles if left untreated.
Gait & Chronic Postural Pain
Chiropractic care can be effective for treating injuries or conditions such as plantar fasciitis, Achilles tendonitis, and ankle sprains, among others. Foot health is essential towards establishing the body�s proper support and balance, together with a proper spinal posture. In the presence of foot complications, chiropractic treatment can be used to achieve long-lasting health.
NCBI Resources
Flexibility is a critical component of keeping your body fit and healthy. Research shows that people who are more flexible are better able to reach their�optimum fitness level. It can also help to prevent injury and reduce your risk of conditions like arthritis and other�chronic diseases.�They also have a better range of motion and mobility as they age.
IFM's Find A Practitioner tool is the largest referral network in Functional Medicine, created to help patients locate Functional Medicine practitioners anywhere in the world. IFM Certified Practitioners are listed first in the search results, given their extensive education in Functional Medicine